Setup Web Filtering
Category based web filtering in OPNsense is done by utilizing the built-in proxy and one of the freely available or commercial blacklists.
For this How-to we will utilize the UT1 “web categorization list” from the Université Toulouse managed by Fabrice Prigent. This list is supplied for free under the Creative Commons license.
For this tutorial we will assume:
Proxy has its default settings / is not configured
We only want web filtering and nothing else (no caching, no authentication)
Note
For other general/basic setup item of the proxy see Setup Caching Proxy
Step 1 - Disable Authentication
To start go to .
Click on the arrow next to the Forward Proxy tab to show the drop down menu. Now select Authentication Settings and click on Clear All to disable user authentication. And click Apply to save the change.
Step 2 - Configure Blacklist
Click on the tab Remote Access Control Lists. Now click on the + in the lower right corner of the from to add a new list.
A screen will popup, enter the following details:
Enabled |
Checked |
Enable/Disable |
Filename |
UT1 |
Choose a unique filename |
URL |
(copy/paste the URL) |
The URL of the blacklist |
categories |
(Leave blank) |
If left blank the full list will be fetched |
Description |
UT1 web filter |
Your description |
- The URL of the full compressed UT1 category based list is:
ftp://ftp.ut-capitole.fr/pub/reseau/cache/squidguard_contrib/blacklists.tar.gz
Note
If you want to add self-hosted lists, be sure to not use the file extensions .doc, .pdf or .txt.

Press Save Changes.
Step 3 - Download the Categories
Now press Download ACLs, please note that this will take a while (can be several minutes) as the full list (>19 MB) will be converted to squid ACLs.
Step 4 - Setup Categories
Now we can select the categories we want to use by clicking on the pencil icon next to the description of the list. This will open the edit window again, but now you will see all available categories extracted from the list.

For our example we will filter ads and adult content. The easiest way to do so is clear the list and select the following from the drop down list:
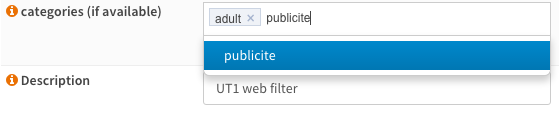
Now Save changes and press Download ACLs again to download and reconstruct the list with only the selected categories. This will take roughly the same amount of time as the first fetch as the adult alone section is ~15 MB.
Step 5 - Enable Proxy
To enable the proxy just go to and check Enable proxy en click on Apply. The proxy will bind to LAN and port 3128.
It may take a while for the proxy to start and the play icon on the top right corner of the screen will turn red. Refresh the page to see if the proxy is done loading (play icon will turn green).
Step 6 - Disable Proxy Bypass
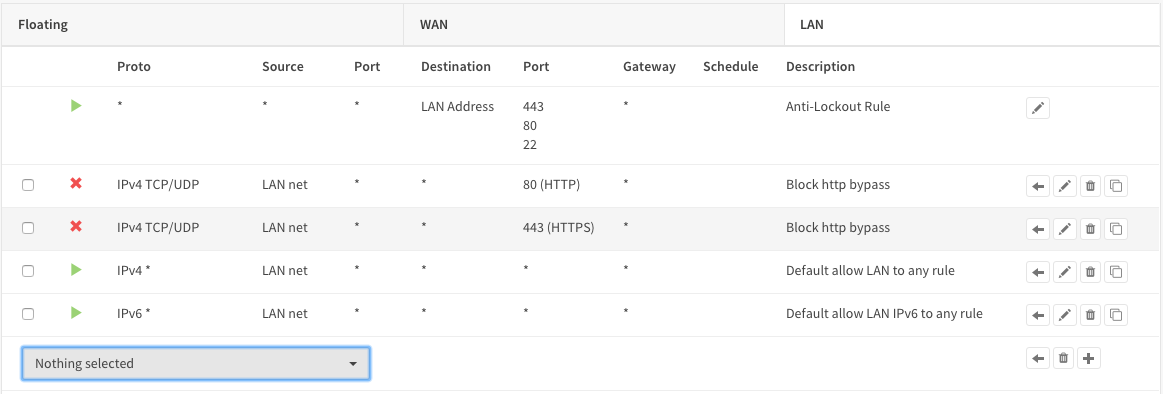
To make sure no-one can bypass the proxy you need to add a firewall rule. Go to and add the following to the top of the list rule on the LAN interface (if LAN is where your clients and proxy are on).
Action |
Block |
Interface |
LAN |
Protocol |
TCP/UDP |
Source |
LAN net |
Destination Port Range |
HTTP |
Category |
Block Proxy Bypass |
Description |
Block HTTP bypass |
Save
And one more rule to block HTTPS access:
Action |
Block |
Interface |
LAN |
Protocol |
TCP/UDP |
Source |
LAN net |
Destination Port Range |
HTTPS |
Category |
Block Proxy Bypass |
Description |
Block HTTPS bypass |
Save & Apply changes