Tor Configuration
Note
Saving changes in modal dialogs does not apply the settings. To apply them, you have to click the “Reload Service” button.
Installation
First of all, install the tor plugin (os-tor) from the plugins view.

After a page reload you will get a new menu entry under services for Tor. Open the menu and choose “Configuration” to configure the plugin.
General Settings
This section controls how Tor behaves in general as well as forward proxying.
Global Settings
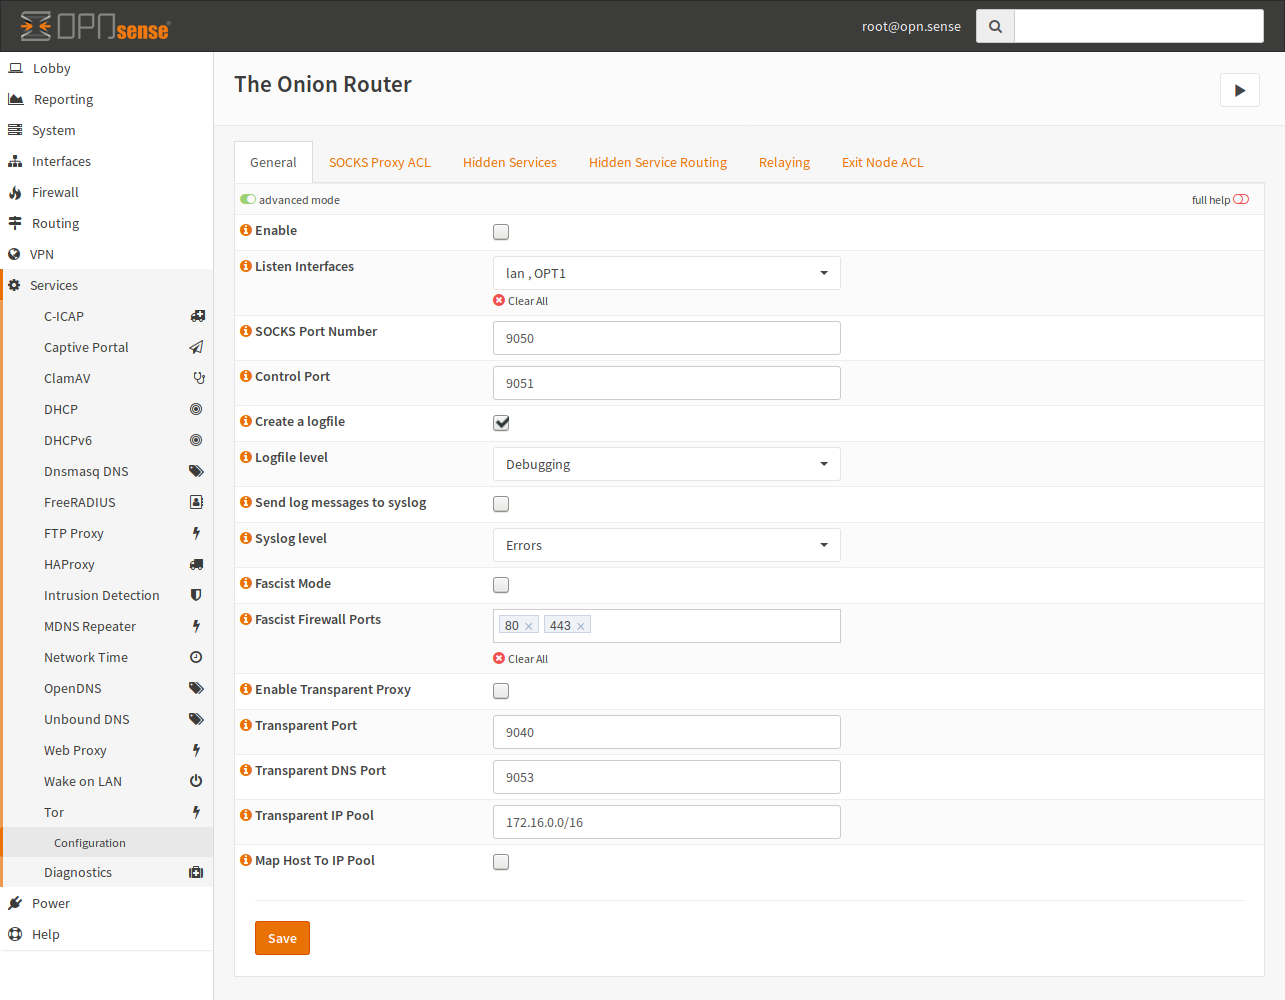
Tor Service Settings
- Enable
Controls if the service should be running. If it is enabled, it will also be enabled at boot time.
- Control Port
The control port is used for control communication with the Tor daemon. This Port requires a password, which will not be disclosed to the GUI but can be queried via the API. This setting is available for you to handle Port conflicts, so you can change this port.
- Create a logfile, Send log messages to syslog
Enable this checkbox if you want some logging. Please note that a detailed log may lead to privacy issues.
- Logfile, Syslog level
If the corresponding checkbox is enabled, this will be the minimum severity for sending or writing log messages.
- Fascist Mode
If internet access is filtered, you can try this option. Please note that this is not compatible with other features like “Hidden Services”.
- Fascist Firewall Ports
These are the unfiltered ports of the firewall. The defaults of 80 and 443 are chosen, because they are commonly open.
Forward Proxy
Note
The SOCKS proxy is only usable from localhost (127.0.0.1 and ::1) unless an ACL is added in the “SOCKS Proxy ACL” section.
- Listen Interfaces
Add one or multiple interfaces, on which Tor should listen additionally to the loopback interface. This is required if you want to use Tor from other computers than the appliance itself. Tor will bind on the statically configured IP address from your interface configuration. If the interface has no static IP configured, it will be ignored.
- SOCKS Port Number
The port which should be used for the SOCKS server.
Transparent Forward Proxy
- Transparent Port
This port is the target for your NAT rule. Please create a rule for this port in the “Destination NAT (Port Forward)” section of the firewall.
- Transparent DNS Port
If you are using Tor transparently, you can resolve .onion addresses to IPs of the given pool for example. This also allows to keep DNS secret.
- Transparent IP Pool
This is used to provide an IP pool to Tor, which can be used for host mapping. This needs to be a /16 network at minimum.
- Map Host To IP Pool
This option will assign IP addresses to resolved .onion domains by the Tor DNS service. Checking this box is recommend but a transparent IP pool is required
SOCKS ACL
Warning
If untrusted devices have access to the SOCKS proxy, private information may be leaked. Please be careful with the networks you allow here.
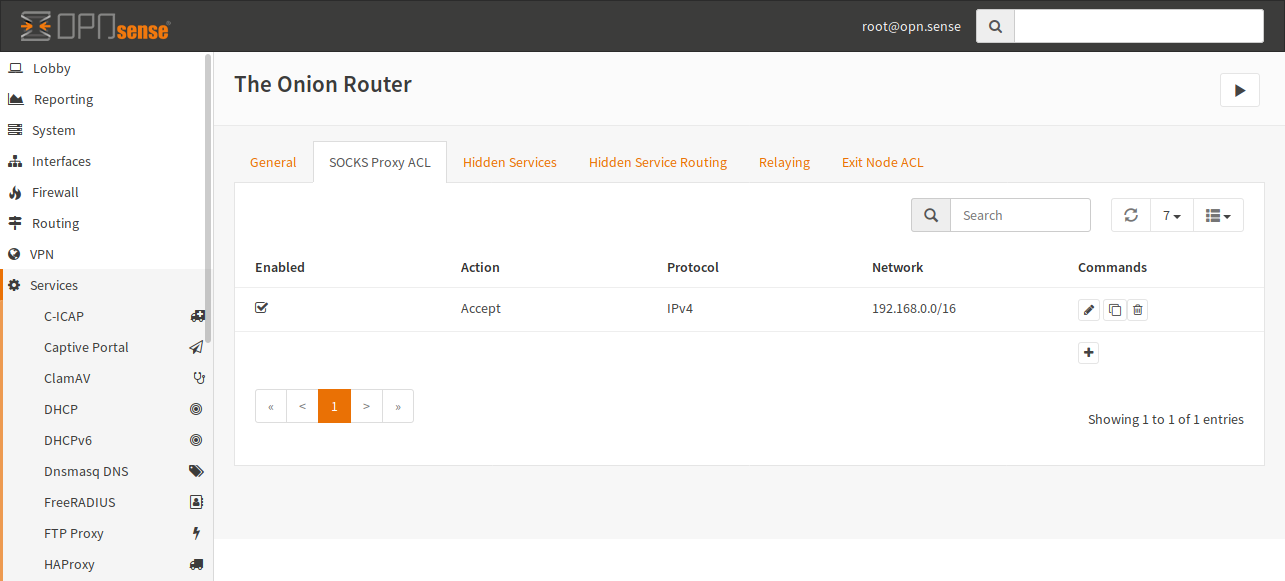
In this example, you can see that all Hosts of the 192.168.0.0/16 network have access to the Tor Proxy. By default, connections are forbidden.
Creating a new entry is quite easy. Just click the + and fill out the form:
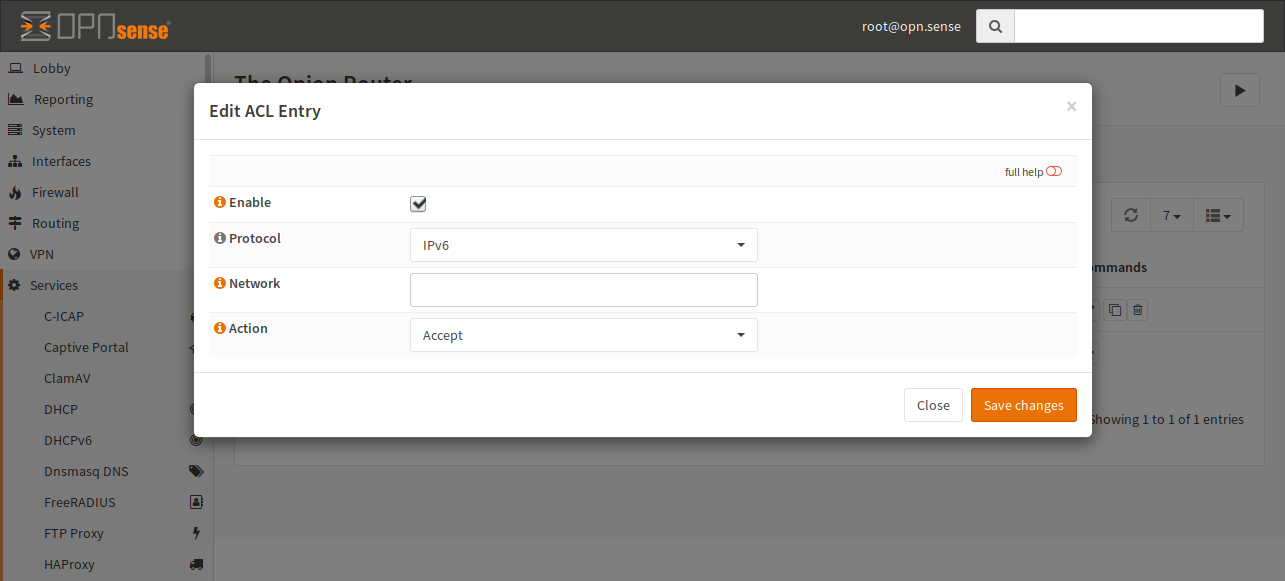
- Enable
The entry will be added to the configuration file. If this checkbox is unchecked, the entry is ignored.
- Protocol
Select the protocol in use for this ACL. You can choose between IPv4 and IPv6. By default, IPv6 is selected.
- Network
In this field, you have to add the network, on which this ACL should be applied in CIDR notation.
- Action
Select if the traffic should be accepted or rejected.

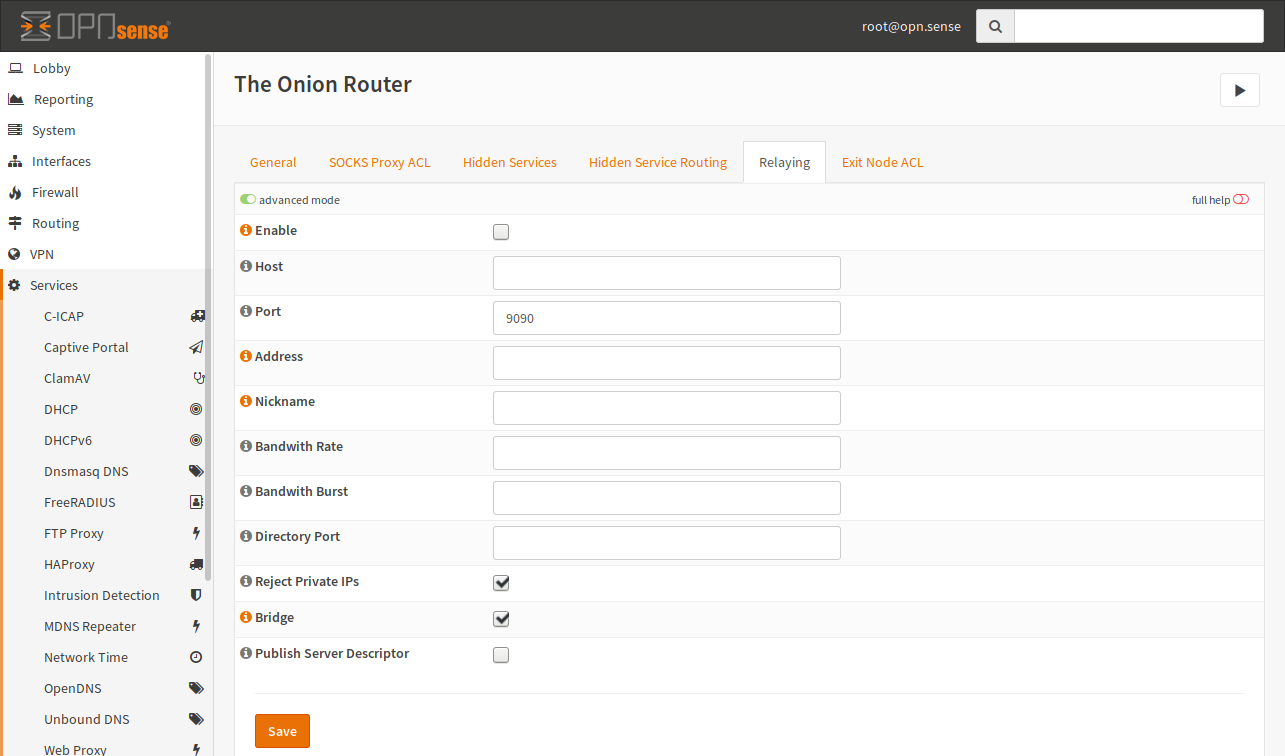
Relays
A Tor relay is a host which forwards traffic for other Tor nodes. A relay that allows traffic to pass outside of the Tor network is called an “Exit Node”. If the relay is configured only for you (not for public access), it is called a bridge. Bridges are used to circumvent filtering of public entry nodes based on IP/Port basis as the existence of bridges is usually unknown.
Relays And Bridges
Note
To be a relay, your host must have a public available port. With relaying, you will increase the anonymity of Tor and it is less risky than an exit node.
- Enable
Enable this checkbox if you want to relay traffic (forward foreign traffic).
- Host
This is the host to bind the relay port to. This can be the public IP address. This setting is optional and may be omitted.
- Port
This is the public port used. Do not forget to add a firewall rule to pass traffic to this port. Otherwise it will not work.
- Address
You can enter the FQDN or the WAN IP of this Firewall.
- Nickname
A nickname can be used to identify your network but it must only consist of alphanumeric characters.
- Bandwidth Rate
You can limit the bandwidth Tor will use. By default, Tor will use the maximum amount of bandwidth available. The value must be at least 72 kilobits per second.
- Bandwidth Burst
See Bandwidth Rate.
- Directory Port
If you have a lot of bandwidth, you can also configure a directory port. You should not enable this port if your bandwidth is small.
- Reject Private IPs
IMPORTANT DO NOT DISABLE UNLESS YOU KNOW WHAT YOU ARE DOING. This option blocks access to RFC1918 addresses regardless of the configured policy. If you disable this option, somebody can invade your network.
- Bridge
Enable this setting, if you want to be a bridge.
- Publish Server Descriptor
If this is disabled, Tor will not publish descriptors. If you don’t want to be in a directory (for example for testing reasons), uncheck this option.
Exit Nodes
Warning
Providing an exit node can lead to legal issues. It may be a good idea to consult a lawyer before setting up one as you might be made responsible for traffic, which originates from a malicious Tor user.
If you have relaying enabled, you can also become an exit node. To allow outgoing connections, you have to open to the “Exit Node ACL” tab.
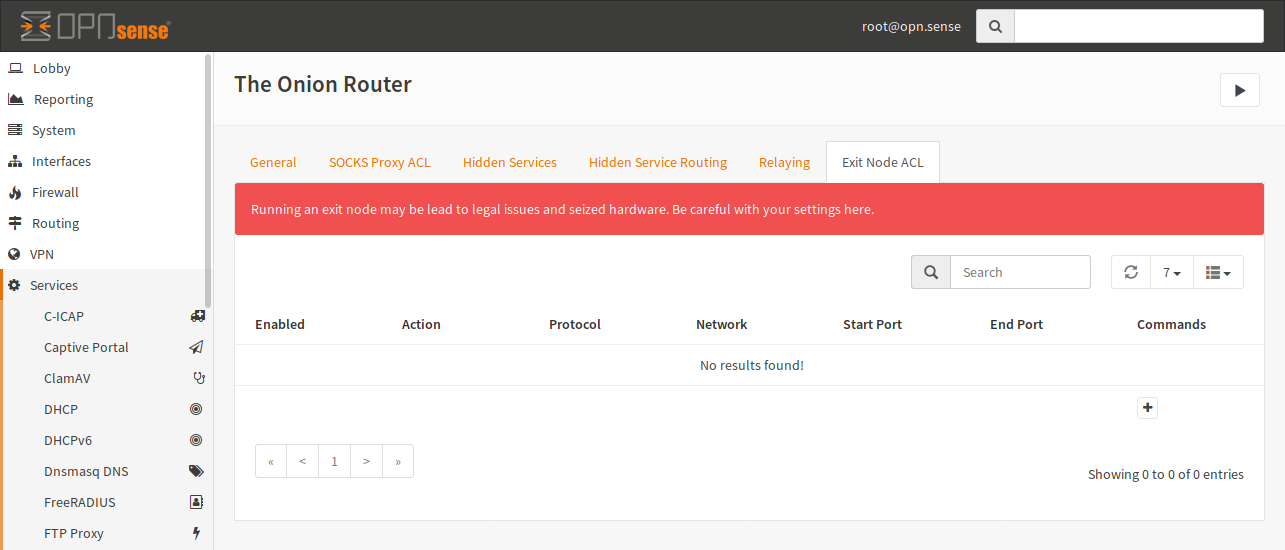
Click on + to add a new ACL.
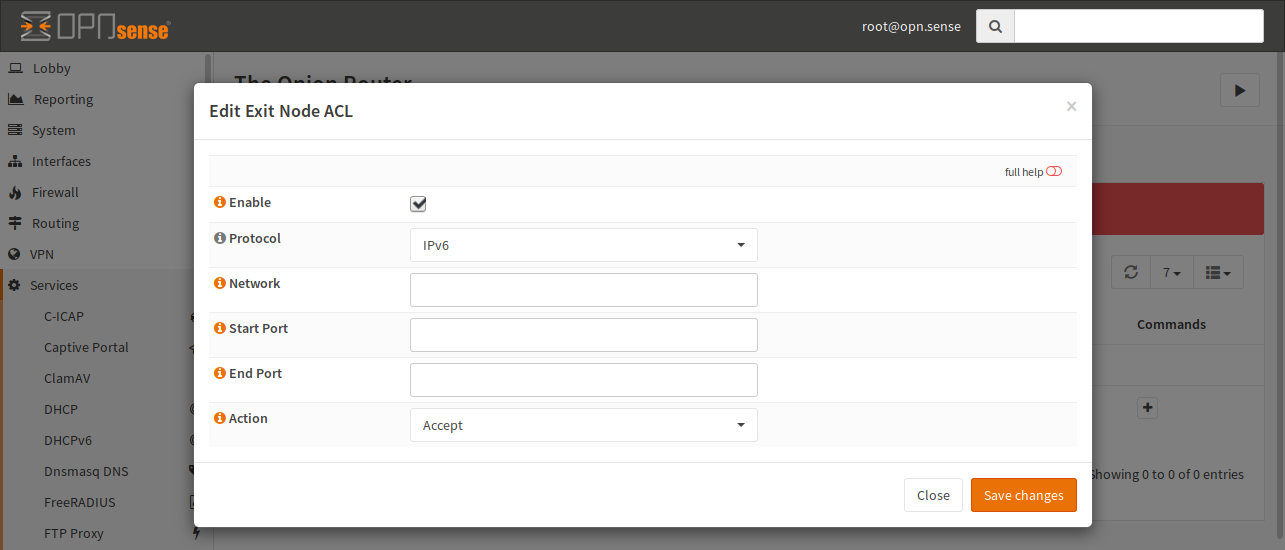
- Enable
If it is checked, the ACL will be used by Tor, otherwise the line is ignored.
- Protocol
Select the protocol, on which this ACL applies. You can select IPv4 and IPv6 here. IPv6 is the default.
- Network
You can enter a target network in CIDR notation or an IP address here. If no IP is given, any IP will match.
- Start Port, End Port
This match is the target port of a connection. You can provide only a start port if you want to match a single port. If you provide both, a port range will be used.
- Action
If you select “Reject”, no exit node traffic will be sent to this host and it will not be forwarded. If you choose “Accept”, your host may be chosen as an exit node in a circuit.