IPv6 For Zen UK
Original Author: Martin Wasley
Introduction
Zen provide two methods of setting up IPv6.
The first method is a simple DHCP method which should suffice most users, the second allows you to set up static IPv6 on LAN. In either case the addresses and prefixes are constant and even under DHCP will not change. Currently Zen provide a /64 WAN address and a /48 prefix allocation. These will have been given to you by Zen when you request IPv6.
Setting up IPv6 using DHCPv6
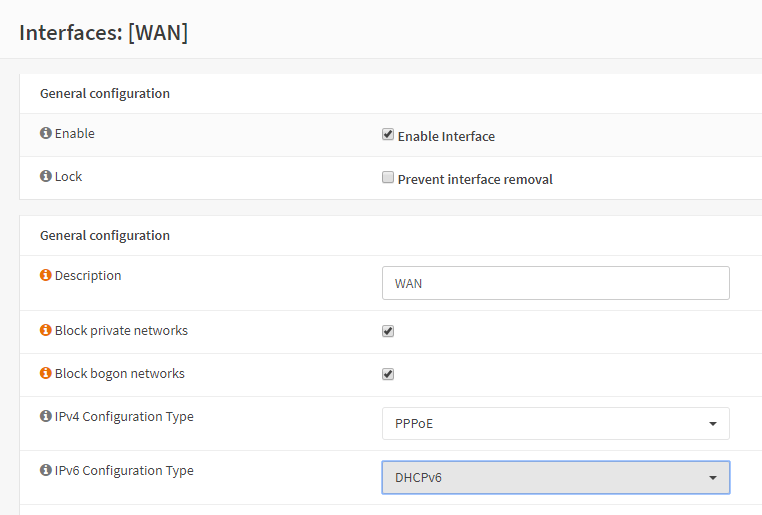
WAN Interface
Zen use PPPoE in the initial V4 connection, so enter PPPoE as the V4 connection type and set the username and password for the PPPoE connection, for IPv6 using DHCP, select DHCPv6 in the IPv6 connection as shown below.
The next step is to configure the parameters required for DHCPv6, these are located in the DHCPv6 client configuration section of the WAN interface shown below.
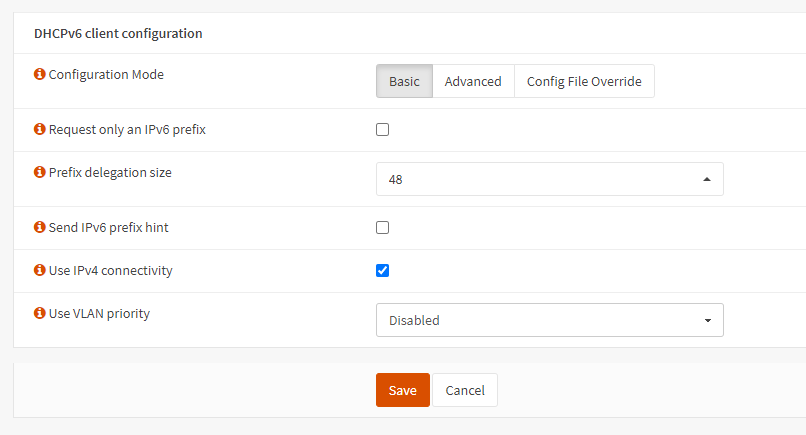
As stated before, Zen provide a /48 prefix, so select the prefix size accordingly.
Click ‘Save’ and then ‘Apply’.
LAN Interface
All that is required now is to set the LAN interface to use assigned IPv6 prefix.
Select and set the IPv6 Configuration Type to ‘Track Interface’
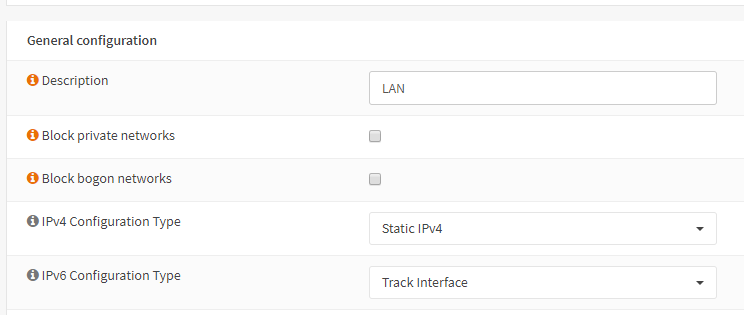
Finally, set the Track IPv6 Interface to WAN, unless there is a special requirement which this document does not cover, set the IPv6 Prefix ID to 0.

Click ‘Save’ and then ‘Apply’.
It is advisable at this point to reboot the system.
Setting up IPv6 using Static Assignment
Although slightly more complex, this option gives you greater control over LAN DHCP6 server, as this can be tailored to specific needs.
Note: The previous version of this guide provided instructions to configure WAN interface statically. Zen have advised that they are now phasing out static configuration and therefore recommend customers to switch to DHCPv6 for WAN interface.
WAN Interface
Zen use PPPoE in the initial V4 connection, so enter PPPoE as the V4 connection type and set the username and password for the PPPoE connection, for IPv6 using DHCP, select DHCPv6 in the IPv6 connection as shown below.
The next step is to configure the parameters required for DHCPv6, these are located in the DHCPv6 client configuration section of the WAN interface shown below.
As stated before, Zen provide a /48 prefix, so select the prefix size accordingly.
Click ‘Save’ and then ‘Apply’.
LAN Interface
The LAN interface is very simple to set up, all we need to do is set the IPv6 Configuration Type to Static, and enter our static address.

Zen give us a /48 prefix to use on the LAN, so pick an address from that range. For example our prefix is:
2a02:8242:55AB::
So
2a02:8242:55AB:0:4:3:2:1 would suffice.
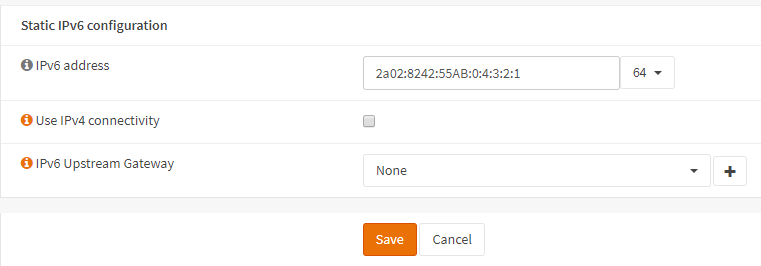
We want to use a /64 prefix on this interface.
Tip Use the same address as found when setting the system up to use DHCPv6.
Click Save and Apply.
DHCPv6 Server
When using DHCPv6 on the WAN, our DHCPv6 LAN server is set automatically, however when using statics, we need to set it up. Go to .
Firstly, enable the server.
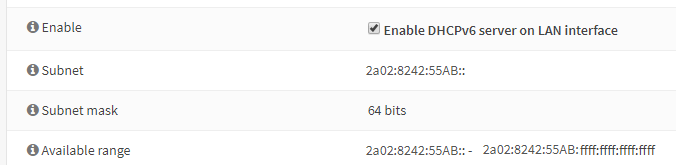
You will notice that the subnet already has a range, and the subnet mask is the /64 we set on the LAN. There is also a range we must use, the available range tells us what that can be.
Enter the lower – start range that the server will use
2a02:8231:d256::eeee:0000:0000:0001
Enter the upper – end range that the server will use.
2a02:8231:d256::eeee:ffff:ffff:ffff

This should cover most LAN subnets, the range given here gives 281,474.976.710,655 addresses.
We can also set up a prefix delegation range, this is used where we have sub routers or VLAN’s that need their own range. In the case of prefixes, we are only interested in the upper 64 bits, as in this example we will only be giving out 64 bit prefixes. We know we have been given a /48 prefix by Zen, so we enter our prefix range like this:

Our prefix range is the upper 48 bits, plus some of the next 16 bits, but we must not cross into the range we have used for our LAN addresses. In the example above I have allowed for up to 254 /64 subnets.
Once these details have been entered, click save.