IPv6 Tunnel Broker
Original Author: Shawn Webb
Introduction
OPNsense supports native IPv6 as well as tunneled IPv6. This article shows how to set up TunnelBroker, Hurricane Electric’s IPv6-in-IPv4 tunnel, with OPNsense. If you’re based in the US and you use Netflix, you might not want to follow these instructions. Netflix now blocks TunnelBroker.
If you use IRC or need access to SMTP over the TunnelBroker connection, Hurricane Electric requires you to go through their free IPv6 certification process. Their “sage” level is the highest level and will allow you to enable IRC and SMTP. Note that your OPNsense firewall must be directly connected to the Internet. Being behind a NAT will not work.
The rest of this article assumes you already have a TunnelBroker account. If not, sign up and go through the free IPv6 certification process. Screenshots are provided throughout this article.
Background
Enable ICMP on the WAN side of your OPNsense firewall. TunnelBroker’s UI will tell you an IP to use when you’re setting up your tunnel on their end.
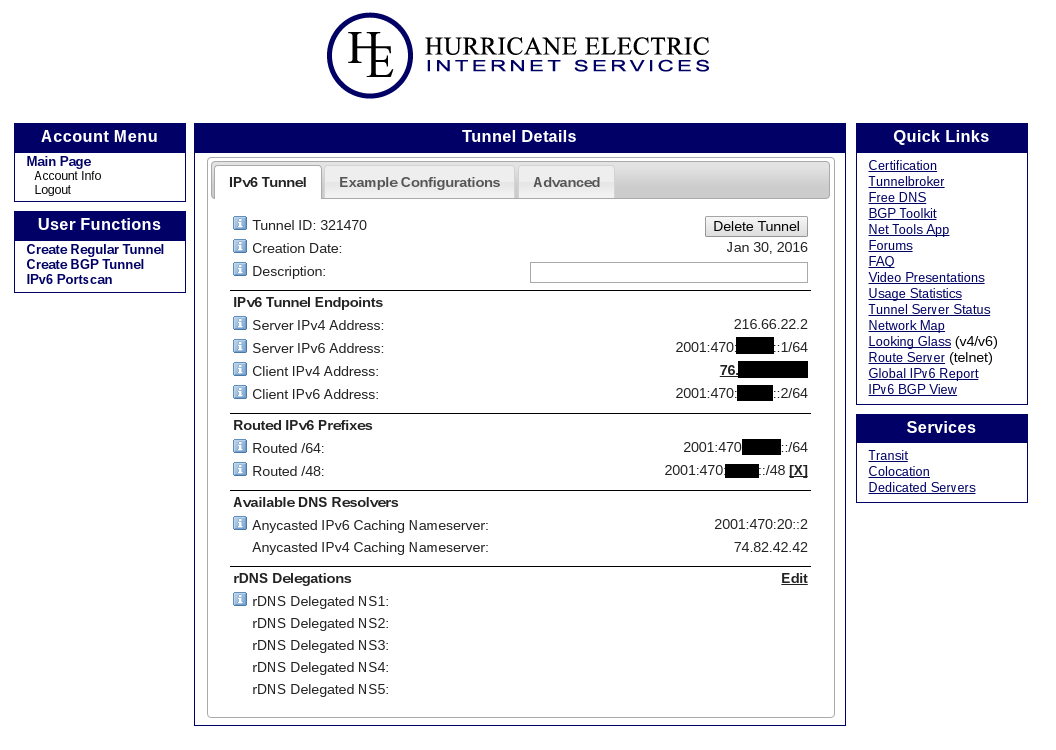
Now add a tunnel. Make sure to add a routed /48 as we will need that to dish out individual /64 slices to each network. Once configured, your tunnel settings should look like this:
Step 1 - Add GIF tunnel
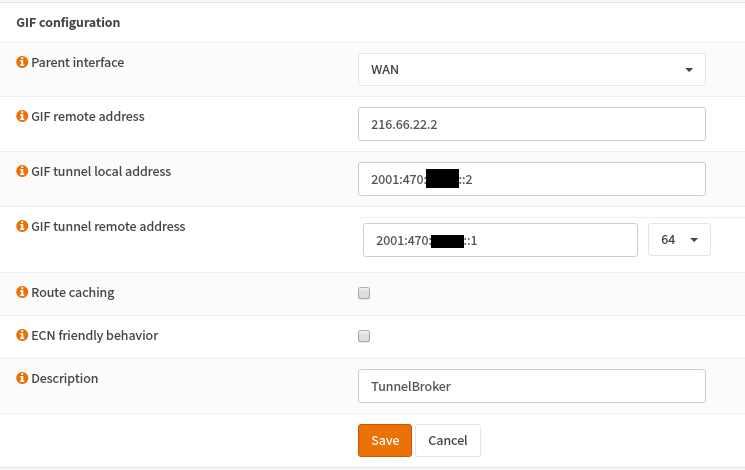
To configure OPNsense start with adding a new gif interface. Go to and click on Add in the upper tight corner of the form.
Use the following settings and copy in the IPv4&6 addresses from your TunnelBroker’s UI.
Parent interface |
WAN |
GIF remote address |
Server IPv4 Address |
GIF tunnel local address |
Client IPv6 Address |
GIF tunnel remote address |
Server IPv6 Address/64 |
Route caching |
disabled |
ECN friendly behavior |
disabled |
Description |
Tunnel Broker |
Step 2 - Configure the GIF tunnel as a new interface
The newly created GIF tunnel must now be assigned as a new interface. Go to , select the GIF tunnel for New interface and click the + sign next to it.
Then under (or depending on what you selected) check Enable Interface and change the description to e.g., TUNNELBROKER before hitting Save.
The newly created interface must now be set as the default IPv6 gateway under by editing the new gateway entry TUNNELBROKER_TUNNELV6 and checking Upstream Gateway before saving.
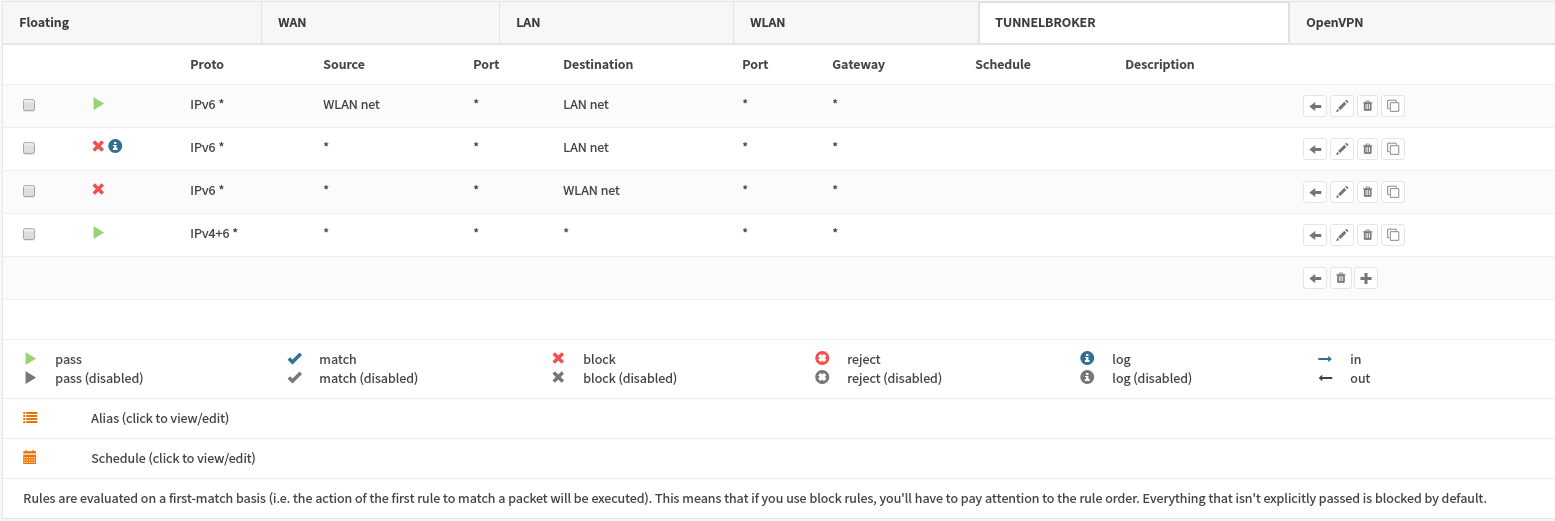
Step 3 - Basic Firewall Rules
Now add basic firewall rules. Since I have a LAN network and a WLAN network, I allow WLAN to initiate connections to LAN, but not the other way around. I only have servers on LAN whereas most of my clients are on WLAN (Wireless LAN). I block all incoming to LAN and WLAN. Of course, outbound connections are fine.
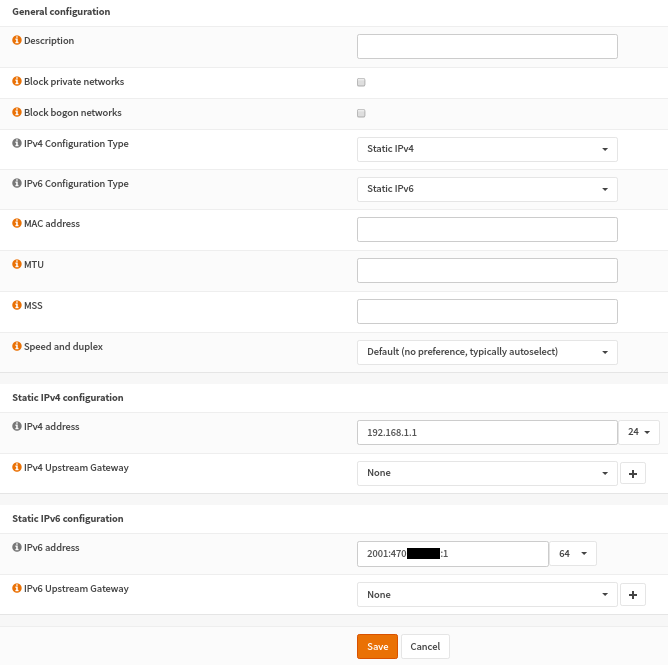
Step 4 - Configure LAN interface
Now configure your LAN interface. The static IPv6 address we’ll give it is a /64 address from your assigned /48. I won’t show the WLAN settings simply because it’s the very same. You’ll repeat the same process for further networks, but assigning the next interface a separate /64 address.
Step 5 - Configure DHCPv6 SLAAC
We’ll next configure OPNsense for Stateless Address Auto Configuration (SLAAC). Go to and choose an interface.
Set the Router Advertisements setting to Assisted and the Router Priority setting to Normal.
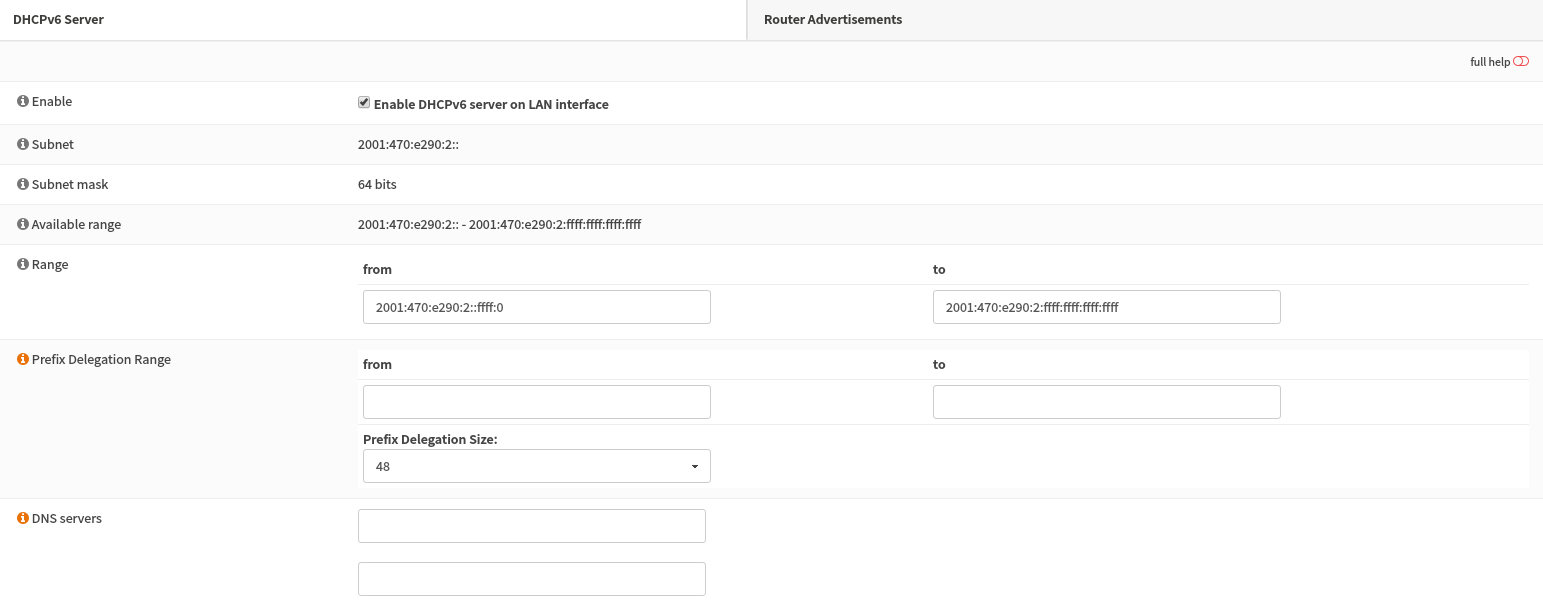
Save your settings.
Step 6 - Test your Configuration
You should now be set up for IPv6. To test your configuration, bring online an IPv6 machine, use your favorite tool to determine you have an IPv6 address. If you’re using SLAAC, it may take up to 30 seconds or more to get an IPv6 address. If you see that your interface has an IPv6 address, you can try going to an IPv6 only test site, such as https://www.doesnotwork.eu/
Step 7 - Configure Endpoint Updates
If your IPv4 address is dynamic, it is important to keep your tunnel endpoint up to date to maintain IPv6 connectivity through the tunnel. We will configure automatic updates using ddclient.
First, install the os-ddclient plug-in under . Once installed, refresh the UI and go to . Add a new account, the fill in the following information, pulling from your Tunnelbroker’s tunnel settings where needed.
Service |
he-net-tunnel |
Username |
Tunnelbroker account username |
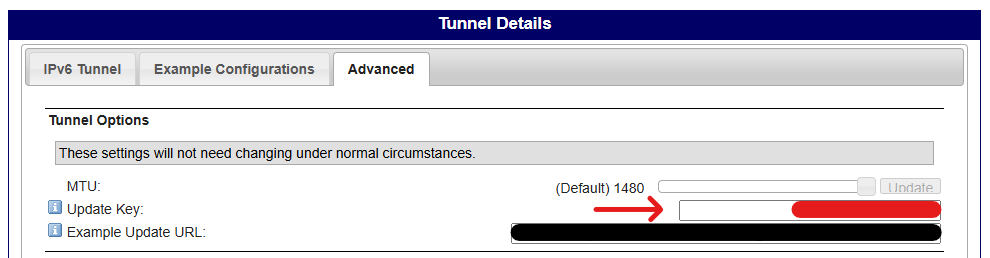
Password |
Update Tunnel Key |
Hostname(s) |
Tunnel ID |
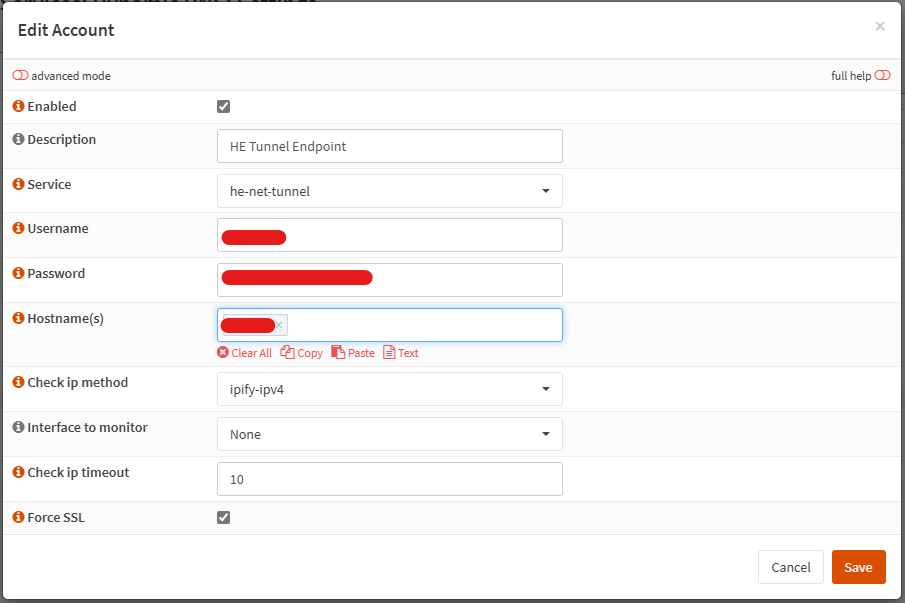

For Check ip method, select any method that will return an IPv4 address (e.g., ipify-ipv4, Interface [IPv4], or ipv4only.me). If using “Interface [IPv4]”, also select the appropriate WAN interface to monitor.
Add a Description for your own use and leave all other options unchanged. Enable and save this account configuration, then enable and start the Dynamic DNS service.