SFR/RED France FTTH IPv4 & IPv6 & Phone
Original Author: Philippe Gaultier
Introduction / Getting ready to make the connection
This guide is for SFR/RED France FTTH using DHCPv4 / DHCPv6 to connect.
The guide deals with internet connection and phone. Support for TV has not been tested.
Note
Before starting this guide, you should have the MAC address of your SFR/RED Box. In the guide you should replace xx:xx:xx:xx:xx:xx with your SFR/RED Box MAC address.
SFR/RED requires that the WAN interface assignment should look similar to this:
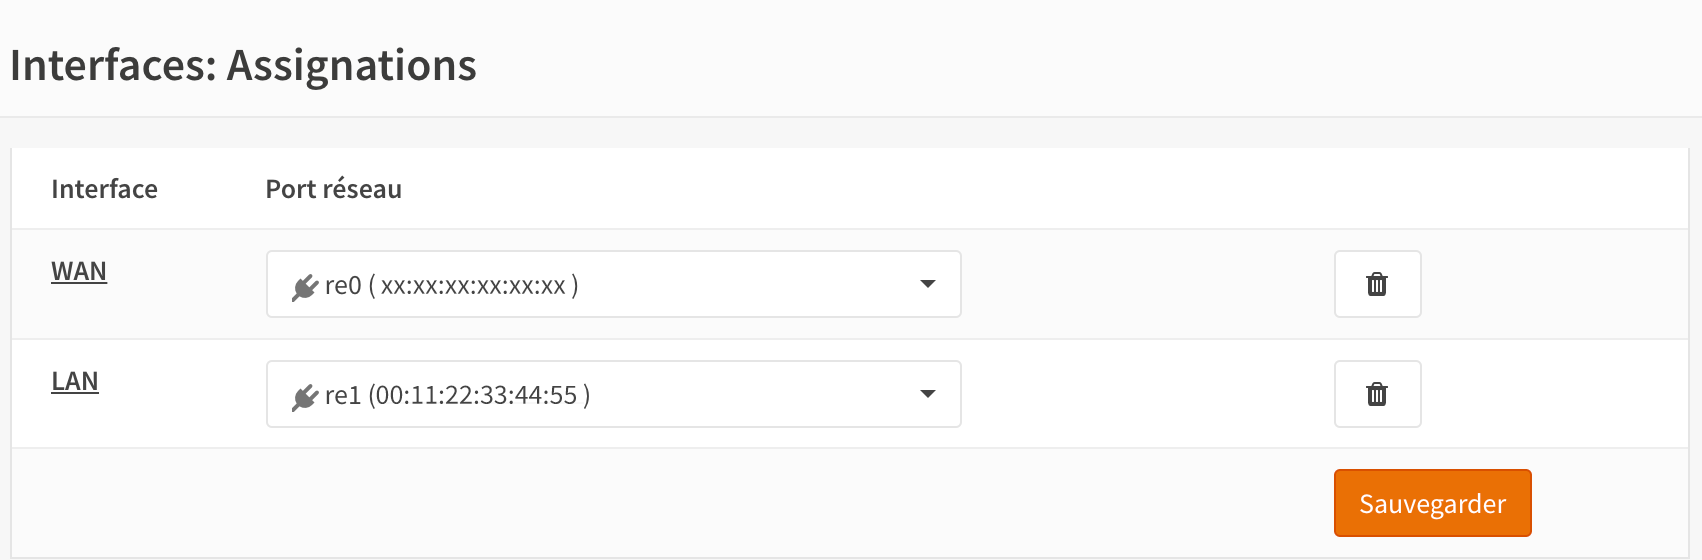
WAN interface has MAC xx:xx:xx:xx:xx:xx which is the original WAN MAC of the BOX (spoofed),
LAN interface has MAC 00:11:22:33:44:55 which is the original MAC of the firewall,
DUID is 00:03:00:01:xx:xx:xx:xx:xx:xx it’s derived from the original WAN MAC of the BOX (spoofed).
Configuring the WAN Interface
Select
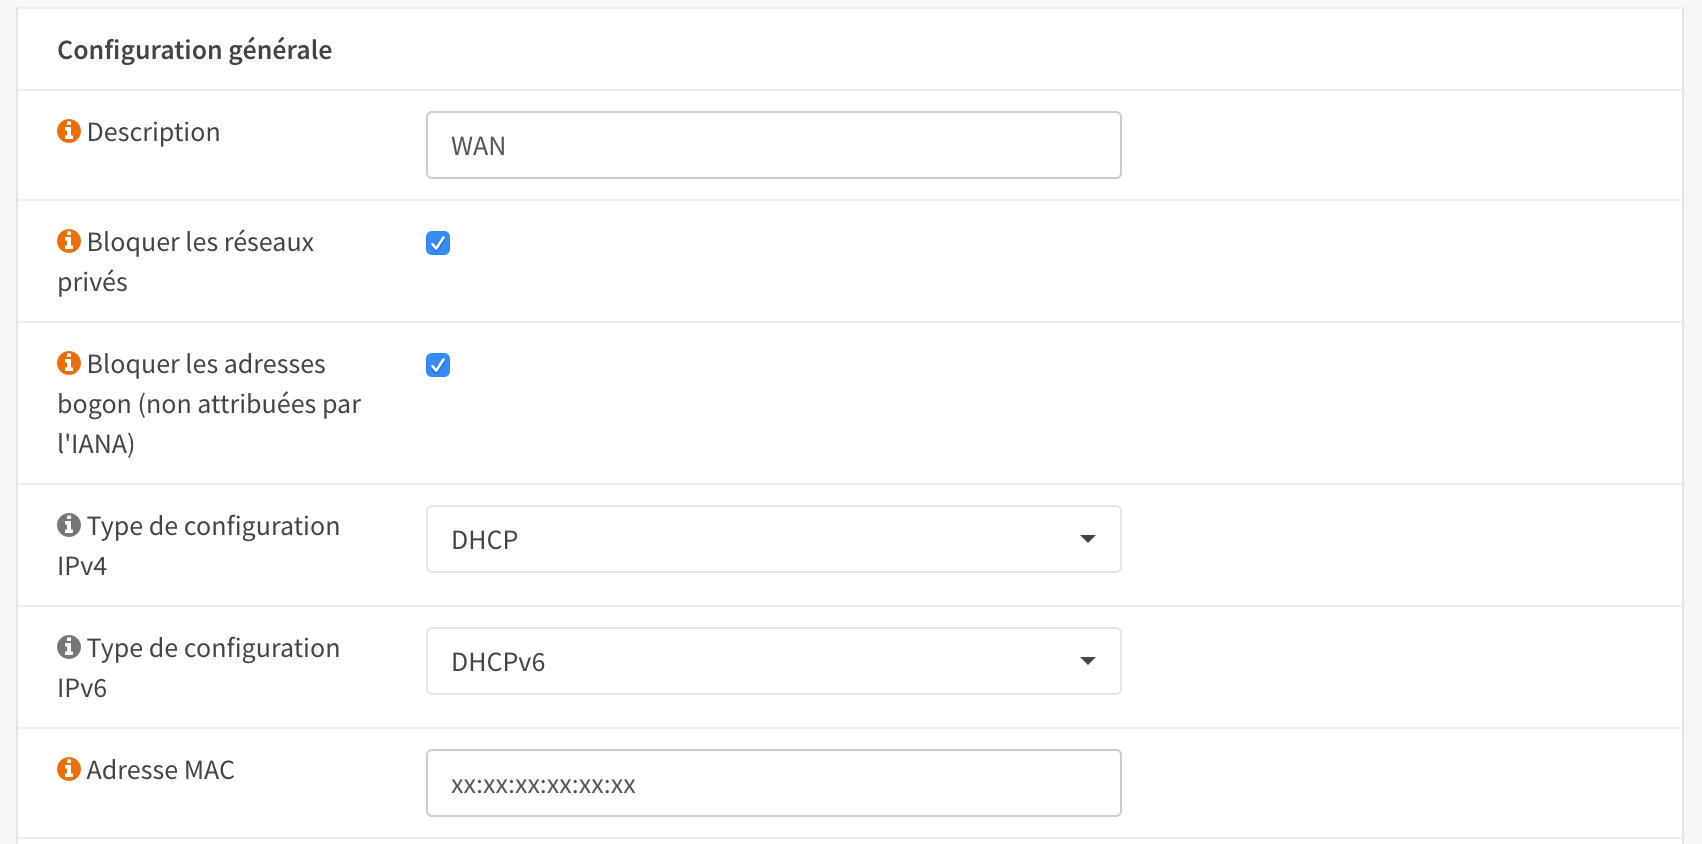
In order to establish the IPv4 and IPv6 connection, SFR/RED requires that the correct parameters are passed for the DHCPv4 and DHCPv6 requests respectively.
Select options:
IPv4 configuration: DHCPv4,
IPv6 configuration: DHCPv6.
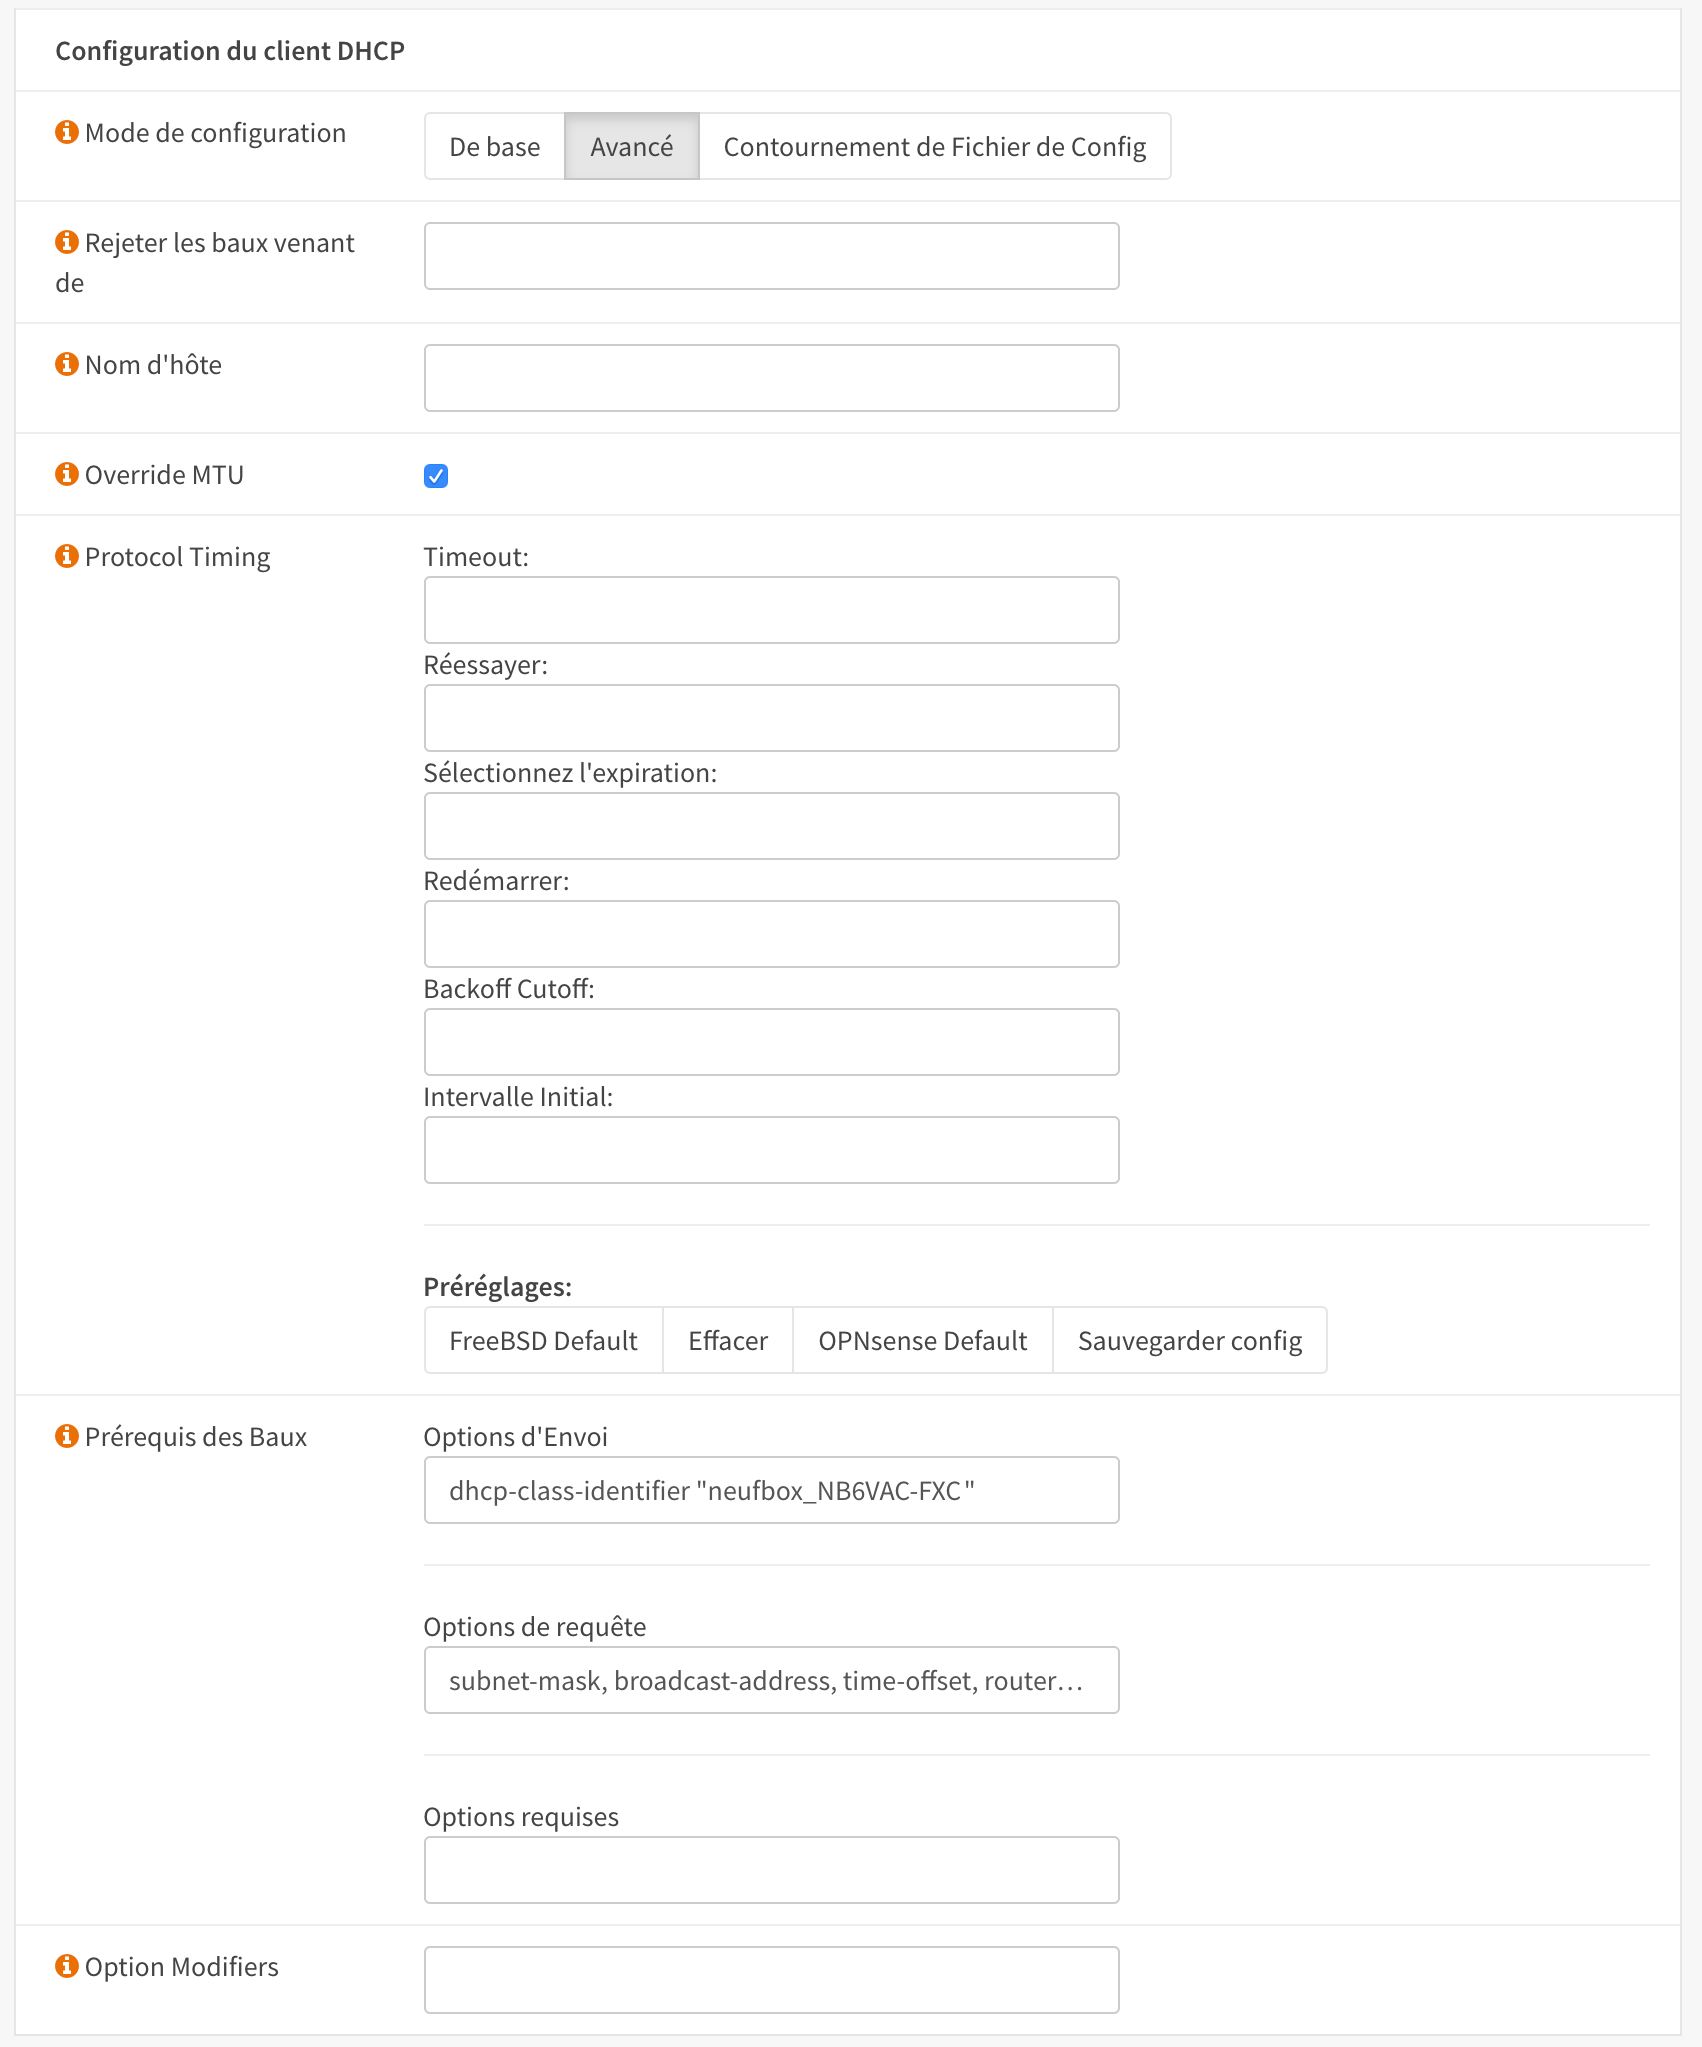
On the DHCPv4 request it is a requirement to pass the following:
Note
It is necessary to specify the following ”Send Options”:
dhcp-class-identifier “neufbox_NB6VAC-FXC”
Note
It is necessary to specify the following ”Request Options”:
subnet-mask, broadcast-address, time-offset, routers, domain-name, domain-name-servers, host-name, ntp-servers, nis-domain, root-path, merit-dump
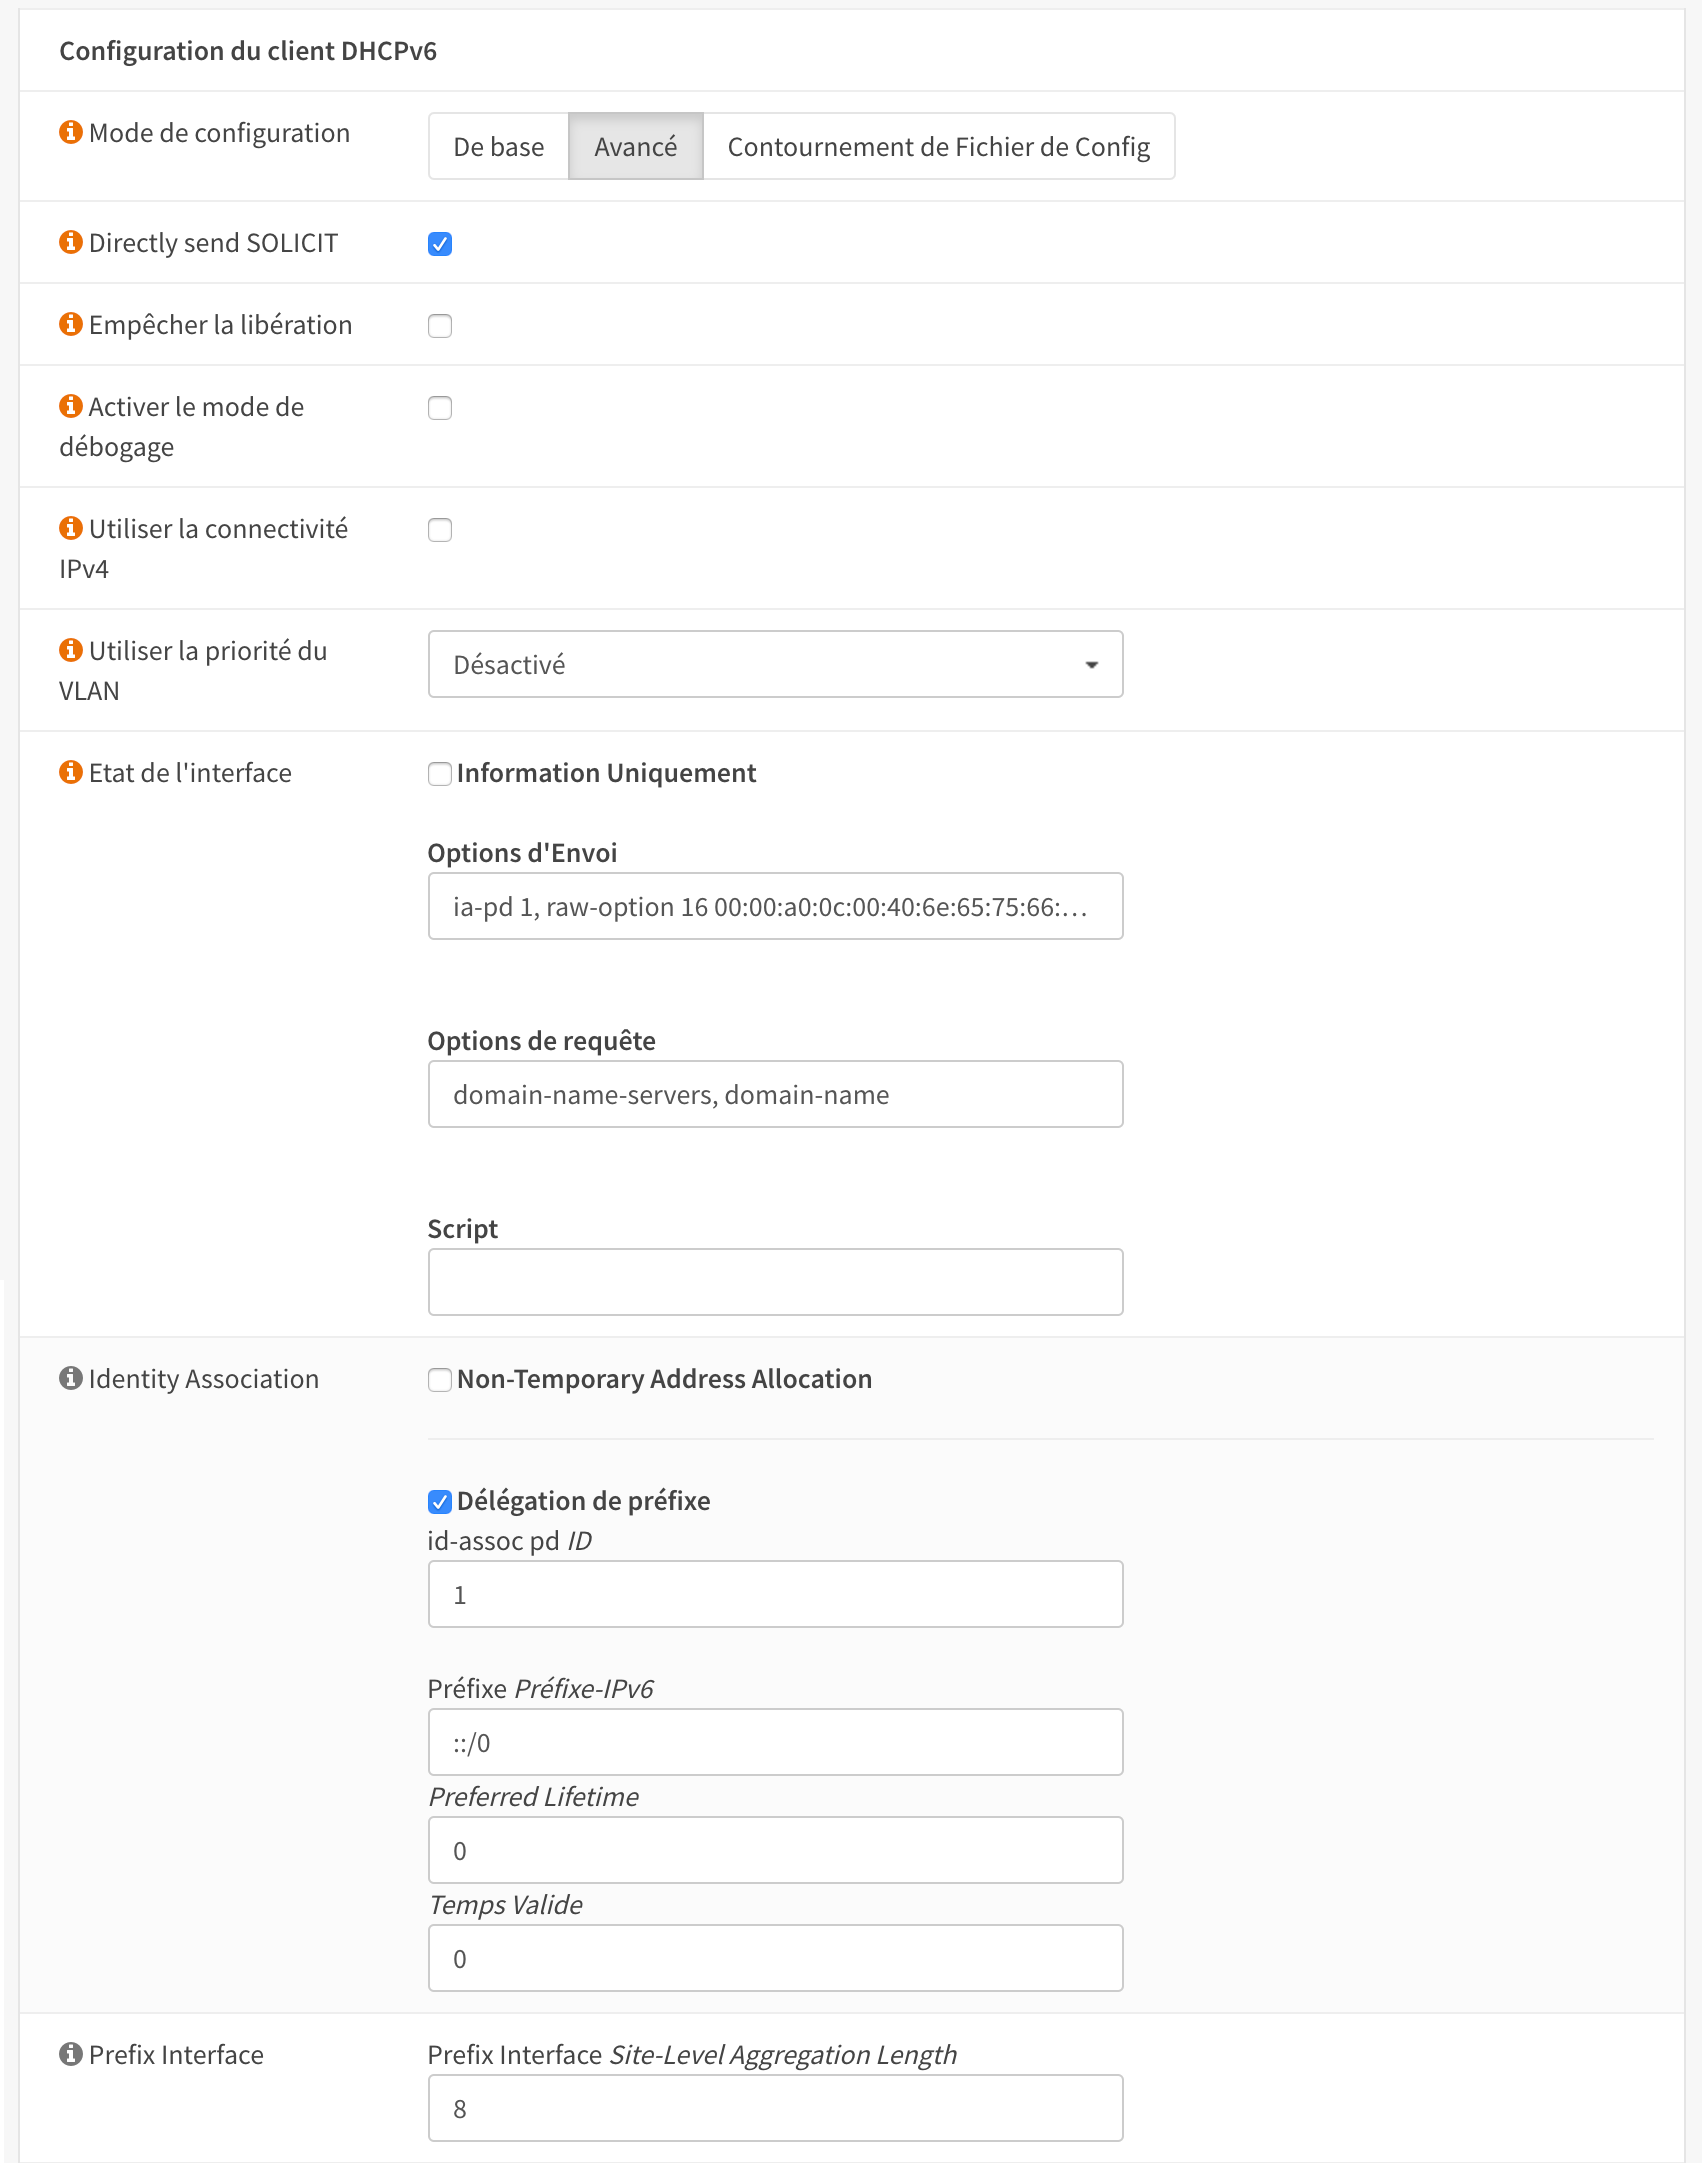
On the DHCPv6 request we need to use raw options
Note
It is necessary to specify the following ”Send Options”:
ia-pd 1, raw-option 16 00:00:a0:0c:00:40:6e:65:75:66:62:6f:78:5f:4e:42:36:56:41:43:2d:46:58:43
Note
It is necessary to specify the following ”Request Options”:
domain-name-servers, domain-name
Note
Set Identity Association options to:
Delegate prefix: checked,
id-assoc pd ID: 1,
Prefix: ::/0.
Set Prefix Interface option to:
Prefix Interface: 8.
Click ”Save” and then ”Apply”.
Configuring the LAN Interface
Interfaces / Parameters
Select and set your DUID.
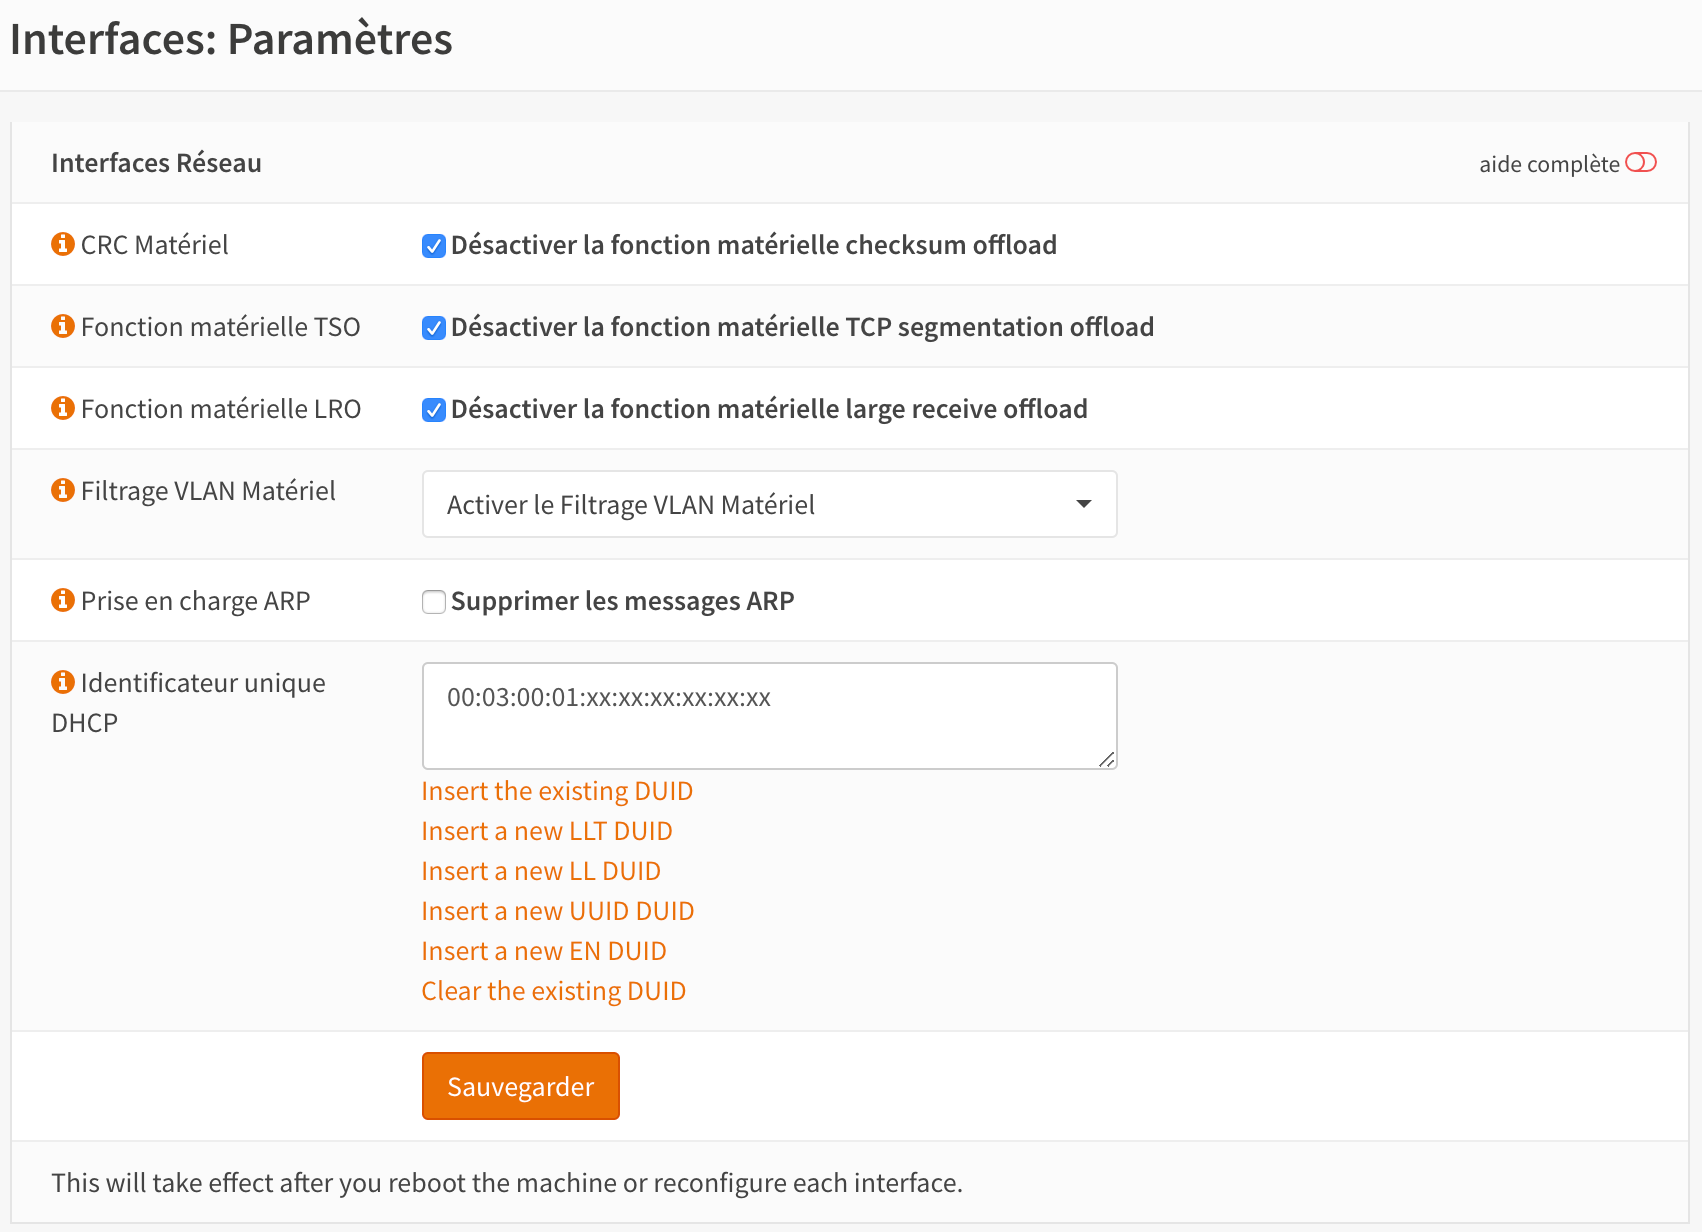
Note
The DUID is based on the SFR/RED Box MAC address : 00:03:00:01:xx:xx:xx:xx:xx:xx.
Click ”Save” and then ”Apply”
Interfaces / [LAN]
Select and set IPv4 to “Static IPv4” and IPv6 Configuration Type to “Track Interface”.
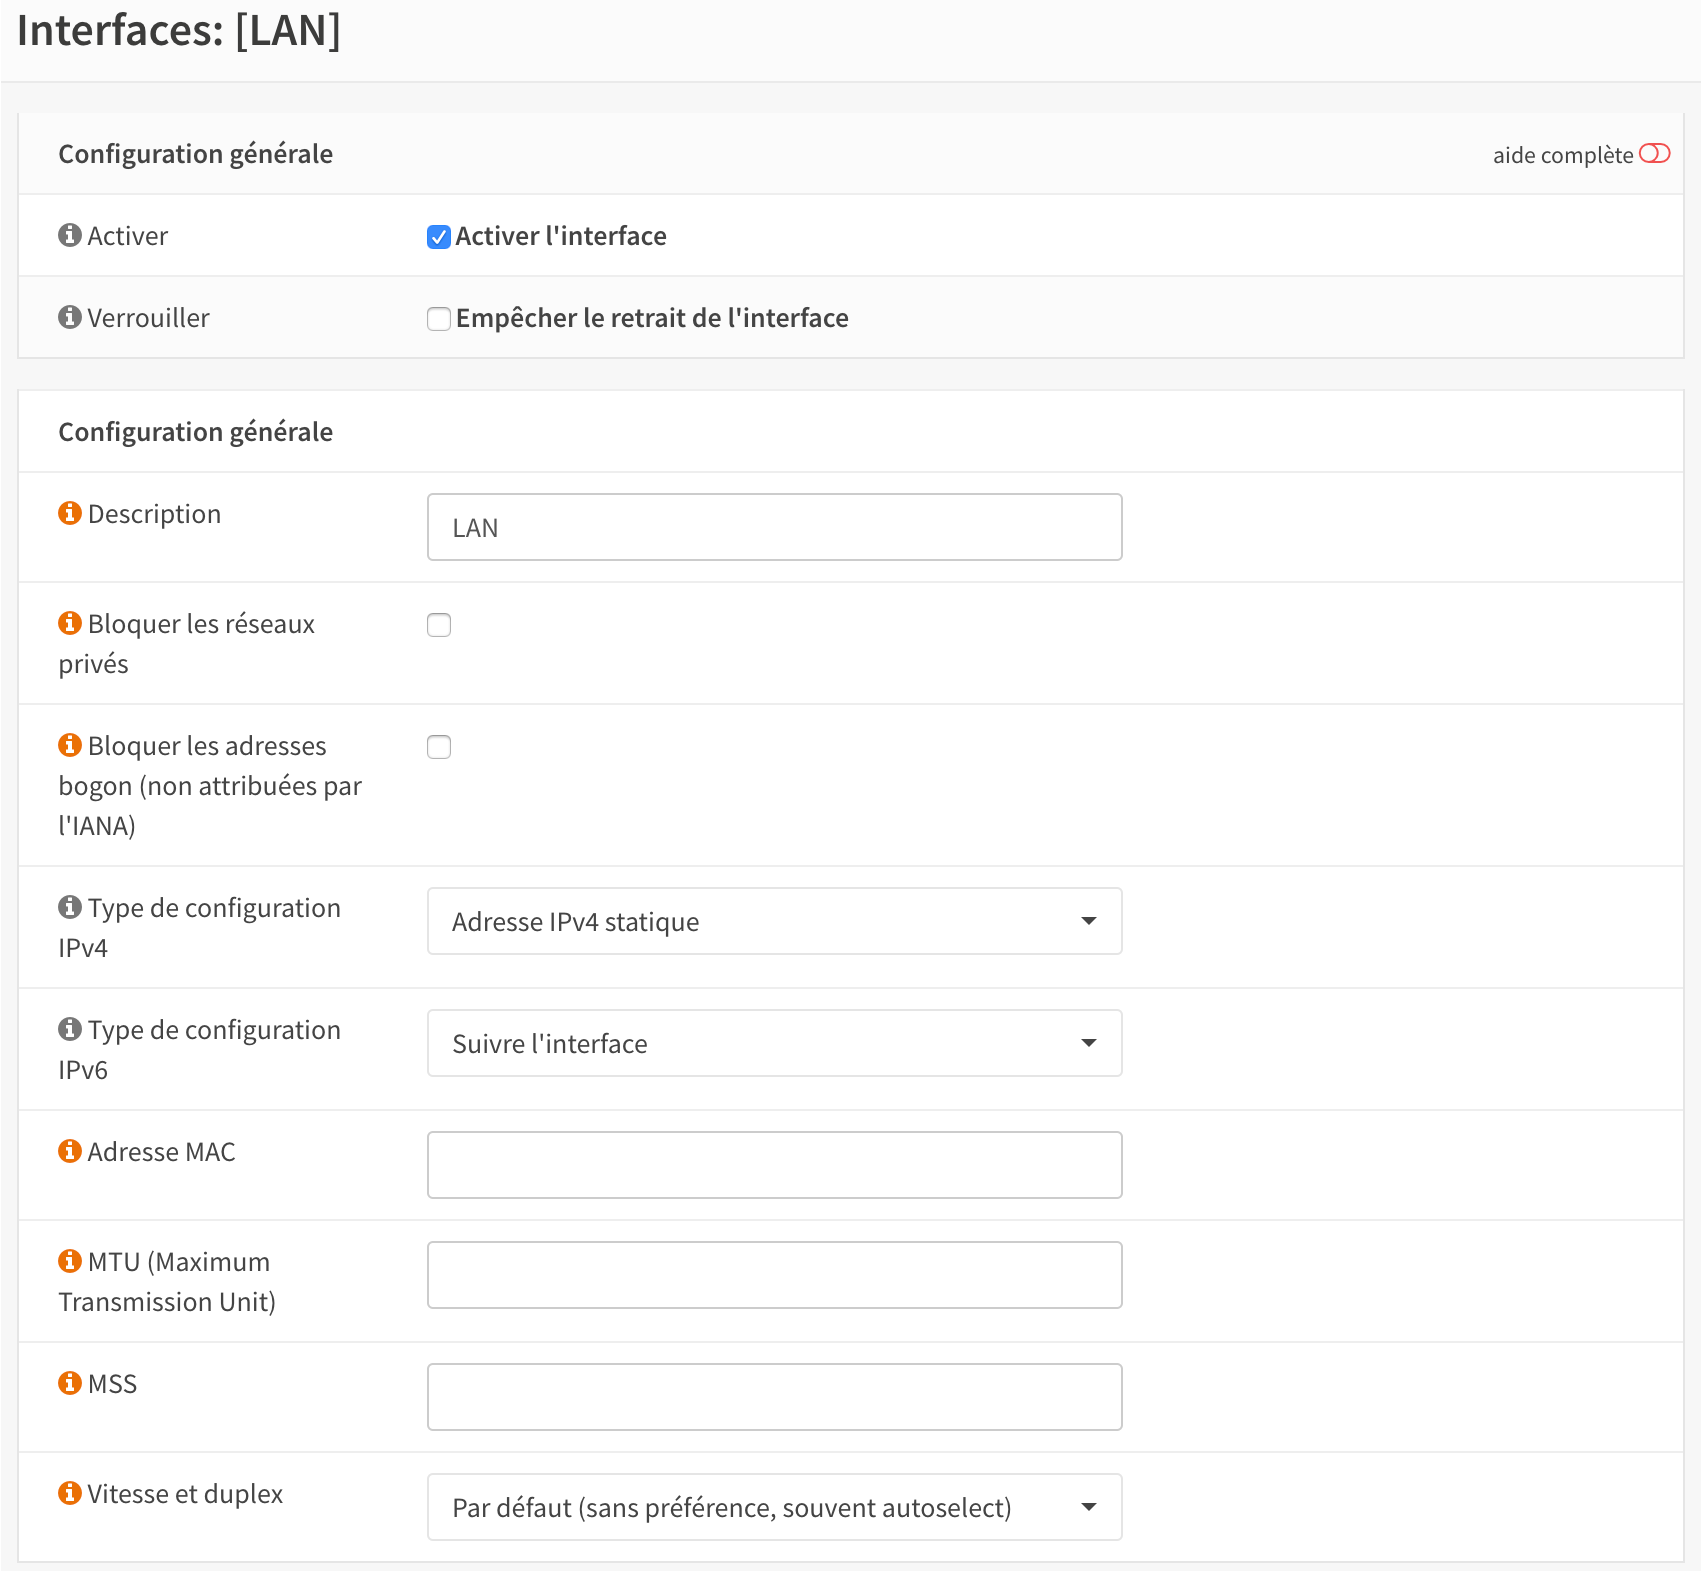
And define the IPv6 Prefix ID to ”0” Finally, set the following parameters as shown:
the IPv4 address to the one wanted,
the IPv6 interfacet to ”WAN”,
the IPv6 Prefix ID to ”0”.
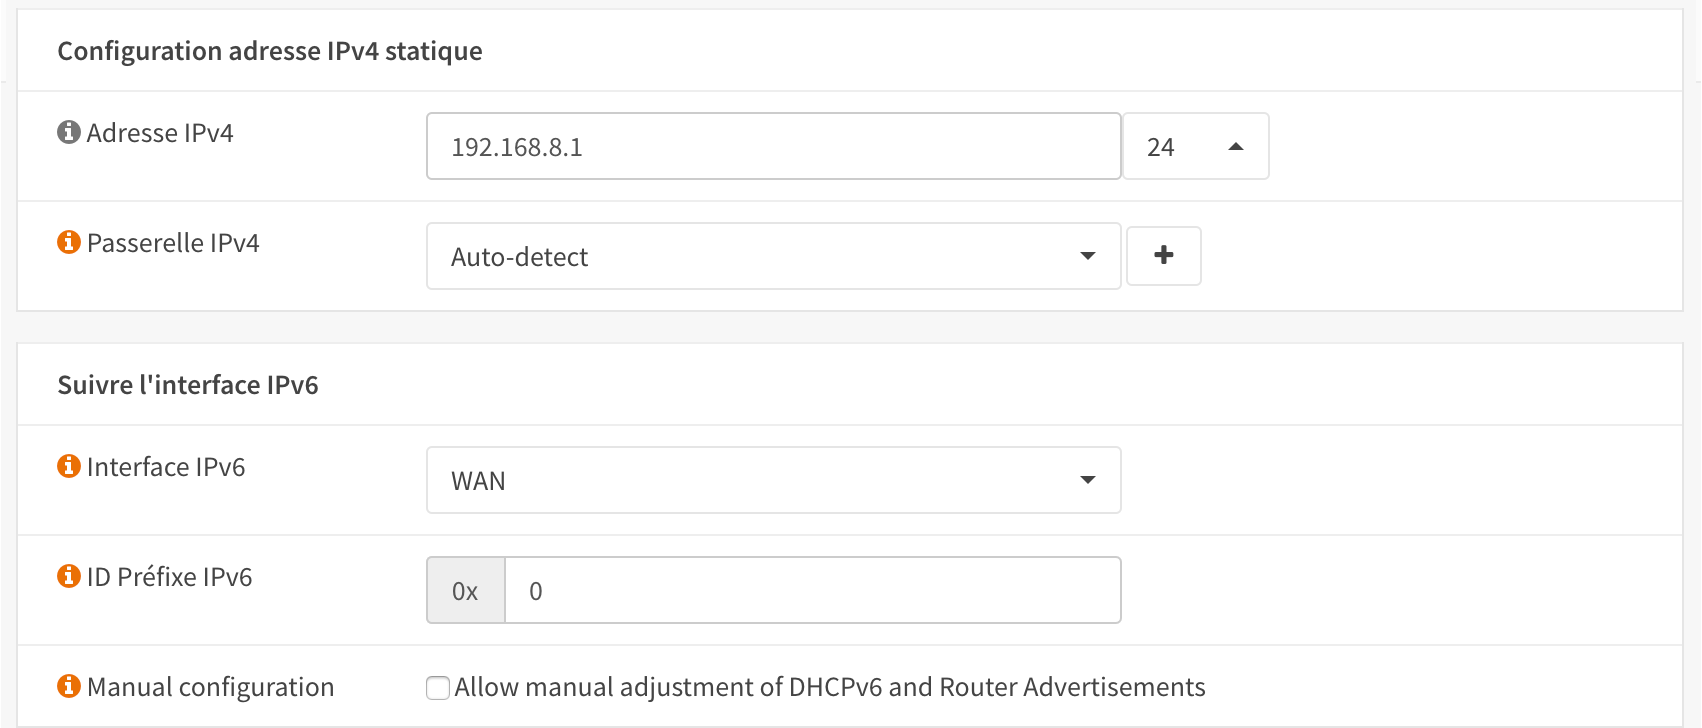
Click ”Save” and then ”Apply”
Note
It is advisable at this point to reboot the system. This will allow you to retrieve an IPv4 address which will be used in next part.
Configuring NGINX to provision the SFR/RED BOX
In order to set up the phone, as the SIP parameters (user/password) are not public, we will add the SFR/RED box in our LAN. This will allow us to plug our regular phone in the SFR/RED box.
Note
This how-to does not cover installation of NGINX nor the use of SSH / shell commands.
First SSH into your OPNSense firewall and create a folder /srv/sfrredbox. In this folder, we will add the scripts used to spoof the SFR/RED Box requests.
In this directory create a file index.php
$currentFirewall = 'firewall.localdomain.intra';
// can probably be replaced with
// $currentFirewall = exec('hostname');
if (isset($_GET['ip_dhcp'])) {
    // adjust re0 to your WAN interface
    $_GET['ip_dhcp'] = exec('ifconfig re0 | grep \'inet \' | cut -d\' \' -f2');
    // if the ifconfig command does not work, set the external IP manually
    // $_GET['ip_dhcp'] = 'your.external.ip.address';
}
$_SERVER['DOCUMENT_URI'] = str_replace('/index.php', '', $_SERVER['DOCUMENT_URI']);
$parameters = http_build_query($_GET);
$url = $_SERVER['REQUEST_SCHEME'].'://'.$_SERVER['HTTP_HOST'].'/'.trim($_SERVER['DOCUMENT_URI'], '/?') .'?'.$parameters;
$ch = curl_init();
curl_setopt($ch, CURLOPT_URL, $url);
curl_setopt($ch, CURLOPT_RETURNTRANSFER, true);
curl_setopt($ch, CURLOPT_HEADERFUNCTION, 'readHeaderLine');
$data = curl_exec($ch);
$data = preg_replace('/<proxy([^>]+)>([^<]+)<\/proxy>/', '<proxy$1>'.$currentFirewall.'</proxy>', $data);
curl_close($ch);
header('Content-Length: '.strlen($data));
header('Content-Type: application/xml');
echo $data;
Warning
Code cannot be copied / pasted as-is, you will have to adjust the parameters and make it consistent with your own settings.

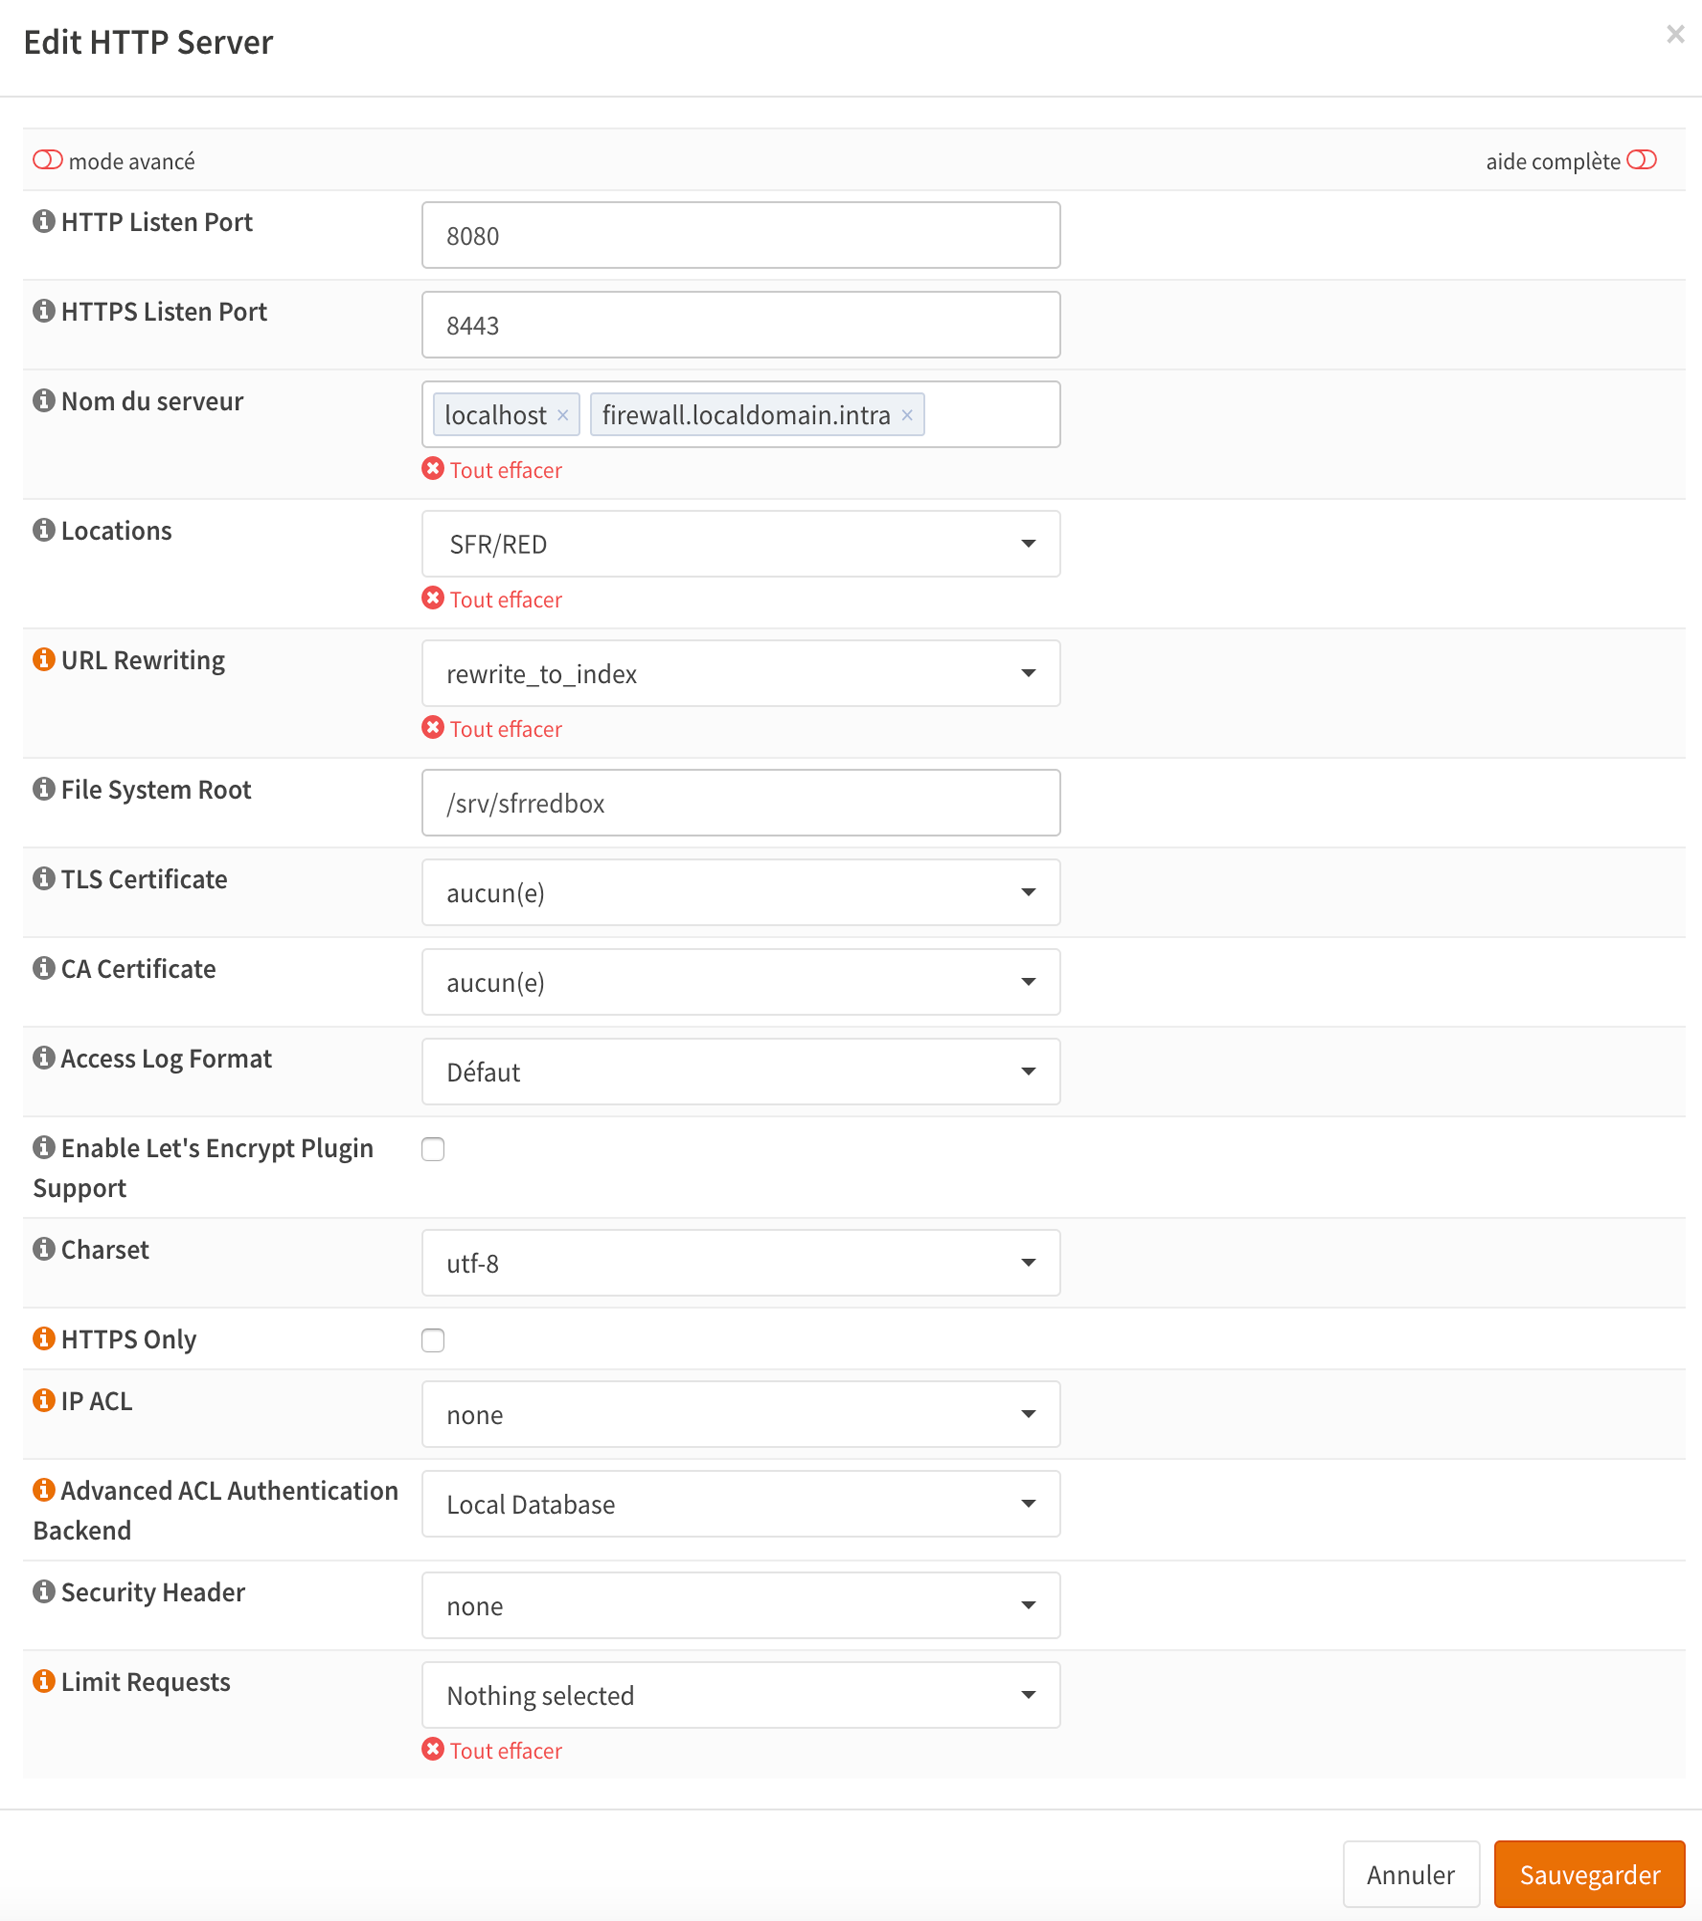
Services / Nginx / Configuration / HTTP(s)
Select
Create a new config
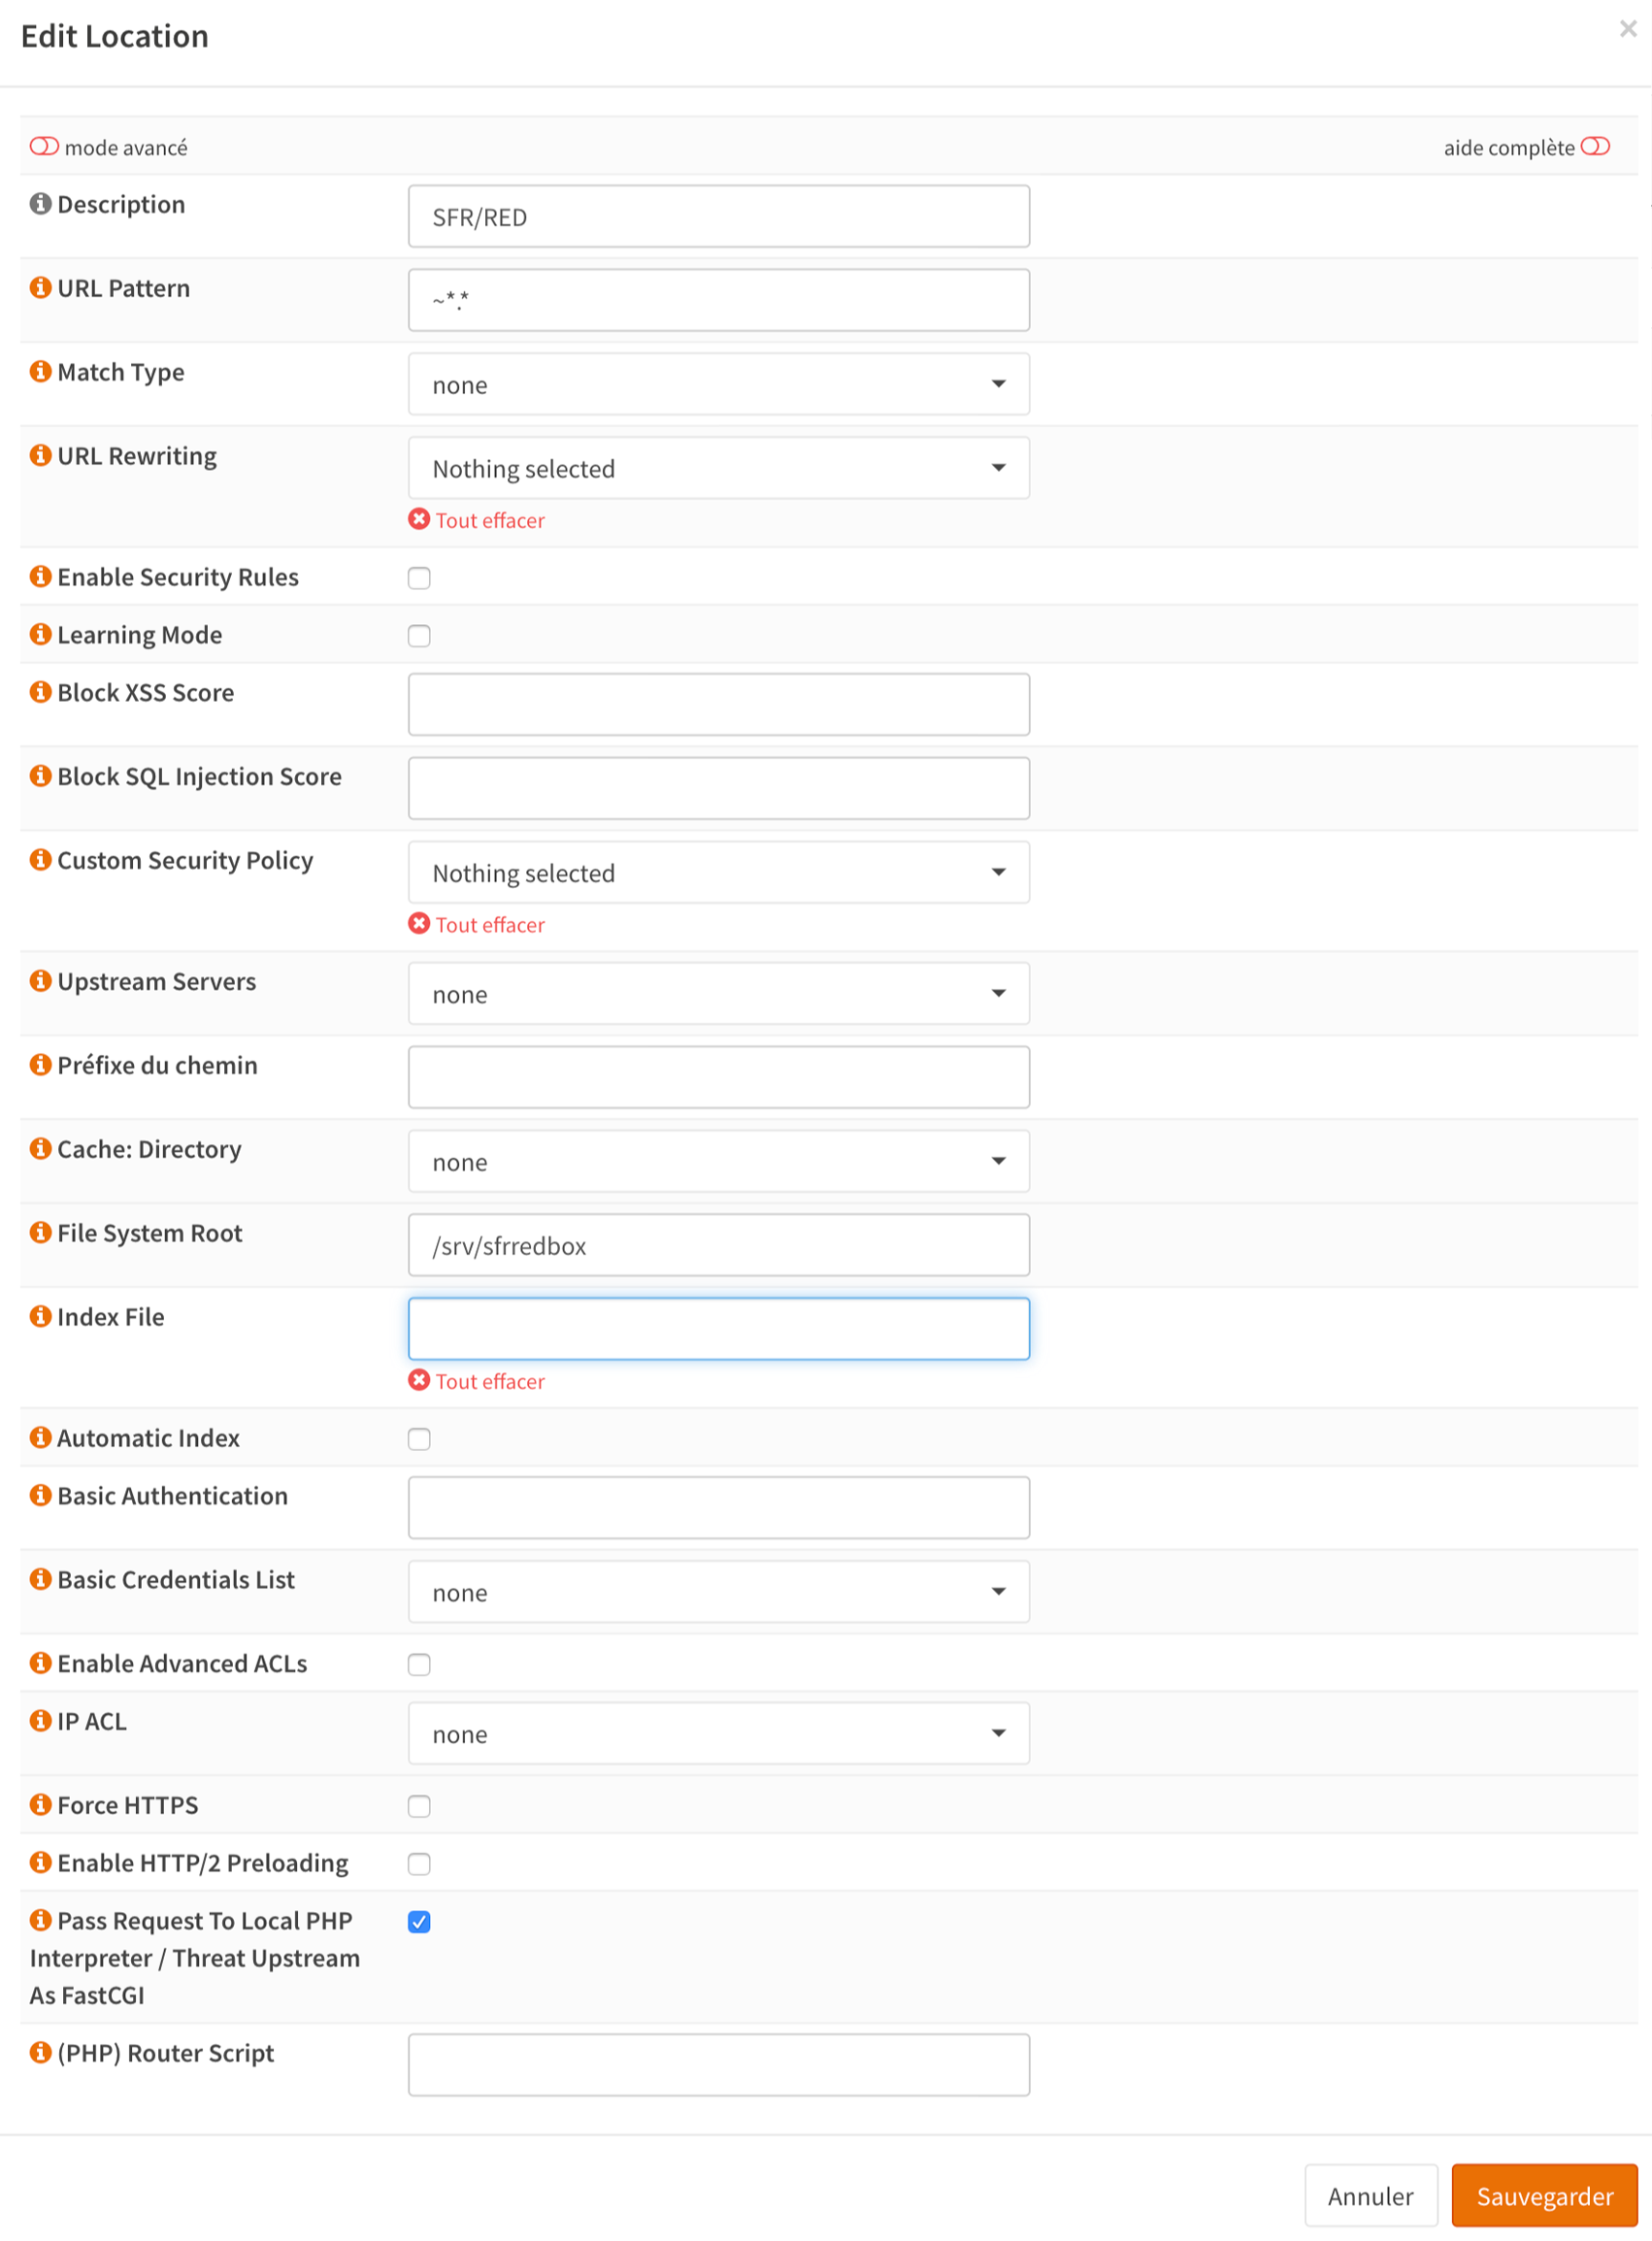
Note
Important settings are:
Description,
URL Pattern,
File System Root,
Pass Request To Local PHP Interpreter / Threat Upstream.
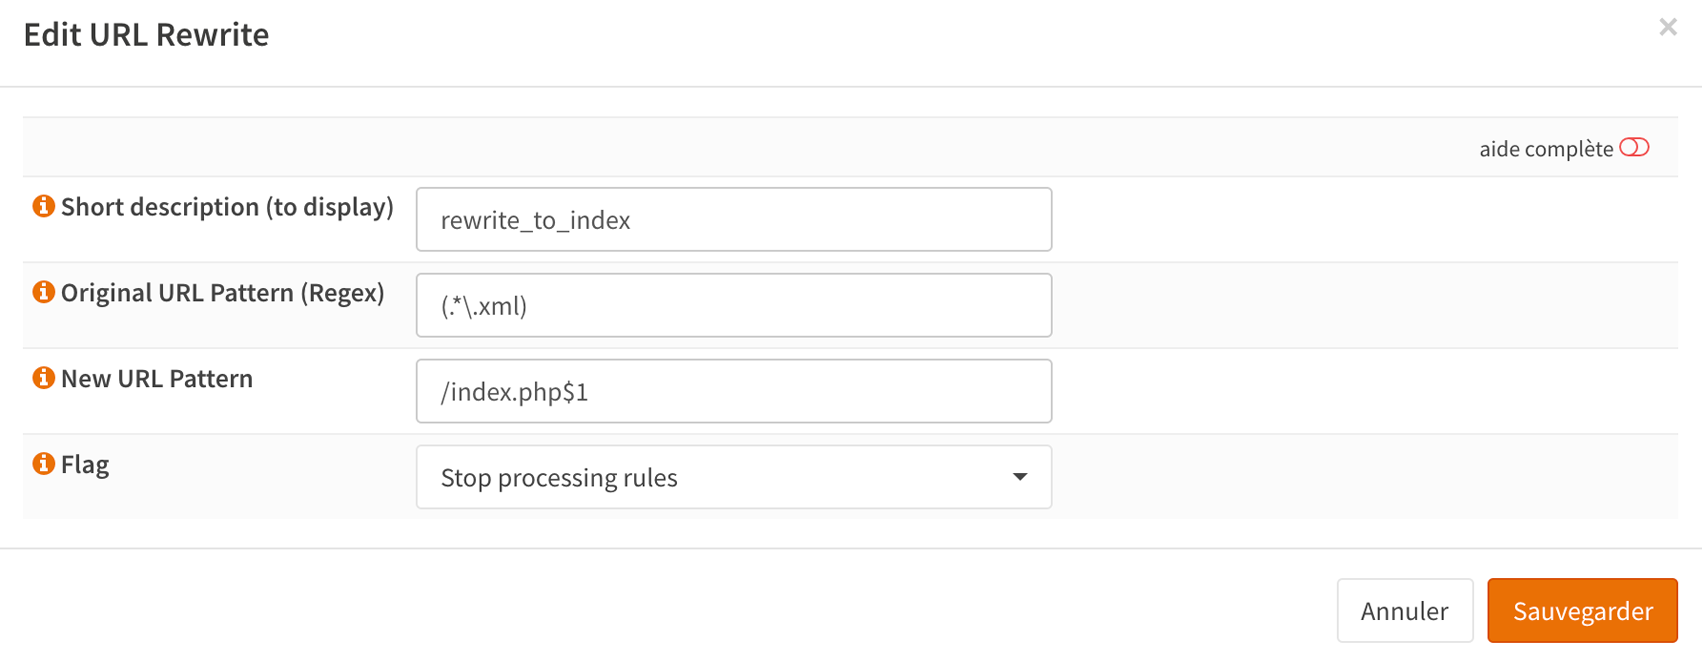
Services / Nginx / Configuration / HTTP(s) / HTTP Server
Select
Add a new rewrite rule
Note
NGINX should be serving the page we have created.
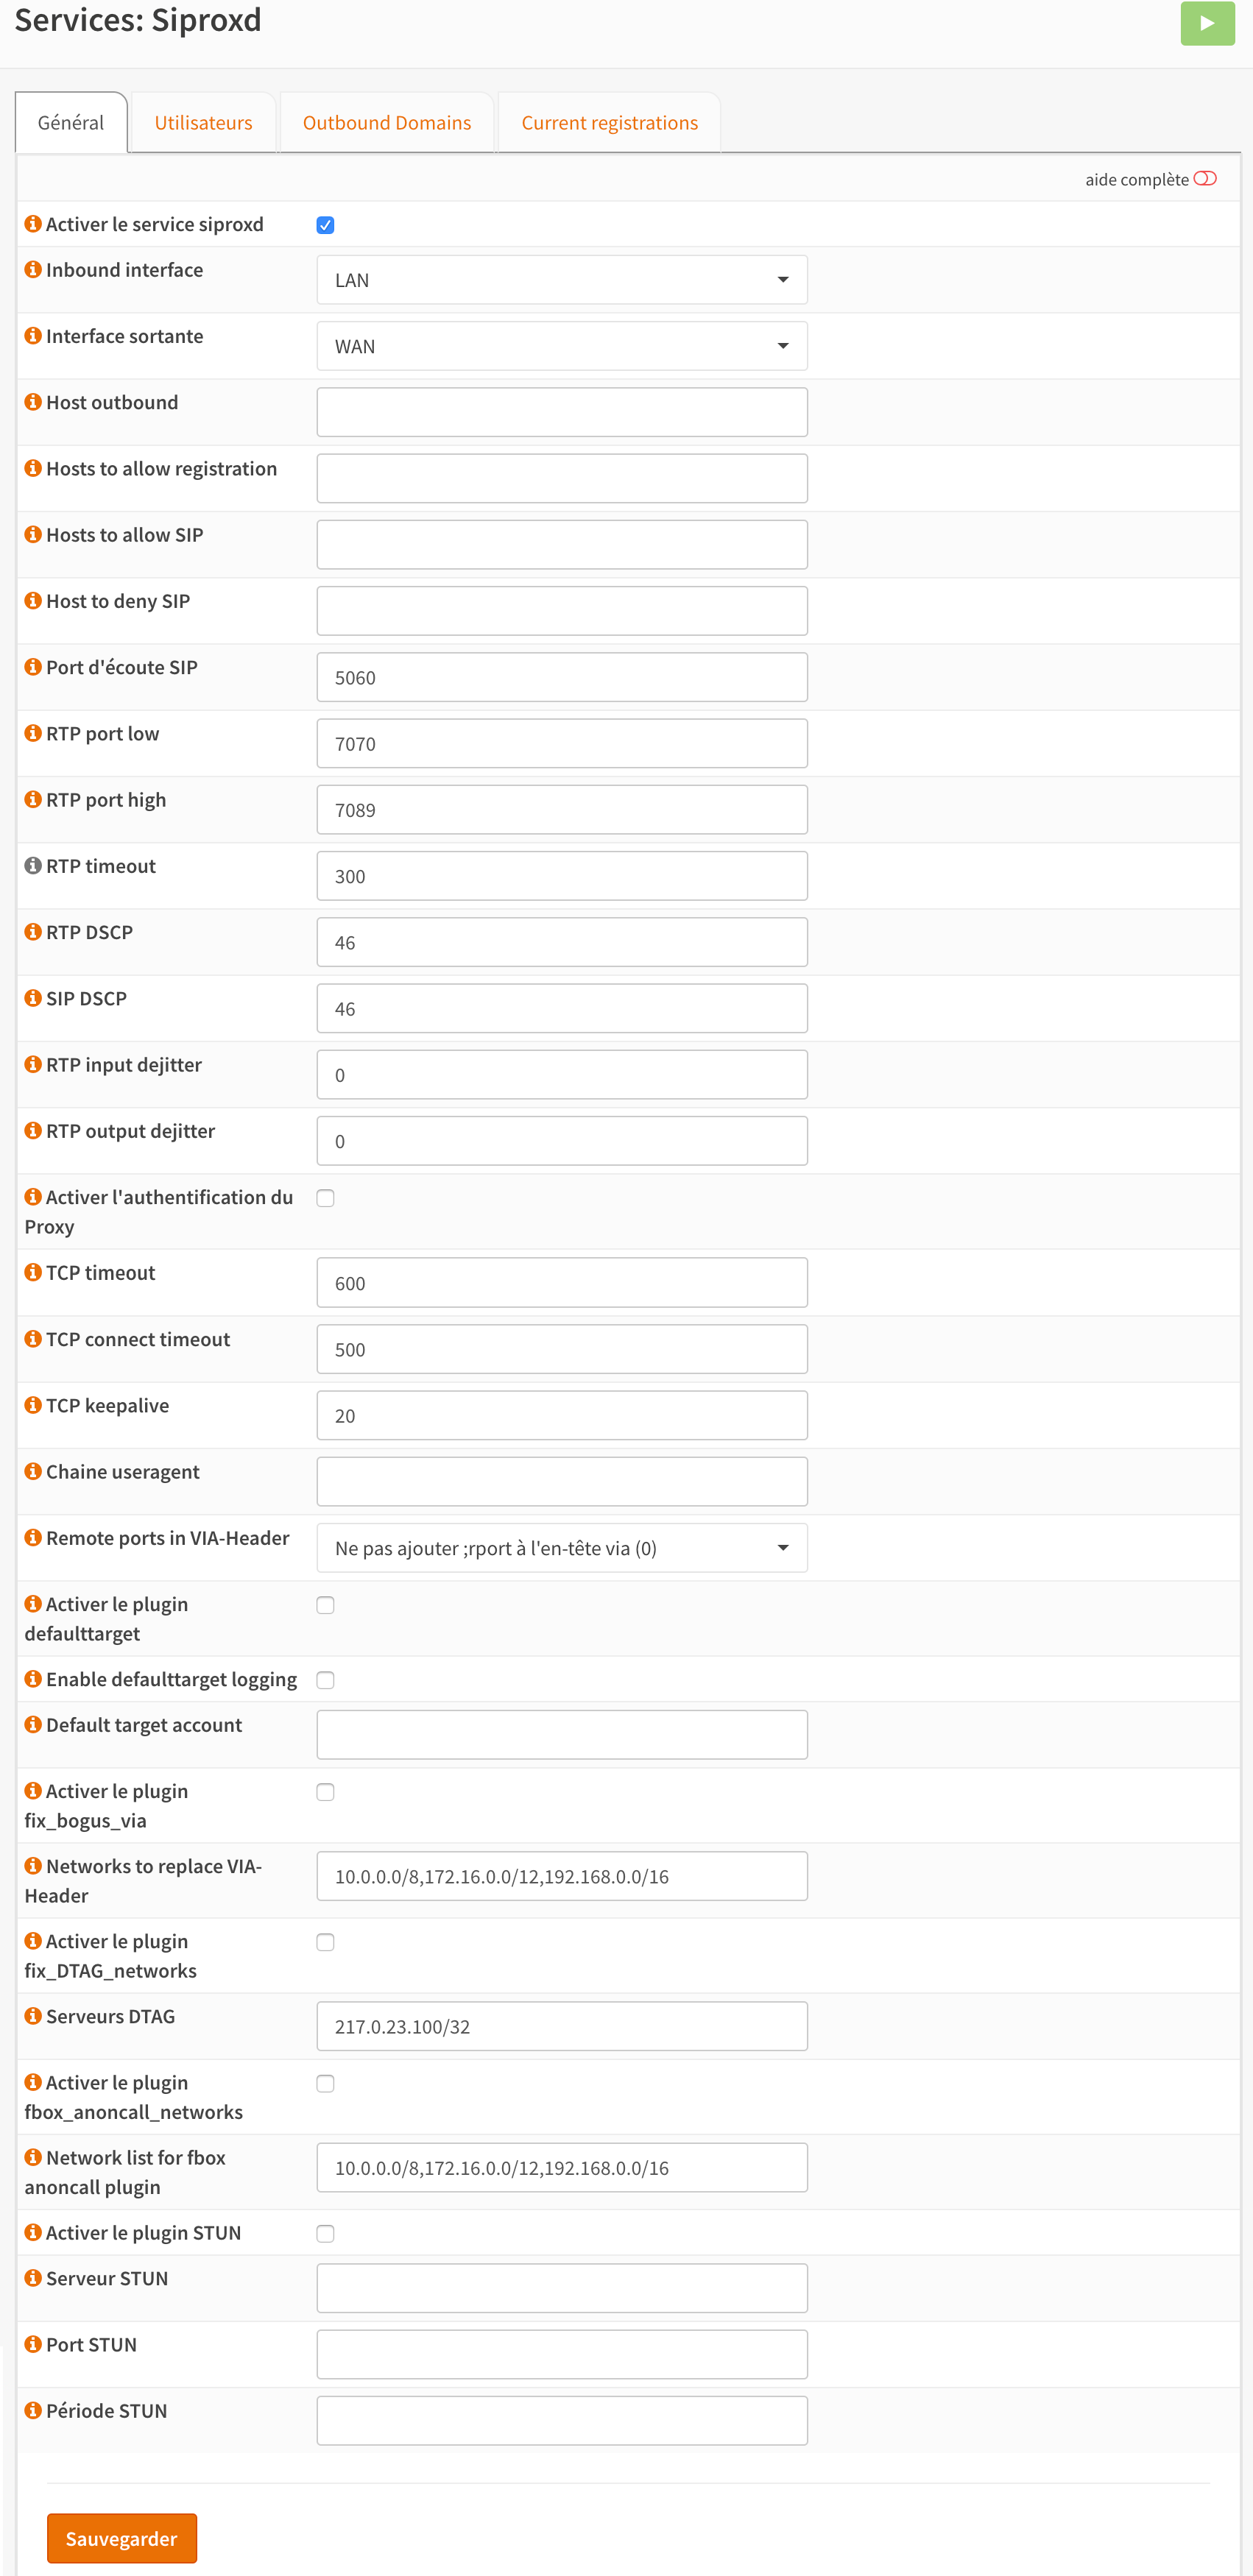
Configuring Siproxd to provision the SFR/RED BOX
To allow phone to work, the easiest way is to set Siproxd on the firewall.
Services / Unbound DNS / General
Select
Add parameters to let SFR/RED Box discover the SIP proxy:
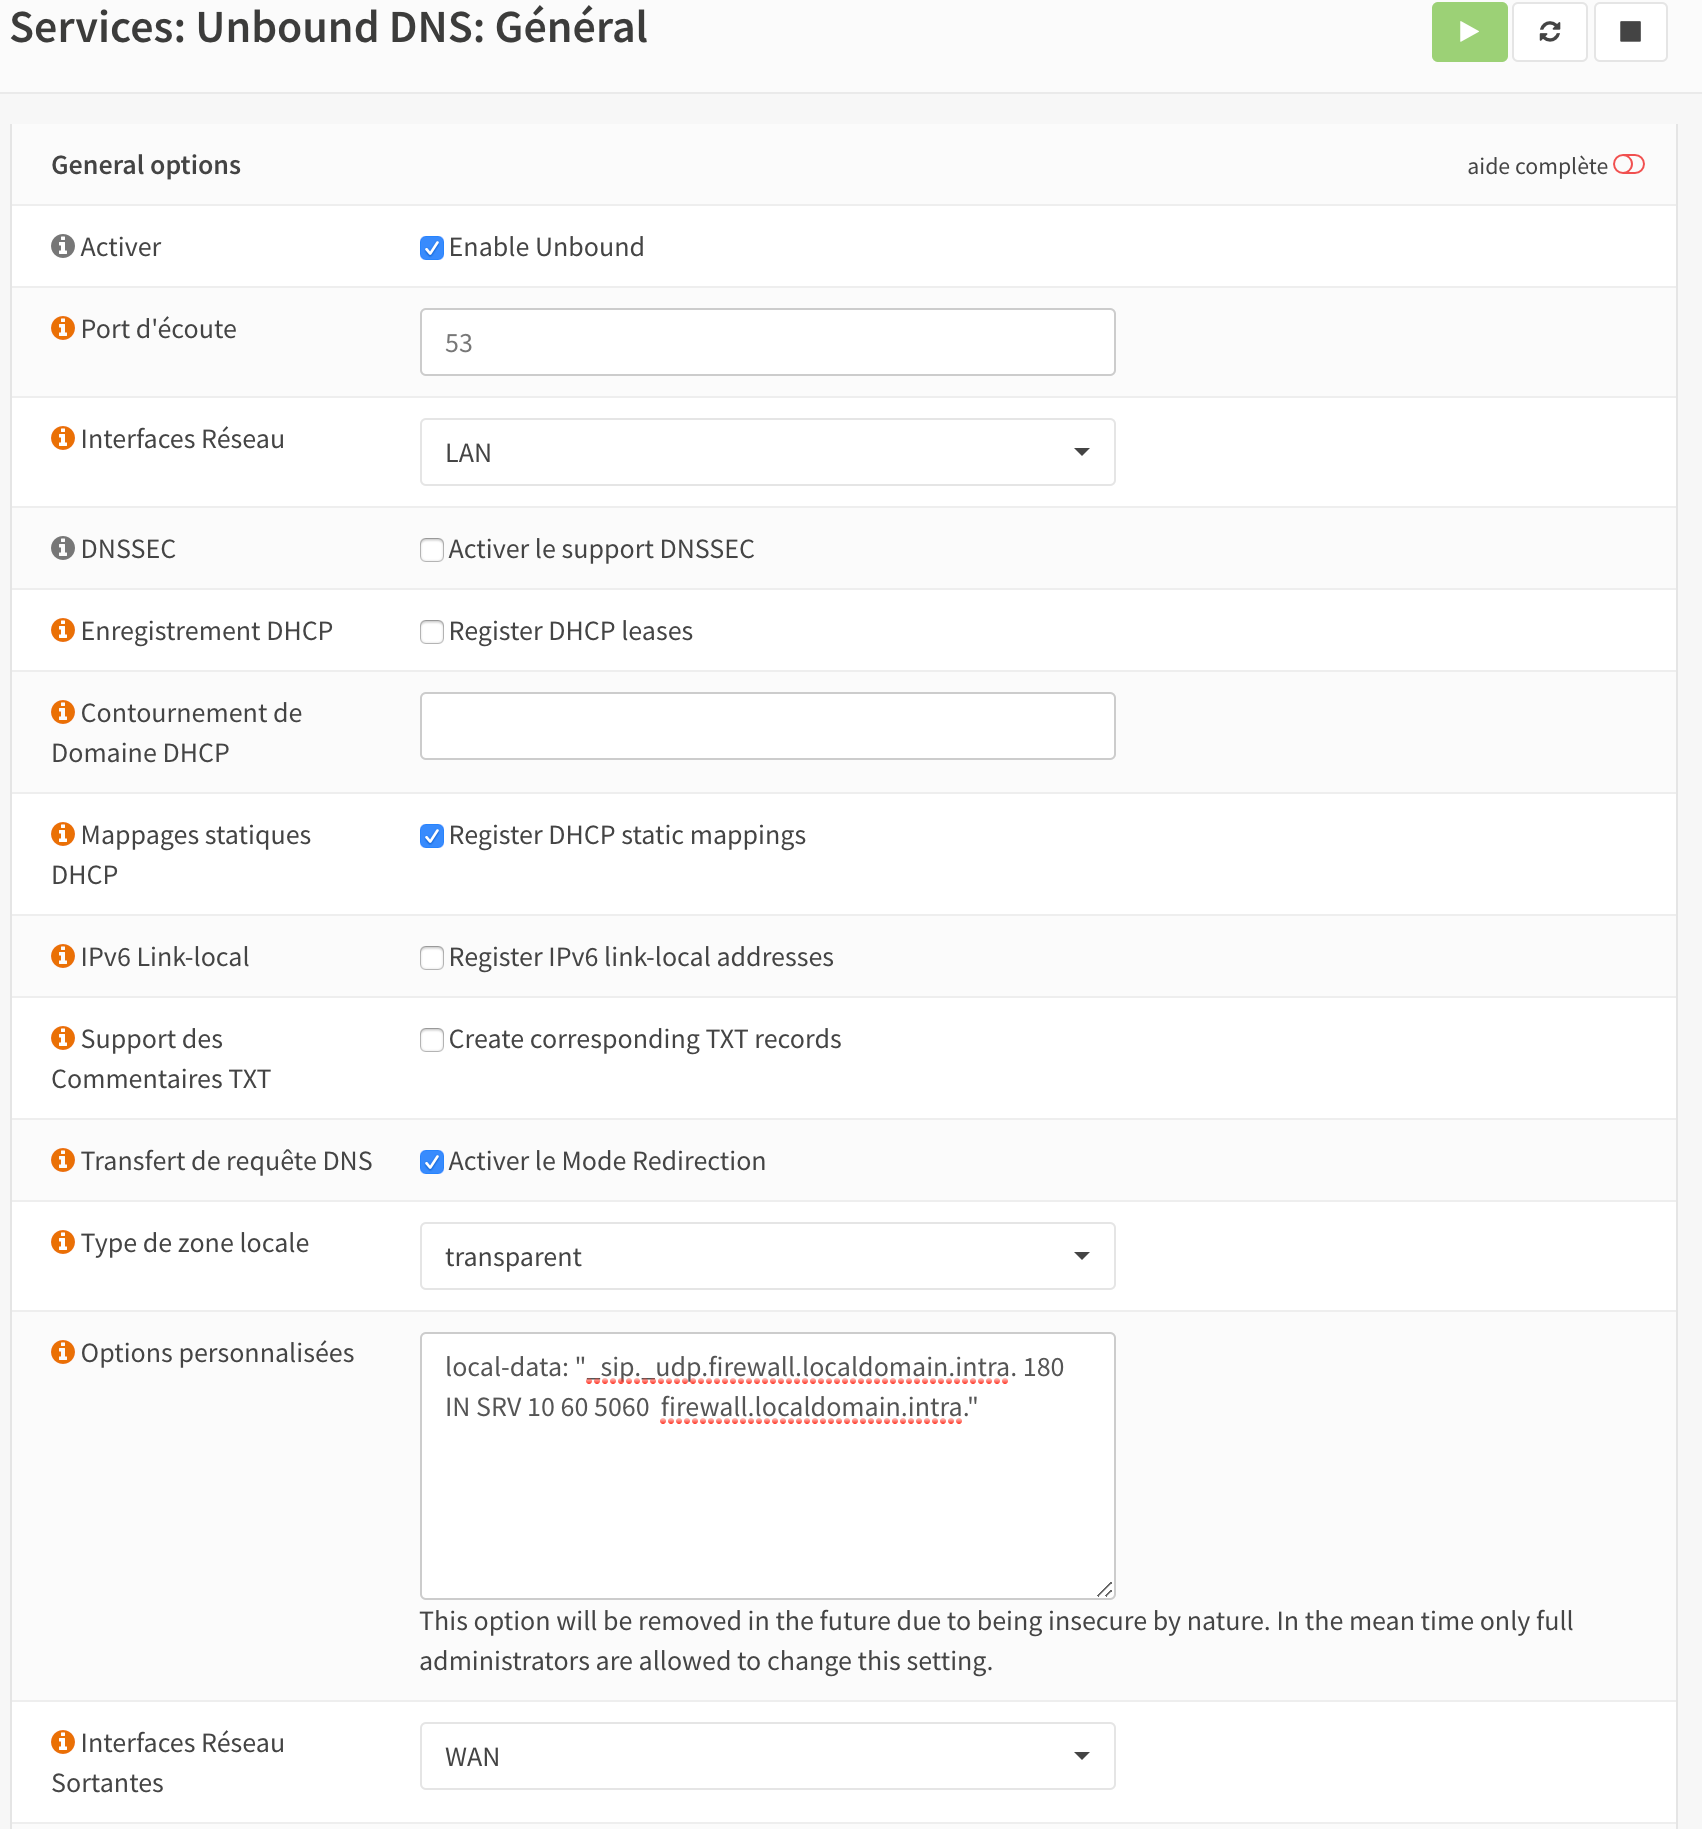
Warning
It appears OPNSense will drop support of functionality of advanced parameters so I don’t know if it will be possible in future releases to define the DNS stuff using:
local-data: “_sip._udp.firewall.localdomain.intra. 180 IN SRV 10 60 5060 firewall.localdomain.intra.”
Services / Siproxd / Outbound Domains
Select
Create the configuration for outbound domain:
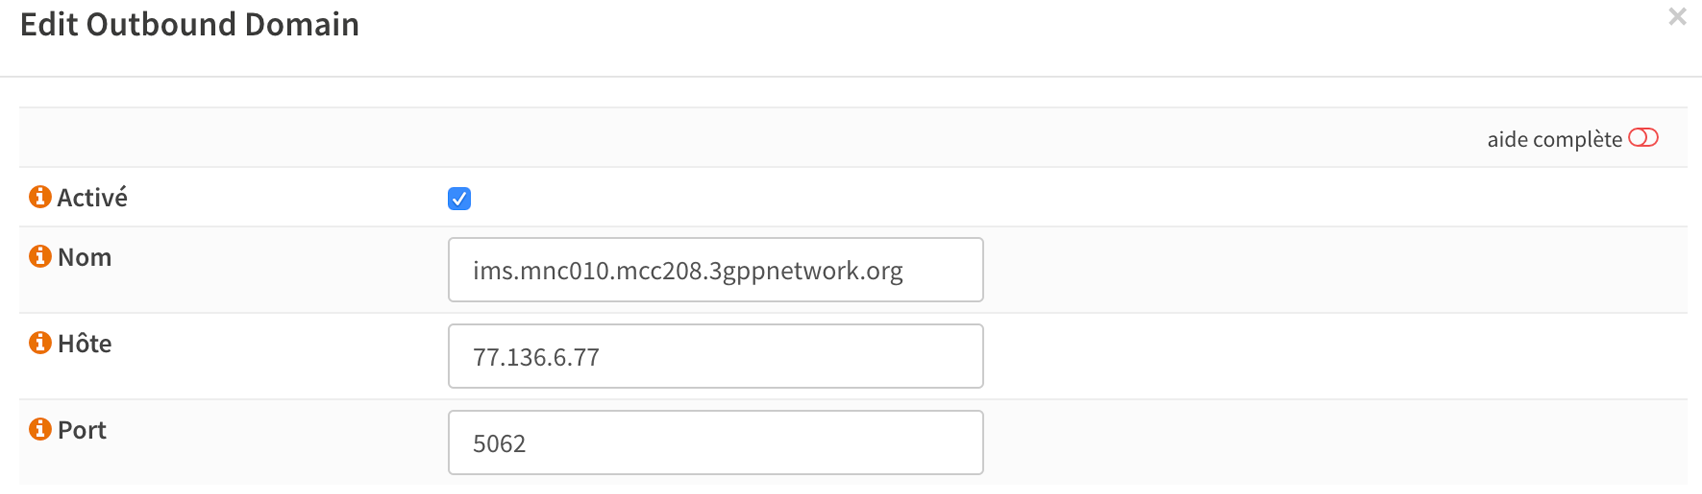
Note
The IP address and the port of outbound domain was discovered using an host request on the proxy returned by SFR/RED while provisionning the box. You will have to check the <proxy></proxy> fields of voip2.xml.
host -t SRV _sip._udp.residential.p-cscf.sfr.net
Note
the host request result gives available SIP servers with the port to use (in my case 5062).
_sip._udp.residential.p-cscf.sfr.net has SRV record 10 0 5062 mitry.p-cscf.sfr.net. _sip._udp.residential.p-cscf.sfr.net has SRV record 10 0 5062 corbas.p-cscf.sfr.net. _sip._udp.residential.p-cscf.sfr.net has SRV record 10 0 5062 trappes.p-cscf.sfr.net.
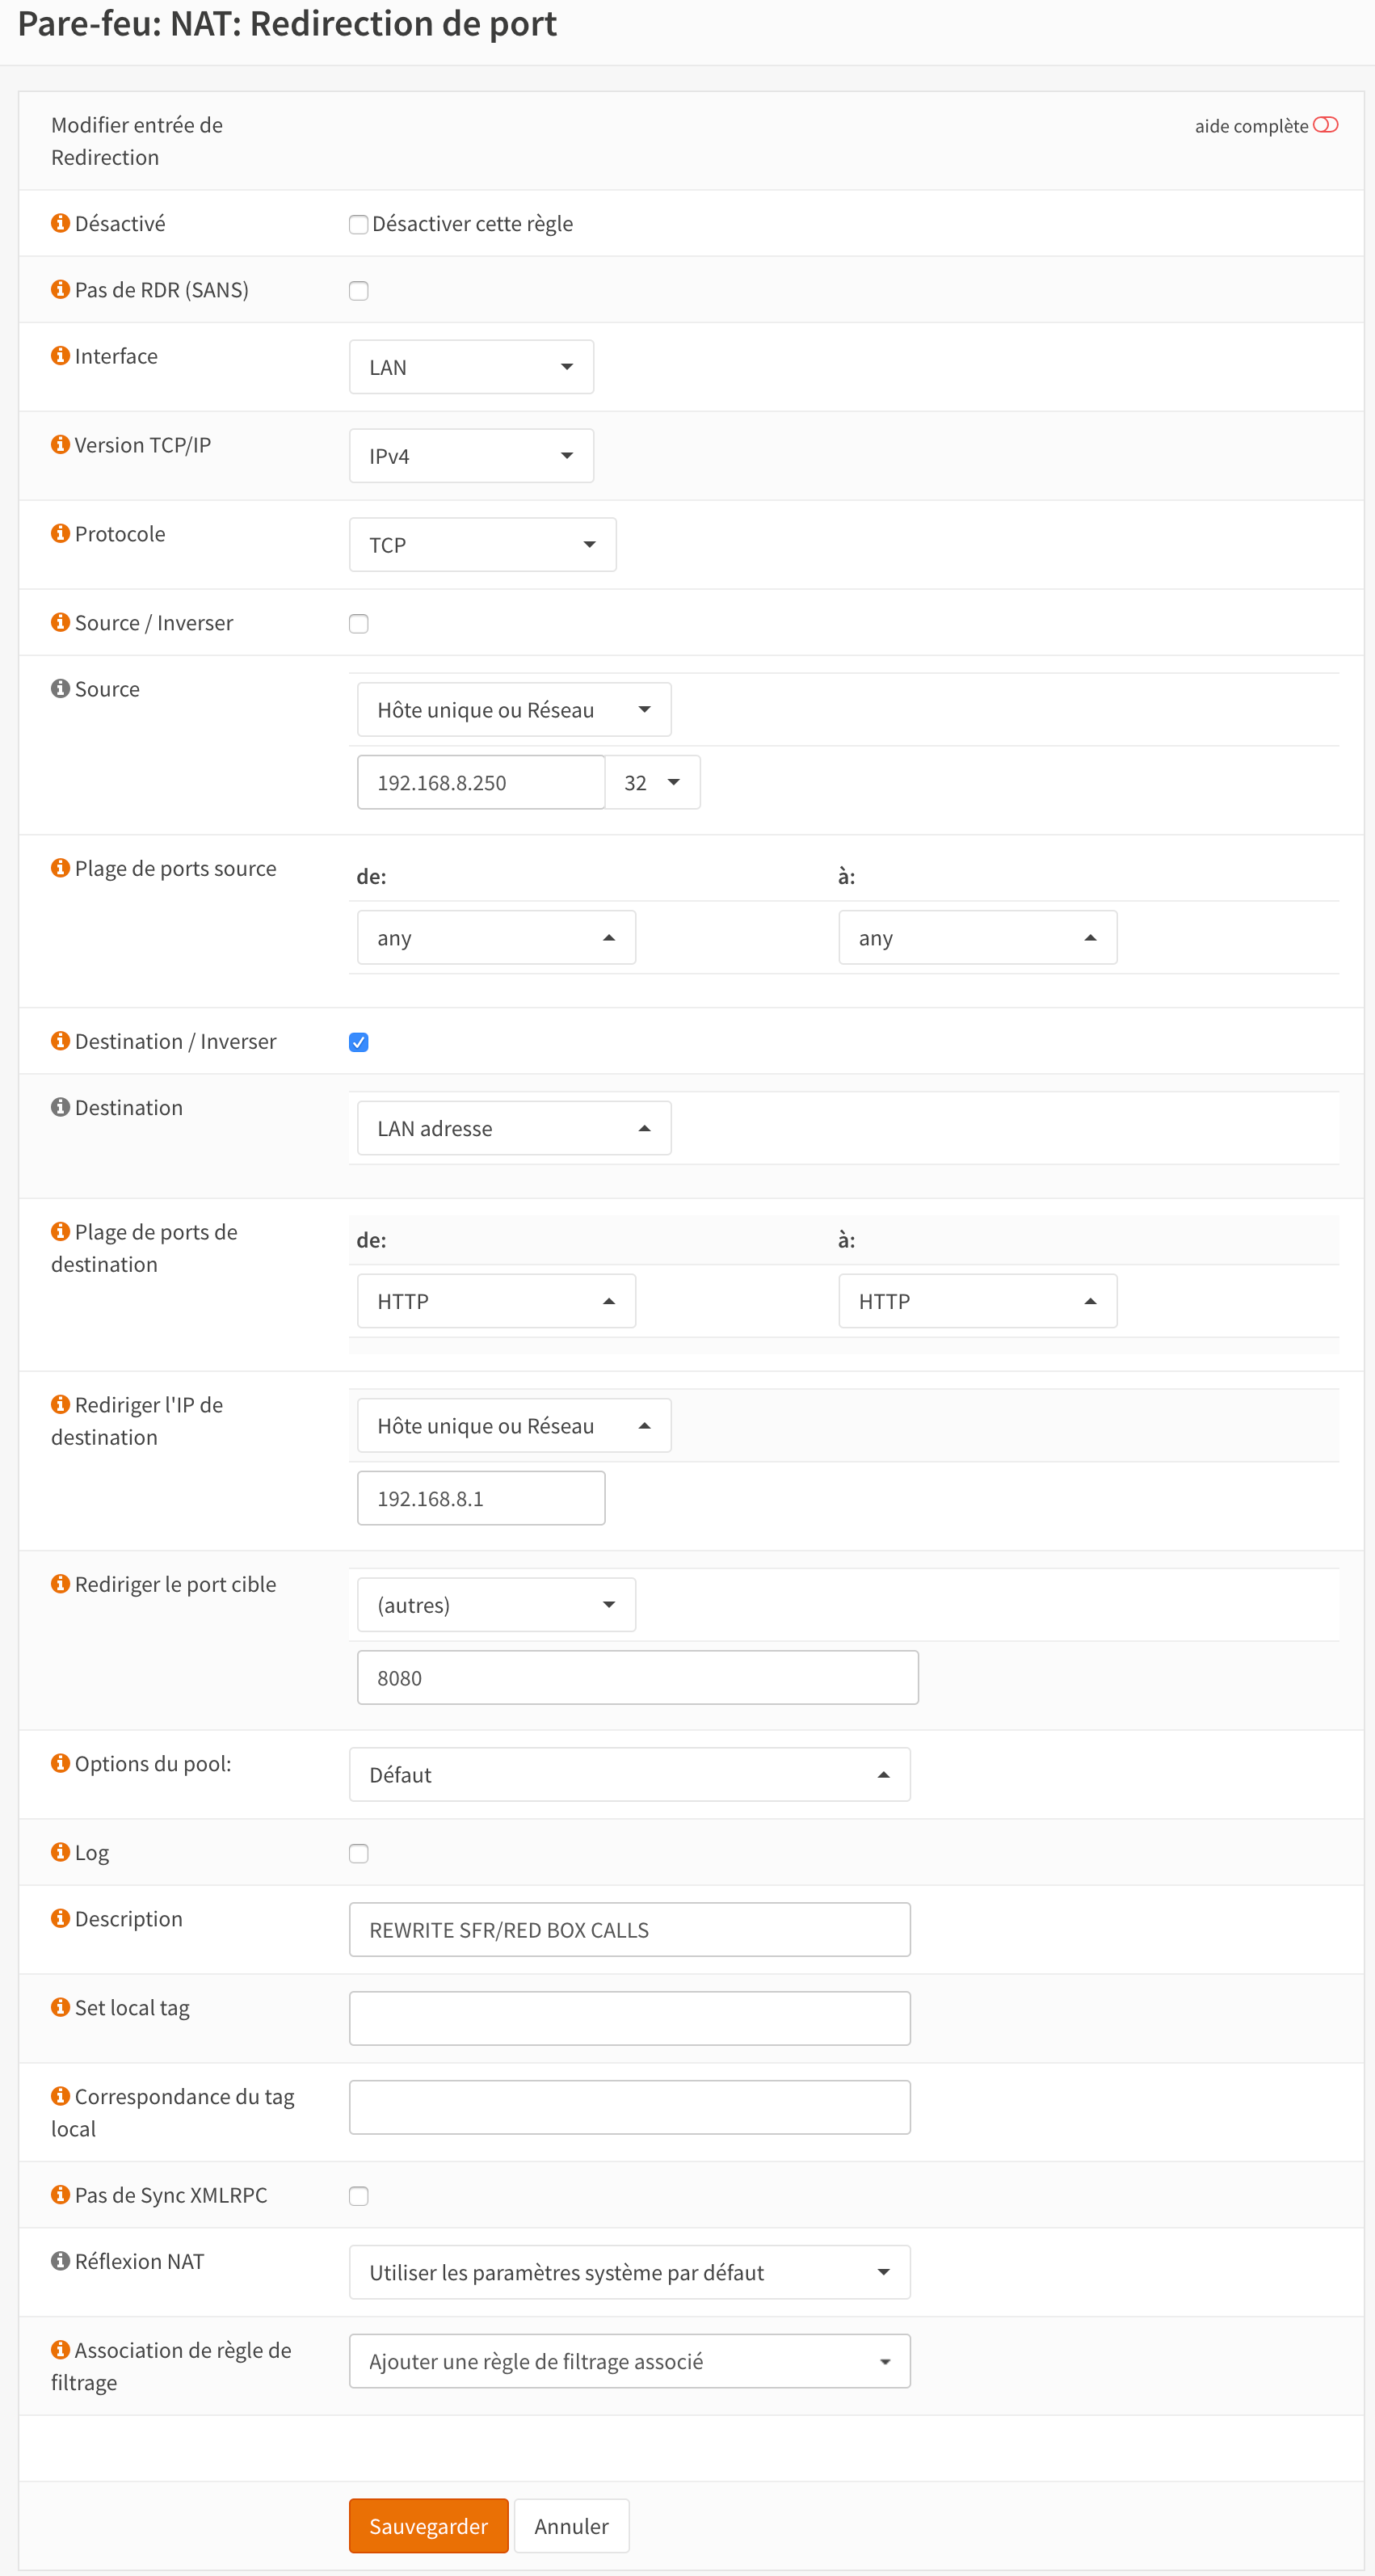
Configuring NAT to redirect SFR/RED BOX calls to NGINX
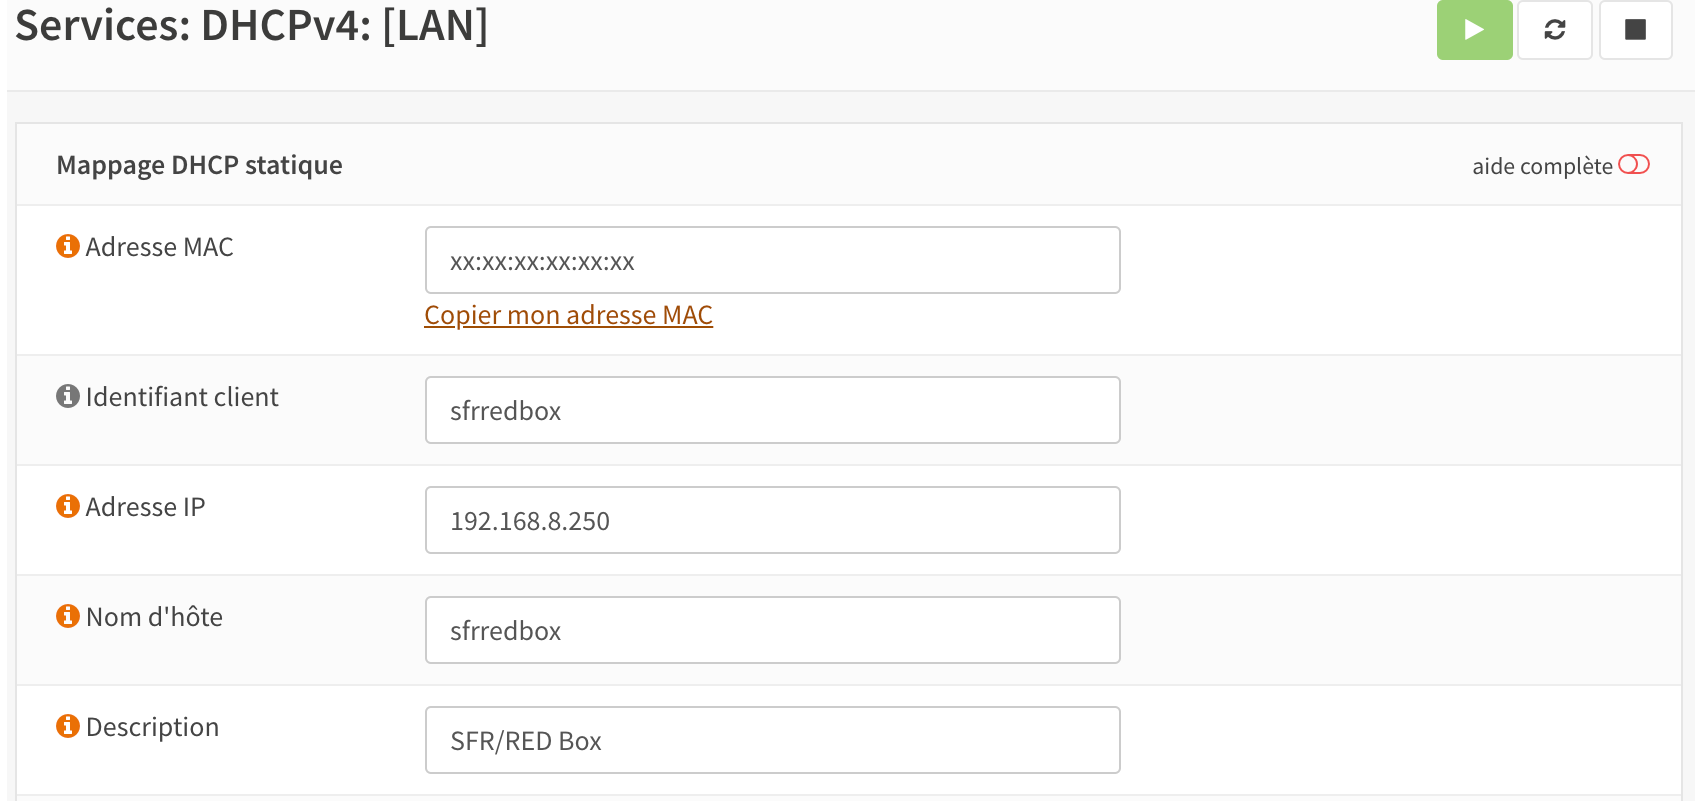
To allow correct Destination NAT (Port Forwarding), we will configure OPNSense to affect a static IP to the SFR/RED Box and we will create an alias for it.
Firewall / NAT / Destination NAT (Port Forward)
Select
Add a new forwarding rule:
Note
Right now, everything should be ready. Restart the firewall, once ready plug the SFR/RED Box on your LAN and start it. You should be able to enjoy IPv4, IPv6 and Phone.