Multi WAN
Multi WAN scenarios are commonly used for failover or load balancing, but combinations are also possible with OPNsense.

Configure Failover
To setup Failover the following step will be taken:
Add monitor IPs to the gateways
Add a gateway group
Configure DNS for each gateway
Use policy based routing to utilize our gateway group
Add a firewall rule for DNS traffic that is intended for the firewall itself
Tip
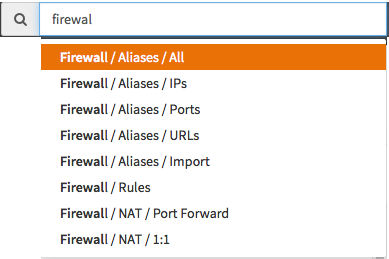
Did you know you can browse quick and easy to the right page by using the search box in the top right corner of your screen? Like this:
Example configuration
Our example utilized two previous configured WAN gateways that both are confirmed to function separately. As DNS’s and monitor IPs we will utilize google’s DNS services 8.8.8.8 and 8.8.4.4, of course you can use your own ‘known good’ setting.
We defined WAN and WAN2, where WAN will be our primary (default) gateway.
Note
Before diving into the gateway group settings, make sure to check if both interfaces are connected to a
gateway in when using static assignments. On a default setup,
these settings are responsible for creating outbound nat rules when traffic leaves the interface and handle
the return path using policy base routing rules (reply-to, route-to).
Step 1 - Add monitor IPs
You may skip this step if you already have setup the monitoring IP and both gateways are shown as online.
To add a monitoring IP go to and click on the first pencil symbol to edit the first gateway.
Now make sure the following is configured:
Disable Gateway Monitoring |
Unchecked |
Make sure monitoring is enabled |
Monitor IP |
8.8.8.8 |
We use Google’s DNS |
Mark Gateway as Down |
Unchecked |
Then click on the second pencil symbol to edit the second gateway.
Now make sure the following is configured:
Disable Gateway Monitoring |
Unchecked |
Make sure monitoring is enabled |
Monitor IP |
8.8.4.4 |
We use Google’s second DNS |
Mark Gateway as Down |
Unchecked |
Step 2 - Add Gateway Group
Go to and press + Add Group in the upper right corner.
Use the following settings:
Group Name |
WANGWGROUP |
Enter a name for the gw routing later on |
Gateway Priority |
WANGW / Tier 1 |
Select the first gateway and Tier 1 |
.. |
WAN2GW / Tier 2 |
Select the second gateway and Tier 2 |
Trigger Level |
Packet Loss |
Select the trigger you want to use |
Description |
Failover Group |
Freely chosen description |
Tip
Trigger Level Explained
- Member Down
Triggers when the gateway has 100% packet loss.
- Packet Loss
Triggers when the packet loss to a gateway is higher than the defined threshold.
- High Latency
Triggers when the latency to a gateway higher than its defined threshold.
- Packet Loss or High Latency
Triggers for either of the above conditions.
Step 3 - Configure DNS for each gateway
Go to and make sure each gateway has its own DNS setup: like this:
DNS servers
8.8.8.8 |
WANGW |
8.8.4.4 |
WAN2GW |
Step 4 - Policy based routing
Go to
For our example we will update the default LAN pass rule. Click on the pencil next to this rule (Default allow LAN to any rule).
Now under Gateway change selection to WANGWGROUP.
Save and Apply changes
Note
This rule will utilize the gateway group for all traffic coming from our LAN network. This also means that traffic intended for the firewall itself will be routed in this (wrong) direction. That is why Step 5 is needed for our DNS traffic going to and coming from our DNS forwarder on the firewall itself.
Tip
Policy-based routing skips normal system routing. Since the default “allow LAN to any” rule has “any” set as destination, any traffic headed towards other internal networks (as is often the case with VPN tunnels) that trigger this rule will be routed through the gateway group as well. To avoid this, you can create an explicit rule before this default rule to allow traffic to those networks without a gateway set.
Step 5 - Add allow rule for DNS traffic
Add a rule just above the default LAN allow rule to make sure traffic to and from the firewall on port 53 (DNS) is not going to be routed to the Gateway Group that we just defined.
Start with pressing the + icon in the bottom left corner.
Enter the following details:
Action |
Pass |
Allow this traffic to pass |
Interface |
LAN |
|
TCP/IP Version |
IPv4 |
For our example we use IPv4 |
Protocol |
TCP/UDP |
Select the right protocol |
Source |
any |
|
Destination |
Single host or Network |
|
Destination |
192.168.1.1/32 |
IP of the firewall only hence /32 |
Destination port range |
DNS - DNS |
Only DNS |
Category |
DNS |
|
Description |
Local Route DNS |
Freely chosen description |
Gateway |
default |
Select default |
Note
When using Unbound for DNS resolution you should also enable Default Gateway Switching via System->Settings->General, as local generated traffic will only use the current default gateway which will not change without this option.
Advanced Options
For each gateway there are several advanced options you can use to change the default behavior/thresholds. These option can be changed under , press the pencil icon next to the Gateway you want to update.
- The current options are:
- Latency thresholds
Low and high thresholds for latency in milliseconds.
- Packet Loss thresholds
Low and high thresholds for packet loss in %.
- Probe Interval
How often that an ICMP probe will be sent in seconds.
- Down
The number of seconds of failed probes before the alarm will fire.
- Avg Delay Replies Qty
How many replies should be used to compute average delay for controlling “delay” alarms?
- Avg Packet Loss Probes Qty
How many probes should be used to compute average packet loss.
- Lost Probe Delay
The delay (in qty of probe samples) after which loss is computed.
Configure Load Balancing
To setup load balancing follow the same configuration procedure as for Failover, but in step 2 choose same Tier for both Gateways.
This will change the behavior from failover to equal balancing between the two gateways.
Note
When using multiple Gateways with the same Tier, you need to disable shared forwarding in .
Sticky Connection
Some web sites don’t like changing request IPs for the same session, this may lead to unexpected behavior. To solve this you can use the option Sticky Connections, this will make sure each subsequent request from the same user to the same website is send through the same gateway.
To set this option can be set under .
Unequal Balancing (Weight)
If you have a non symmetric setup with one ISP having a much higher bandwidth than the other then you can set a weight on each gateway to change the load balance. For instance if you have one line of 10 Mbps and one of 20 Mbps then set the weight of the first one to 1 and the second one to 2. This way the second gateway will get twice as many traffic to handle than the first.
To do so, go to and press the pencil icon next to the Gateway you want to update. The weight is defined under the advanced section.
Combining Balancing & Failover
To combine Load Balancing with Failover you will have 2 or more WAN connections for Balancing purposes and 1 or more for Failover. OPNsense offers 5 tiers (Failover groups) each tier can hold multiple ISPs/WAN gateways.
Failover and Failback States
In some multi-WAN setups it may be necessary to directly influence firewall states. The most common example is the combination of a main ISP with a failover metered ISP (mobile network with data consumption limits).
In case of a main ISP failure, all states should failover quickly to the metered ISP. When the main ISP reconnects, all states should just as quickly fail back. This prevents sticky states on the metered ISP to continue data consumption which could be expensive depending on the contract.
This setup is configured globally via , there cannot be a distinction for different gateway groups.
Configuration
For a minimal working failover configuration, we need two gateways with different priorities.
Go to
Note
We assume both the main and metered gateways already exist due to DHCP configuration.
Name |
|
Upstream Gateway |
|
Failover States |
|
Priority |
|
Note
The Priority must be a lower number than the metered ISP gateway. This will mark this gateway as preferred. Checking Failover States will kill all firewall states if a failover happens. This means you must enable gateway monitoring, otherwise there cannot be a failover.
Name |
|
Upstream Gateway |
|
Failback States |
|
Priority |
|
Note
The Priority must be a higher number than the main ISP gateway. Checking Failback States will kill all firewall states if our main gateway comes back online.
Go to and enable the following:
Gateway switching |
|
This will allow the default gateway of this firewall to change when a failover happens. It is necessary for the failover and failback of states to trigger correctly.
Verification
To verify if the failover and failback kill firewall states as expected, the simplest test is unplugging the main ISP and wait for the gateway monitor to trigger the failover to the metered ISP.
Any client with a session to the internet will be forced to re-establish it. A good test would be a SSH or RDP session.
Afterwards, reconnect the main ISP and wait for the failback to happen. The same scenario with the sessions being forced to re-establish should repeat.
If there are issues, verify default gateway switching, gateway priorities, and if the correct failover and failback states options have been set.
For further diagnostics, use .