Hello world module & plugin
Goal
Goal for this sample
The goal of the “Hello world” module we’re creating in the example is to control a program on our system named “testConnection.py”, which is part of the example package available on GitHub. It will try to send an email using plain smtp and will respond with a json text message about the result of that attempt.
Our application will need some settings to operate correctly, like an ip address and an email address and we need to be able to run that application. Because this application returns some valuable data for our users, we need to be able to fetch the response data back.
Guidelines
Guidelines and coding style
For all OPNsense modules and applications there are some basic style and coding guides which you should use.
Naming
When creating modules for OPNsense, always name your components like this: VendorName/ModuleName
In our sample case this will be: OPNsense/HelloWorld
PHP code
Please use PSR-12 style (https://www.php-fig.org/psr/psr-12/) for all new code.
Architecture
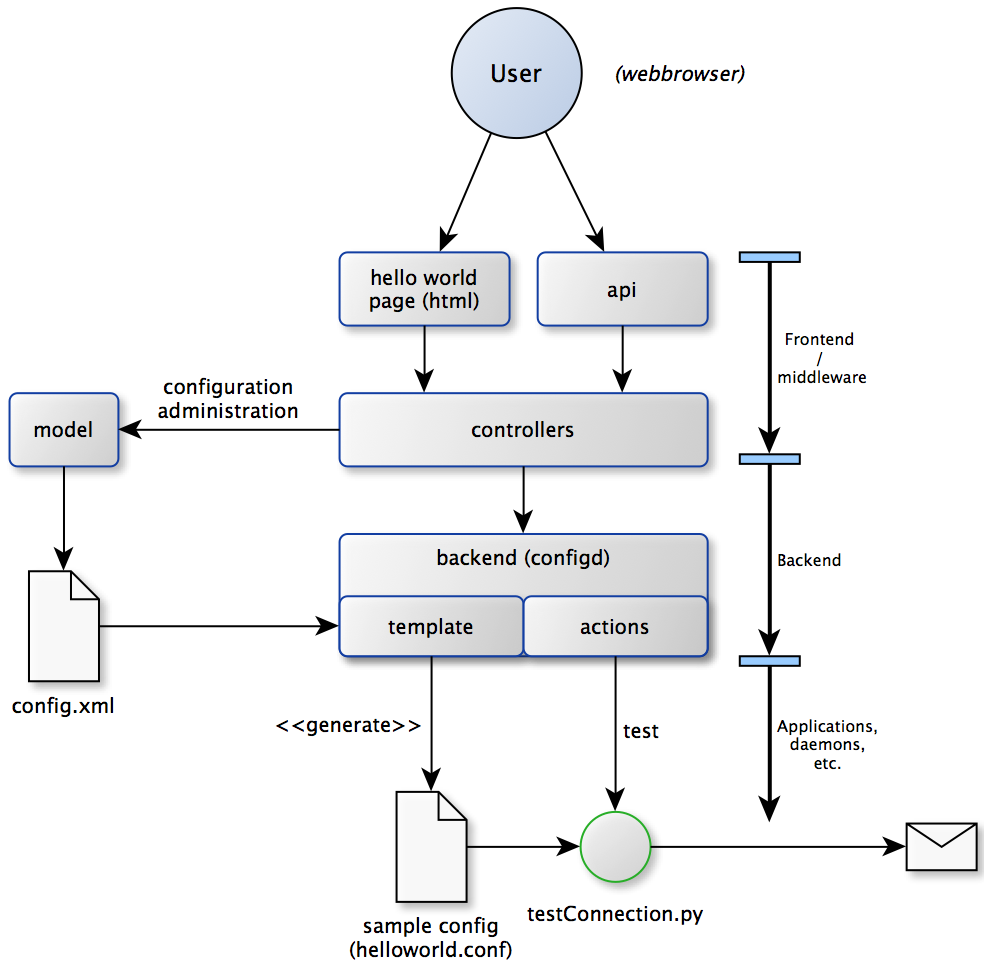
Always make sure there’s a clear separation of concerns, back-end calls (like shell scripts) should be implemented using the configd system, all communication to the client should be handled from an API endpoint. (the example provides more insights on how this works).
Back-end programs should not access the config.xml directly, if data is needed let the template system handle the desired output (most applications, daemons and tools deliver their own desired configuration format). There’s generally no good reason to avoid the standards that are already there.
If you follow this basic rules, you’re automatically building a command structure for the system administrators and provide a connector to third party tools to the API of your component.
Directory structure
We will build our HelloWorld example step by step and create several files. Here is the directory structure and the files which will get created:
./src/opnsense/
  ├── mvc/
  |   └── app/
  |       ├── controllers/
  |       |   └── OPNsense/HelloWorld/
  |       |       ├── IndexController.php
  |       |       ├── Api/
  |       |       |   ├── ServiceController.php
  |       |       |   ├── SettingsController.php
  |       |       └── forms/
  |       |           └── general.xml
  |       ├── models/
  |       |   └── OPNsense/HelloWorld/
  |       |       ├── HelloWorld.php
  |       |       ├── HelloWorld.xml
  |       |       ├── ACL/
  |       |       |   └── ACL.xml
  |       |       └── Menu/
  |       |           └── Menu.xml
  |       └── views/
  |           └── OPNsense/HelloWorld/
  |               └── index.volt
  ├── scripts/
  |   └── helloworld/
  |       └── testConnection.py
  └── service/
      ├── templates/
      |   └── OPNsense/HelloWorld/
      |       ├── +TARGETS
      |       └── helloworld.conf
      └── conf/actions.d/
          └── actions_helloworld.conf
Skeleton
Setup a skeleton for the frontend / middleware
First step for our project is to build a skeleton which holds the structure for our frontend/middleware.
Model
For our sample application we want to setup some configuration data, which for all new style projects should live in it’s own model.
First we start by creating two files inside the models/OPNsense/HelloWorld directory.
The first one is the boilerplate for the model class, which should contain model specific methods and (by deriving it from BaseModel) automatically understands the second file.
<?php
namespace OPNsense\HelloWorld;

use OPNsense\Base\BaseModel;

class HelloWorld extends BaseModel
{
}
Not all modules contain additional code in the PHP class, sometimes all the standard behaviour is already sufficient for your modules/application.
Note
When stored data has derivatives, the model is usually the place to build these. Good examples are a flag to figure out if a service is enabled in cases where it depends on structures inside the data. (such as a list of interfaces which can all be enabled and/or disabled)
Which is the model XML template, our skeleton starts with something like this:
<model>
    <mount>//OPNsense/helloworld</mount>
    <description>
        the OPNsense "Hello World" application
    </description>
    <items>
    </items>
</model>
The content of the mount tag is very important, this is the location within the config.xml file where this model is responsible. Other models cannot write data into the same area. You should name this location with your vendor and module name to make sure others could easily identify it.
Use the description tag to identify your model, the last tag in place is the items tag, where the actual definition will live. We leave it empty for now as we proceed with the next step of creating our skeleton.
View
Page template (View)
We should add a (Volt) template to use for the index page of our module; we will use the same naming convention here.
Create a template named index.volt inside the views/OPNsense/HelloWorld directory containing the following data:
<h1>Hello World!</h1>
Controller
Next step is to add controllers, which will be automatically picked up by the system routing. A controller connects the user interaction to logic and presentation.
Every OPNsense module should separate presentation from logic, that’s why there should always be multiple controllers per module.
Our first controller handles the template rendering to the user and connects the user view we just created. We start by creating a PHP file in controllers/OPNsense/HelloWorld/ with the following name IndexController.php and contents:
<?php
namespace OPNsense\HelloWorld;
class IndexController extends \OPNsense\Base\IndexController
{
    public function indexAction()
    {
        // pick the template to serve to our users.
        $this->view->pick('OPNsense/HelloWorld/index');
    }
}
At this point you should be able to test if your work so far was successful, by going to the following location (after being logged in to the firewall as root user):
http[s]://<your ip>/ui/helloworld/
Which should serve you the “Hello World!” text you’ve added in the template.

Next two controllers we are going to create are to be used for the api to the system, they should take care of service actions and the retrieval/changing of configuration data.
They should live in a subdirectory of the controller called Api and extend the corresponding class.
For our modules we create two API controllers, one for controlling settings and one for performing service actions. (Named SettingsController.php and ServiceController.php) Both should look like this (replace Settings with Service for the other one):
<?php
namespace OPNsense\HelloWorld\Api;

use \OPNsense\Base\ApiMutableModelControllerBase;
class SettingsController extends ApiMutableModelControllerBase
{
}
Note
For the sake of simplicity we use ApiMutableModelControllerBase in our example, in practice this
class derives from ApiControllerBase which is the essential requirement for an api endpoint.
Using ApiMutableModelControllerBase prevents duplicating boilerplate code.
First Input Form
Building your first input form
The first step in building forms is to determine what information we should collect.
Our simple application will send an email using data in our configuration xml. For this very module we want to collect the following:
Property |
Default |
Description |
|---|---|---|
General.Enabled |
Enabled (1) |
Should this module be enabled (Boolean) |
General.SMTPHost |
<empty> |
IP address for the remote smtp host |
General.FromEmail |
Email address of the sender |
|
General.ToEmail |
<empty> |
Email address to send our test email to |
General.Description |
<empty> |
Description, used as subject of the email. |
Adding Fields
Adding fields to your model
When building the skeleton, we have created an empty model (XML), which we are going to fill with some attributes now. The items section of the model XML should contain the structure you want to use for your application, you can create trees to hold data in here. All leaves should contain a field type to identify and validate it’s content. The list of attributes for our application can be translated to this:
………
<items>
    <!-- container -->
    <general>
        <!-- fields -->
        <Enabled type="BooleanField">
            <default>1</default>
            <Required>Y</Required>
        </Enabled>
        <SMTPHost type="NetworkField">
            <Required>Y</Required>
        </SMTPHost>
        <FromEmail type="EmailField">
            <default>sample@example.com</default>
            <Required>Y</Required>
        </FromEmail>
        <ToEmail type="EmailField">
            <Required>Y</Required>
        </ToEmail>
        <Description type="TextField">
            <Required>Y</Required>
        </Description>
    </general>
</items>
………
All available field types can be found in the models/OPNsense/Base/FieldTypes directory. If specific field types support additional parameters, for example for validation, they should be registered in the model as well (just like the default tag in Enabled).
Tip
Read more about field types in Creating Models.
Presentation XML
Create a presentation XML to feed your template
Because creating forms is one of the key assets of the system, we have build some easy to use wrappers to guide you through the process. First we create an XML file for the presentation, which defines fields to use and adds some information for your template to render. Create a file in your controller directory using the sub directory forms and name it general.xml. Next copy in the following content:
<form>
    <field>
        <id>helloworld.general.Enabled</id>
        <label>enabled</label>
        <type>checkbox</type>
        <help>Enable this feature</help>
    </field>
    <field>
        <id>helloworld.general.SMTPHost</id>
        <label>SMTPHost</label>
        <type>text</type>
        <help><![CDATA[ip address of the mail host]]></help>
        <hint>choose a valid IPv4/v6 address</hint>
    </field>
    <field>
        <id>helloworld.general.FromEmail</id>
        <label>Email (from)</label>
        <type>text</type>
    </field>
    <field>
        <id>helloworld.general.ToEmail</id>
        <label>Email (to)</label>
        <type>text</type>
    </field>
    <field>
        <id>helloworld.general.Description</id>
        <label>Description</label>
        <type>text</type>
    </field>
 </form>
All items should contain at least an id (where to map data from/to), a type (how to display) and a label, which identifies it to the user. Optional you may add additional fields like help or mark features as being only for advanced users. (The Volt template defines which attributes are usable.)
Now we need to tell the controller to use this information and pass it to your template, so change the IndexController.php and add this line:
$this->view->generalForm = $this->getForm("general");
And we are ready to update the (Volt) template with this information. Let’s remove the “<h1>Hello World!</h1>” line and replace it with something like this:
{{ partial("layout_partials/base_form",['fields':generalForm,'id':'frm_GeneralSettings'])}}
This tells the template system to add a form using the contents of generalForm and name it frm_GeneralSettings in the HTML page. Based on a standard template part which is already part of the standard system, named base_form.volt.
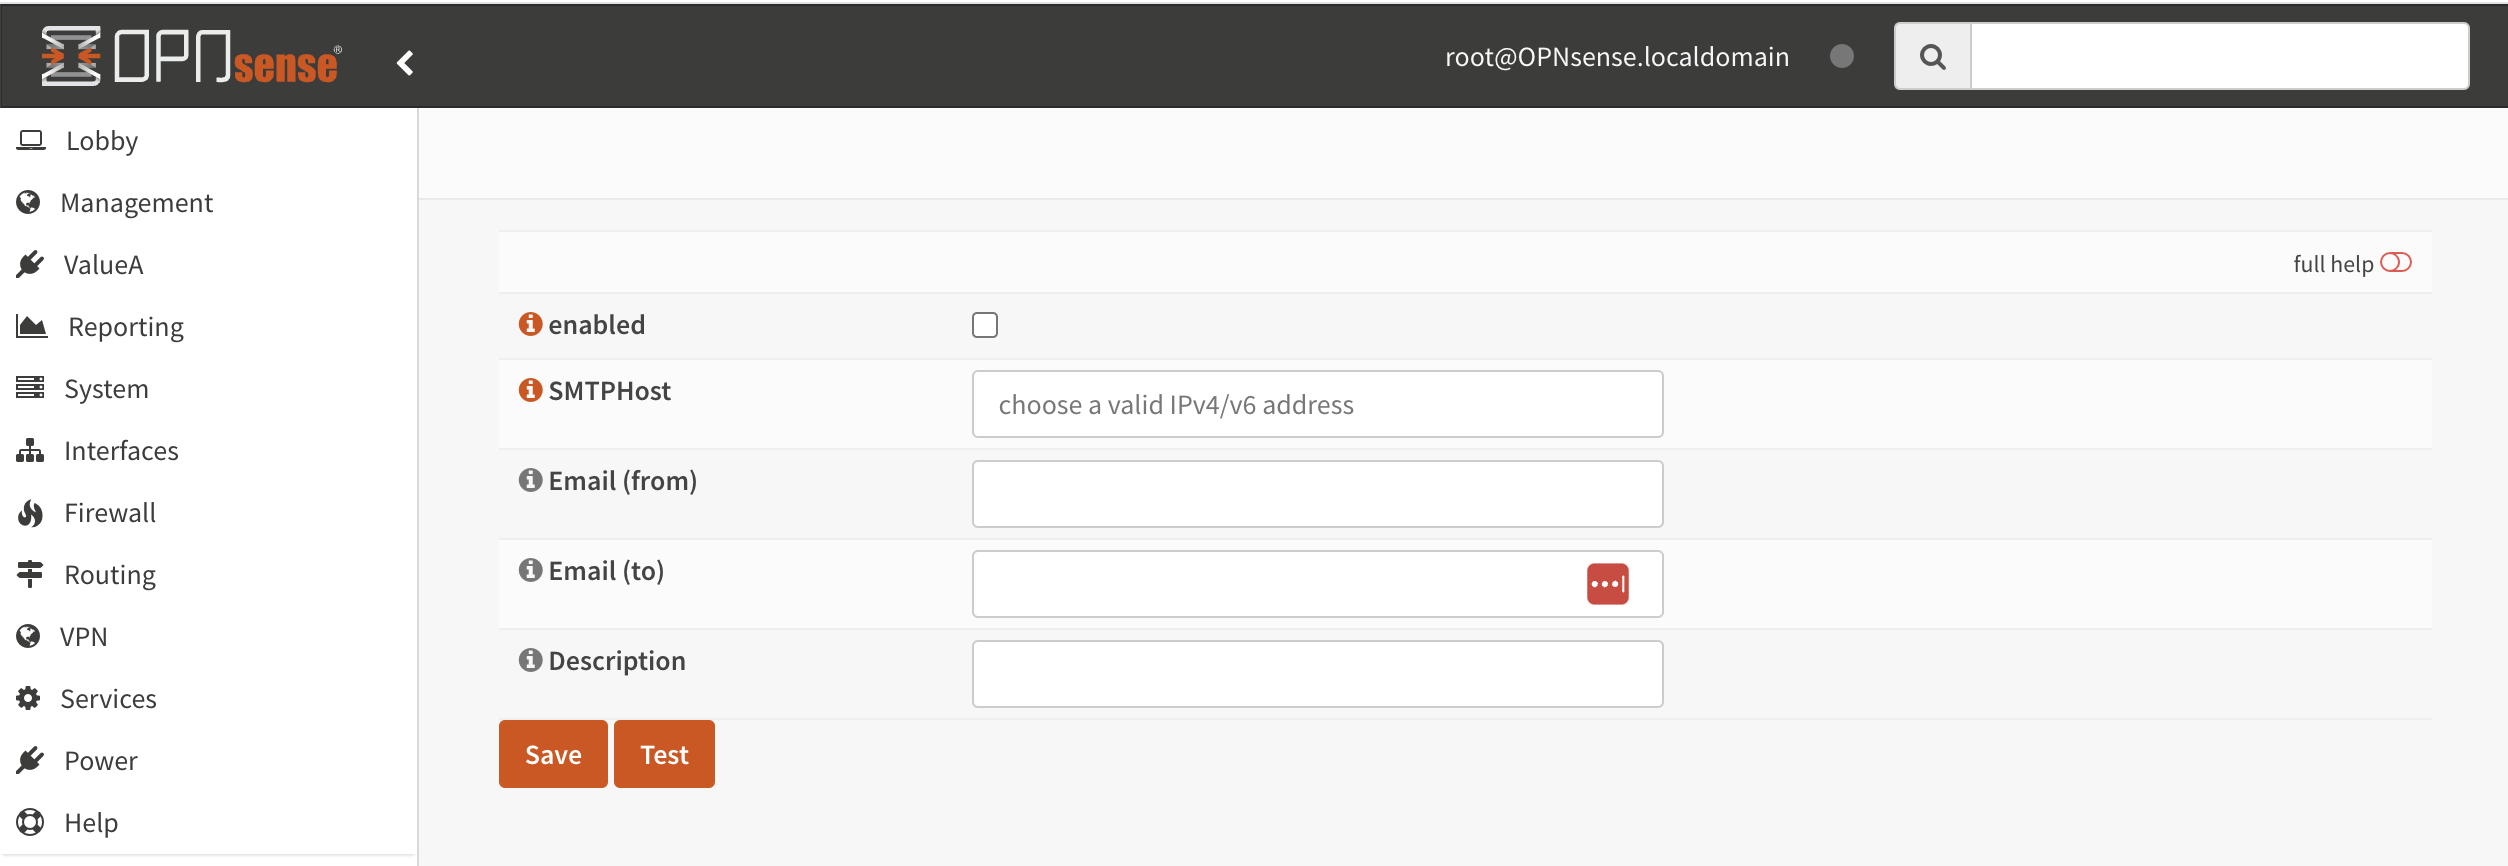
When opening the page again it will render like this:
Create API calls
Create API calls to retrieve and store data
The framework provides some helpful utilities to get and set data from
and to the configuration XML by using your defined model. First step in
binding your model to the system is to point the SettingsController to the model and teach it how
it should return the data. For this we add two lines to the controller created earlier:
 class SettingsController extends ApiMutableModelControllerBase
 {
     protected static $internalModelClass = 'OPNsense\HelloWorld\HelloWorld';
     protected static $internalModelName = 'helloworld';
 }
The $internalModelClass creates the model for you, so you don’t have to create one manually (and define get and
set actions), $internalModelName names the response container.
You can test the result (while logged in as root), by going to this address:
http[s]://<your ip>/api/helloworld/settings/get
Which will output a json structure in your browser like:
{
    "helloworld": {
        "general": {
        "Enabled": "1",
        "SMTPHost": "",
        "FromEmail": "sample@example.com",
        "ToEmail": "",
        "%ToEmail": "Enter recipient here",
        "Description": ""
        }
    }
}
Note
The outer container is named “helloworld” and contains all fields defined in the model.
Note
ApiMutableModelControllerBase contains more shared functionality for grid like operations as well, most of
our api controllers use this as a base. When interested in the internals of the get action itself, search
for getAction in ApiMutableModelControllerBase.php.
Note
%ToEmail is similar to <hint>Enter recipient here</hint> except that it can be used to generate
a dynamic hint during data fetch. Fields with a % prefix cannot be stored and are not relevant to the
model data, but do refer to the respective field type without the prefix.
Support jQuery API calls
Update the view to support the API calls using jQuery
Now we need to link the events to the backend code to be able to load and save our form, by using the OPNsense libraries you can validate your data automatically.
Add this to the index.volt template from the HelloWorld module:
<script type="text/javascript">
    $( document ).ready(function() {
        mapDataToFormUI({'frm_GeneralSettings':"/api/helloworld/settings/get"}).done(function(data){
            // place actions to run after load, for example update form styles.
        });

        // link save button to API set action
        $("#saveAct").click(function(){
            saveFormToEndpoint("/api/helloworld/settings/set",'frm_GeneralSettings',function(){
                // action to run after successful save, for example reconfigure service.
                ajaxCall(url="/api/helloworld/service/reload", sendData={},callback=function(data,status) {
                    // action to run after reload
                });
            });
        });
    });
</script>

<div class="col-md-12">
    <button class="btn btn-primary"  id="saveAct" type="button"><b>{{ lang._('Save') }}</b></button>
</div>
The first piece of javascript code handles the loading of data when opening the form, then a button is linked to the save event.
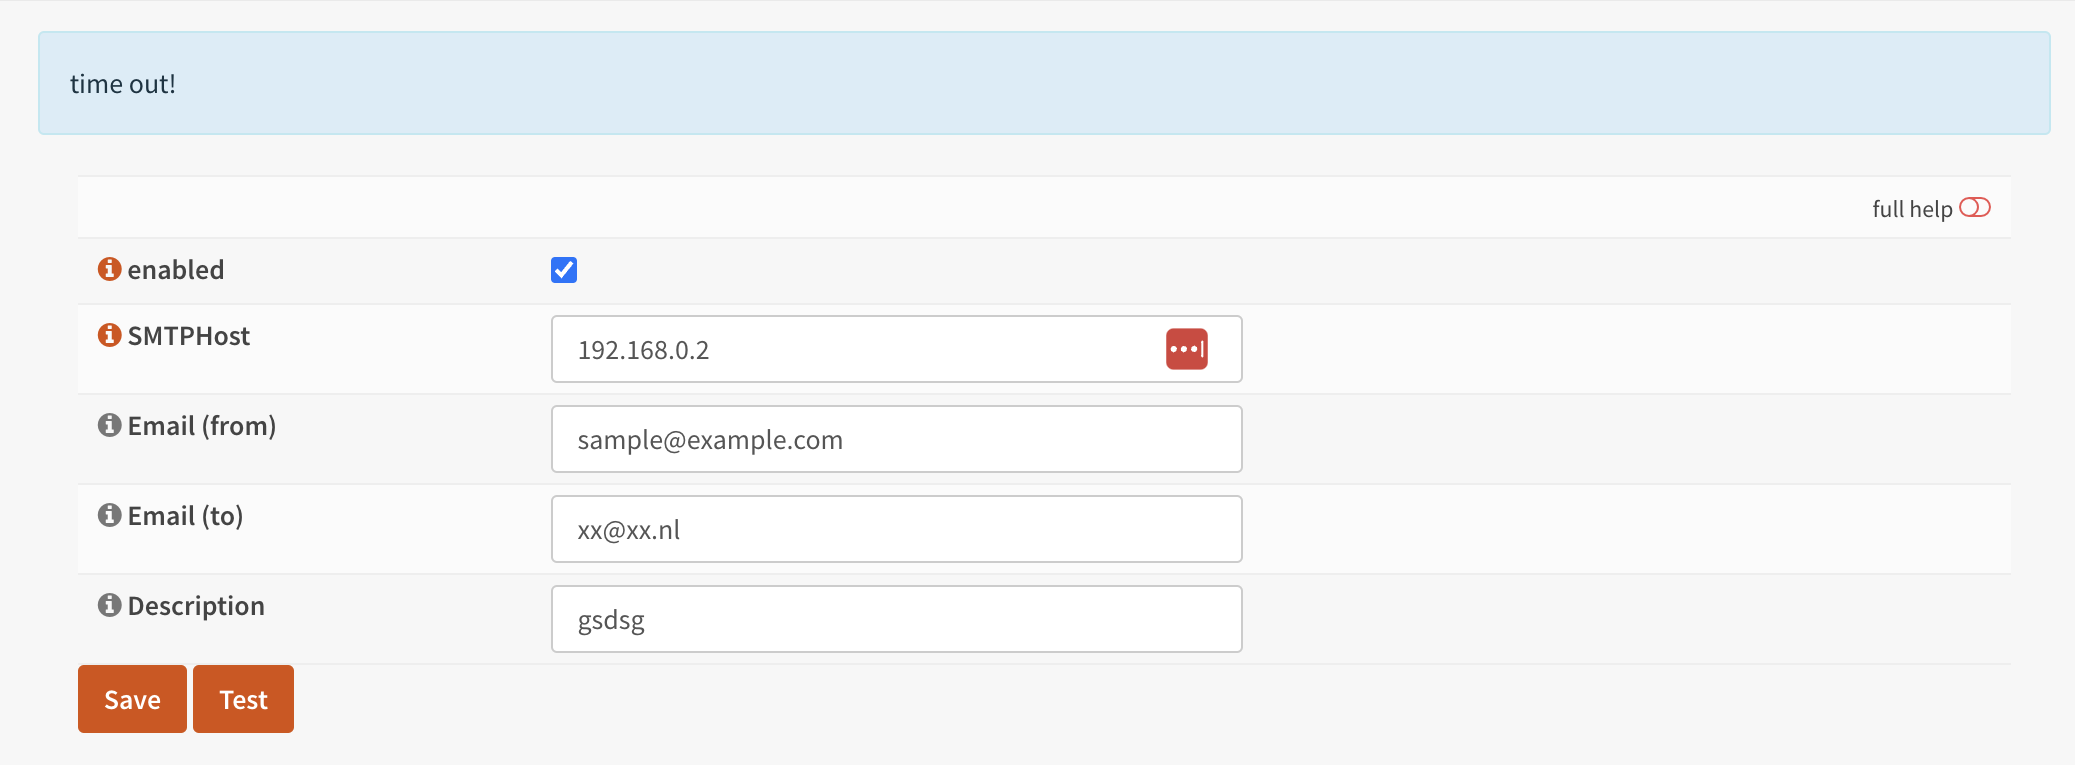
Let’s give it a try and save our data, without modifying it first.

Next correct the errors and save again, on successful save the data should be stored in the config.xml. If you want to change validation messages, just edit the model XML and add your message in the ValidationMessage tag. For example:
<ToEmail type="EmailField">
    <Required>Y</Required>
    <ValidationMessage>Please specify a valid email address.</ValidationMessage>
</ToEmail>
Changes the “Email address is invalid.” into “Please specify a valid email address.” when an invalid email address is provided. Since this field is required the validation message for an empty field will always be “A value is required.” instead.
Add actions
Add some activity to the module
Our basic module provides a way to read and modify configuration data using the web interface (and in time also other consumers using the api). Next step is to add some activity to our system, all backend applications should use their own configuration, which in real life we would keep as standard as possible.
For our example we will follow the same process as for any other service and start writing some configuration data for our sample application. Which means, creating a template and hooking it into our save action.
Our example will write a simple configuration file, stored in /usr/local/etc/helloworld/helloworld.conf
The configd system is responsible for updating the contents of that file when requested, it does so by using a definition found in its template folder. This sample will use the following path to store the backend templates:
/usr/local/opnsense/service/templates/OPNsense/HelloWorld/
First we add a content definition, by creating a file named +TARGETS, which should hold the following information:
helloworld.conf:/usr/local/etc/helloworld/helloworld.conf
This basically tells the engine that there will be a file in the same folder named “helloworld.conf” which provides, together with config.xml, data for the file in /usr/local/etc/helloworld/helloworld.conf
Next thing to do is create that helloworld.conf file in the templates directory. We will keep things very simple for this one and just copy in our data into an ini file structured configuration, when the module is enabled.
{% if not helpers.empty('OPNsense.helloworld.general.Enabled') %}
[general]
SMTPHost={{ OPNsense.helloworld.general.SMTPHost|default("") }}
FromEmail={{ OPNsense.helloworld.general.FromEmail|default("") }}
ToEmail={{ OPNsense.helloworld.general.ToEmail|default("") }}
Subject={{ OPNsense.helloworld.general.Description|default("") }}
{% endif %}
Now we need to be able to reload this module (or in real life, this would probably be a service) by adding a service action into our ServiceController. Edit controllers/OPNsense/HelloWorld/Api/ServiceController.php and add the backend module to the use section, like this:
use \OPNsense\Core\Backend;
By doing this we can use the backend communication in this class. Next add a new action to the class called “reloadAction” using this piece of code:
public function reloadAction()
{
    $status = "failed";
    if ($this->request->isPost()) {
        $status = strtolower(trim((new Backend())->configdRun('template reload OPNsense/HelloWorld')));
    }
    return ["status" => $status];
}
This validates the type of action (it should always be POST to enable CSRF protection) and adds a backend action for reloading the template. When successful the action will return “status”:”ok” as json object back to the client.
Now we are able to refresh the template content, but the user interface doesn’t know about it yet. To hook loading of the template into the save action, we will go back to the index.volt view and add the following jQuery / framework code between the braces of “saveFormToEndPoint”.
ajaxCall(url="/api/helloworld/service/reload", sendData={},callback=function(data,status) {
    // action to run after reload
});
If you save the form now (when enabled), you should see a new file in
helloworld.conf:/usr/local/etc/helloworld/helloworld.conf
Containing something like this:
[general]
SMTPHost=127.0.0.1
FromEmail=sample@example.com
ToEmail=sample@example.com
Subject=test
What have we accomplished now, we can input data, validate it and save it to the corresponding format of the actual service or application, which uses this data. So if you have a third party application, which you want to integrate into the user interface. You should be able to generate what it needs now. (There’s more to learn, but these are the basics).
But how do should we control that third part program now? That’s the next step.
Controlling the sample
Instead of running all kinds of shell commands directly from the PHP code, which very often need root access (starting/stopping services, etc.), we should always communicate to our backend process which holds templates of possible things to run and protects your system from executing arbitrary commands.
Another advantage of this approach is that all commands defined here, can also be ran from the command line of the firewall providing easier serviceability. For example, the command to refresh the helloworld configuration can be run from the command line by running:
configctl template reload OPNsense/HelloWorld
First thing to do when registering new actions to the system for a new application is to create a config template.
/usr/local/opnsense/service/conf/actions.d/actions_helloworld.conf
And add a command to the template like this:
[test]
command:/usr/local/opnsense/scripts/helloworld/testConnection.py
parameters:
type:script_output
message:hello world module test
Let’s test our new command by restarting configd from the command line:
service configd restart
And test our new command using:
configctl helloworld test
Which should return some response in json format.
Next step is to use this command in our controller (middleware), just like we did with the template action. For consistency we call our action testAction and let it pass json data to our clients when using a POST type request.
public function testAction()
{
    if ($this->request->isPost()) {
        $bckresult = json_decode(trim((new Backend())->configdRun("helloworld test")), true);
        if ($bckresult !== null) {
            // only return valid json type responses
            return $bckresult;
        }
    }
    return ["message" => "unable to run config action"];
}
And now we can make our user interface aware of the action, place a button and link an action in the index.volt. Using the following elements:
$("#testAct").SimpleActionButton({
    onAction: function(data) {
        $("#responseMsg").html(data['message']);
    }
});
(in HTML section)
<div class="alert alert-info hidden" role="alert" id="responseMsg">

</div>
<button class="btn btn-primary" id="testAct" data-endpoint="/api/helloworld/service/test" data-label="{{ lang._('Test') }}"></button>
Tip
As you might have noticed the testAct button uses a different method to call an endpoint, it uses the SimpleActionButton
wrapper which eases the implementation of simple actions
Now go back to the page and save some data using the save button, next press test to see some results.
Multi language / Translations
OPNsense is available in may different languages like english, german or japanese. This works because we are using the gettext library which is available to all GUI components. While the XML based user interfaces are supporting it automatically, there may still the need to call it manually (buttons, tabs etc.).
If you have a static string, you should add it like this into a classic PHP page:
<?= gettext('your string here') ?>
And this way into a volt template:
{{ lang._('your string here') }}
If your string is not only plaintext because it contains non-static words, HTML tags and other dynamic content, you need to use a format string. This way, you can use placeholders for such elements which should not land in the translation file.
For php it works this way:
<?= sprintf(gettext('your %s here'), $data) ?>
And for volt templates it works this way:
{{ lang._('your %s here') | format(data) }}
Note
You should NEVER split strings which should belong together like a sentence. This makes plugins hard to translate and will decrease the quality of OPNsense in other languages.
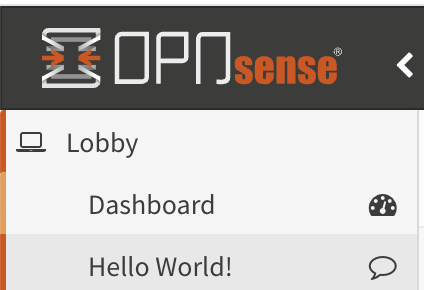
Plugin to the menu system
Most modules and applications need a place in the menu system, you could easily arrange that by creating a Menu.xml definition for your module in the model directory under Menu/Menu.xml.
Now let’s register our “hello world” in the user section of our menu, by adding this content into the Menu.xml:
<menu>
    <!-- Plugin HelloWorld menu -->
    <User order="999">
        <HelloWorld VisibleName="Hello World!" url="/ui/helloworld/"/>
    </User>
</menu>
The menu system is subject to caching, so you may not see your changes
in the UI yet. Delete the /tmp/opnsense_menu_cache.xml file, if it
exists. Now, when you refresh your page, you should notice the menu
system automatically picks up the new information.
Plugin to access control (ACL)
If we want to authorize users to access this module, we can add an ACL to this module. Without it, only admin users can access it. Create an XML file in the model directory name ACL/ACL.xml and place the following content in it:
<acl>
    <!-- unique acl key, must be globally unique for all ACLs  -->
    <page-user-helloworld>
        <name>WebCfg - Users: Hello World! </name>
        <description>Allow access to the Hello World! module</description>
        <patterns>
            <pattern>ui/helloworld/*</pattern>
            <pattern>api/helloworld/*</pattern>
        </patterns>
    </page-user-helloworld>
</acl>
This creates an ACL key named “page-user-helloworld” which authorizes access to both the ui and API urls of this application. You can now grant access to this module from the system user manager.
The ACL system is subject to caching, so you may not see your changes
in the user manager page yet. Delete the
/tmp/opnsense_acl_cache.json file, if it exists. Now, when you
refresh the user manager page, you should see that the new ACL is
available to be assigned.
Create an installable plugin
All files are created in their original locations (on the OPNsense machine /usr/local/…), now we are ready to create a package from them. To fully use this process and create the actual package, it’s best to setup a full build environment (explained over here: https://github.com/opnsense/tools )
When everything is in place, we will create a new plugin directory. For this example we will use the following:
/usr/plugins/devel/helloworld/
Add a new Makefile, containing the information for our plugin:
PLUGIN_NAME=     helloworld
PLUGIN_VERSION=        1.0
PLUGIN_COMMENT=        A sample framework application
#PLUGIN_DEPENDS=
PLUGIN_MAINTAINER= user@domain

.include "../../Mk/plugins.mk"
/usr/plugins/devel/helloworld/src/
Next copy all files created and located in /usr/local/ into this new src directory, which results in the following file listing:
src/opnsense/mvc/app/controllers/OPNsense/HelloWorld/Api/ServiceController.php
src/opnsense/mvc/app/controllers/OPNsense/HelloWorld/Api/SettingsController.php
src/opnsense/mvc/app/controllers/OPNsense/HelloWorld/IndexController.php
src/opnsense/mvc/app/controllers/OPNsense/HelloWorld/forms/general.xml
src/opnsense/mvc/app/models/OPNsense/HelloWorld/ACL/ACL.xml
src/opnsense/mvc/app/models/OPNsense/HelloWorld/HelloWorld.php
src/opnsense/mvc/app/models/OPNsense/HelloWorld/HelloWorld.xml
src/opnsense/mvc/app/models/OPNsense/HelloWorld/Menu/Menu.xml
src/opnsense/mvc/app/views/OPNsense/HelloWorld/index.volt
src/opnsense/scripts/helloworld/testConnection.py
src/opnsense/service/templates/OPNsense/HelloWorld/+TARGETS
src/opnsense/service/templates/OPNsense/HelloWorld/helloworld.conf
src/opnsense/service/conf/actions.d/actions_helloworld.conf
With everything in place, you could build the plugin package using the “make plugins” command in the /usr/tools directory. The result of this will be a standard pkg package, which you can install on any OPNsense system and will be usable right after installing. All plugins are prefixed with os-, our new package file will be called:
os-helloworld-1.0.txz
(-1.0 comes from the version in the makefile)
Reference
source of this example : https://github.com/opnsense/plugins/tree/master/devel/helloworld
build instructions : https://github.com/opnsense/tools
practical frontend development : https://github.com/opnsense/ui_devtools
frontend template language reference (Volt) : https://docs.phalcon.io/latest/volt/
configuration template language reference (mostly the same as Volt) : https://jinja.palletsprojects.com/en/stable/
OPNsense architecture Architecture
OPNsense creating models Develop:Frontend/Creating_models