Zerotier Configuration
Note
It is strongly recommended that the reader familiarise themselves with the Zerotier Manual, in order to further understand the concepts behind this plugin.
Prerequisites
Firstly, it is important that you have signed up to Zerotier at the Zerotier Portal. Second, you will need to create at least one network on the portal in order to obtain a Network Id that this plugin uses to join this node to the created Zerotier network. This network will become your private network that by default is visible only to your nodes - in other words, other nodes that are on that network can talk to each other, but nothing else can talk to them - they are completely transparent to the internet in general. In effect you are layering a private network over the public internet and all intra-node communication is encrypted and private between them. This is further hinted at by the fact that the assigned IP addresses are normally RFC1918 addresses, i.e., non-routable across the internet.
Finally, in order to have a fully functioning private VPN between Zerotier nodes, a combination of this plugin plus some configuration on the portal will be required.
Installation
From the Plugins view under System...Firmware, install the os-zerotier
package. Once the new plugin has been installed, perform a page reload and a
new menu item should appear under VPN called Zerotier.

Clicking on the Zerotier menu item will reveal two further sub-menu items - namely Settings and Overview. Clicking on “Settings” will present a new view with two named tabs. The first tab is called Settings and the second tab is called Networks. These are further described below.
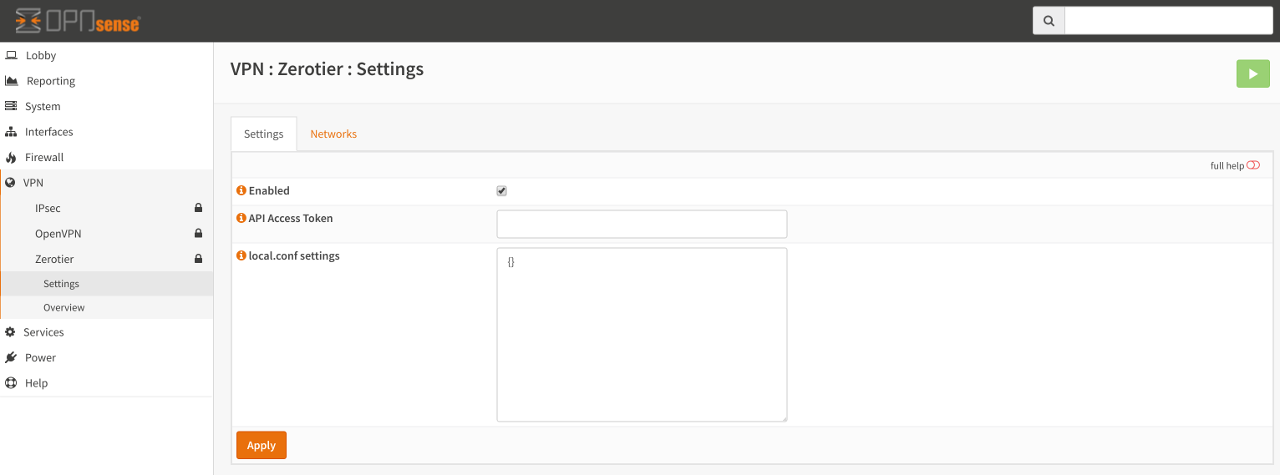
Settings
This tab controls the overall operation of Zerotier. Anything changed here is applied globally to all defined networks and to the Zerotier service itself.
- Enabled
Controls if the service should be running. If it is disabled, then access to the Networks tab will be disabled. If it is enabled, access to the Networks tab will be enabled and the service will also start at boot time.
- API Access Token (optional)
This optional entry is for future use and further development of the Zerotier plugin. The API access token can be generated by logging into your portal and creating a new API Access Token. When the token has been generated, copy the value into this input box.
- local.conf settings (optional)
As described in the Zerotier Manual, a local.conf can be created to enable or disable custom node-specific configuration overrides. Further details of permitted options can be found on the ZeroTier Manual. Please note that the local.conf must be a valid JSON document otherwise the service will fail to start.
Networks
This table allows for the creation, modification and deletion of Zerotier networks. Adding a Network here will join your OPNsense installation to the specified Zerotier network.
Note
Remember, you will have to log into the Zerotier portal, select the network and authorise the node before it can be assigned an IP address (or indeed, talk to other nodes on that network).
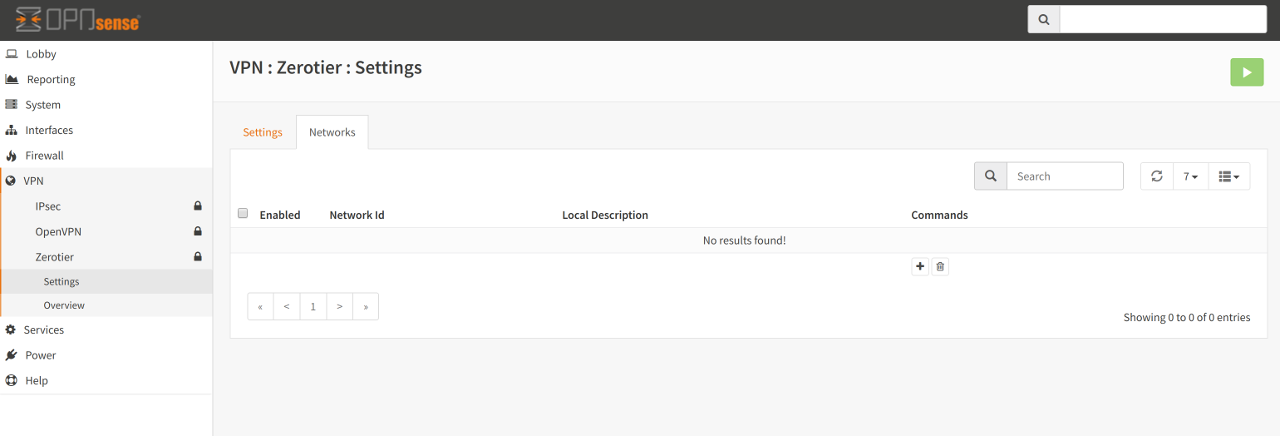
Adding a network is quite straight-forward. Simply click on the + symbol key in the following:
- Network Id
This is the 64-bit (16 character hex) address that is generated on the portal when creating a Zerotier network.
- Local Description (optional)
You may key in a description here that will help you remember what the network is for. Please note that this field is not the same as the name/description of the Zerotier network - it’s simply an aide-mémoire to help you remember what the network is for.
Adding a network does not automatically cause your OPNsense installation
to join that network. In order to join that network it must be Enabled
first. Likewise, to remove your OPNsense node from the configured network
simply deselect Enabled, thus disabling the network.
Once a network has been added and enabled the node must be authorised to join the network on the portal. Simply enabling the network on your OPNsense installation marks that node as a member of that network. It now has to request permission to talk to the other nodes on that network. To achieve this, you log into the portal, select the network, find the node address (this can found on the OPNsense Zerotier Overview menu item, under the Information tab) and authorise it by clicking on the “Auth?” check box beside the node. It should go from “red” to “green” to indicate that it has been authorised.
Some final “Network” operations:
If you wish to completely remove the network, simply select the network and
click on the Bin icon.
If you wish to edit the network, click on the Pencil icon.
To “clone” the network entry, click on the Copy icon. Please ensure you
change the Network Id, as having two networks with the same id is an invalid
configuration.
For a very quick overview of the Zerotier network information, click on the
Information icon. A more detailed view of the network can be found under
the Overview...Networks menu item.
ZeroTier Overview
The following 3 tabs reveal Global, Network and Peer information. They can only be viewed if the Zerotier plugin is enabled, so please ensure that the service is enabled first. For information on the terminology used, please refer to the Zerotier Manual.
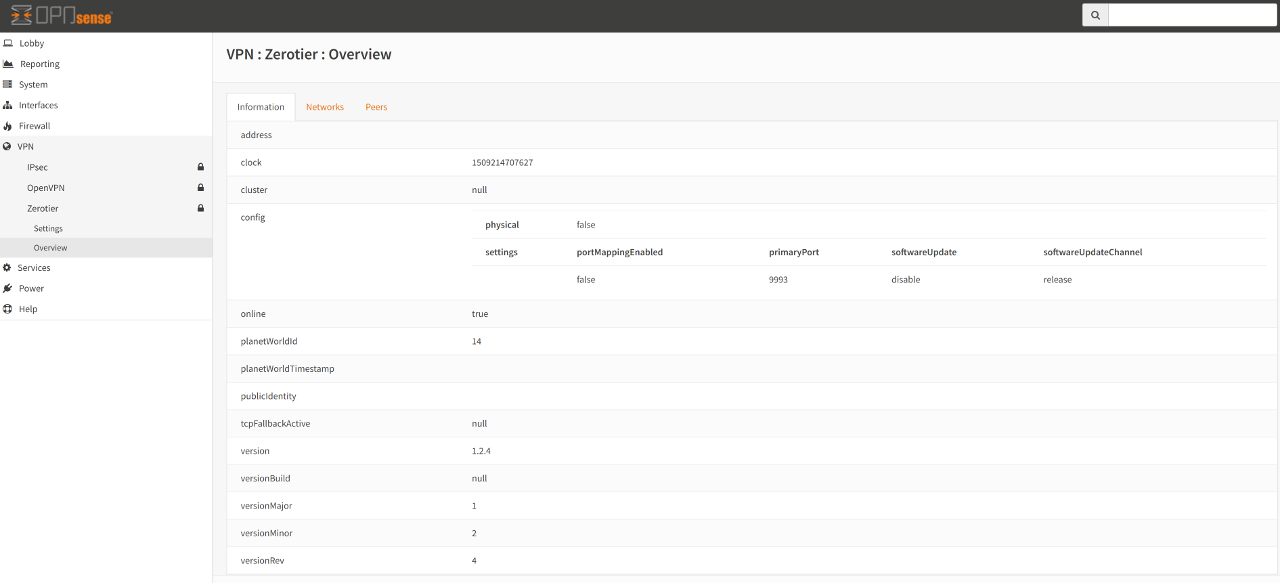
Information Overview
This tab shows “Global” information concerning the overall health of the Zerotier service.
Networks Overview
This tab shows each configured and enabled network that this OPNsense installation has joined. If no networks are enabled, no information is shown.
Peers Overview
This tab shows the peers (leaf, planets and moons - Zerotier terminology) known by this node.
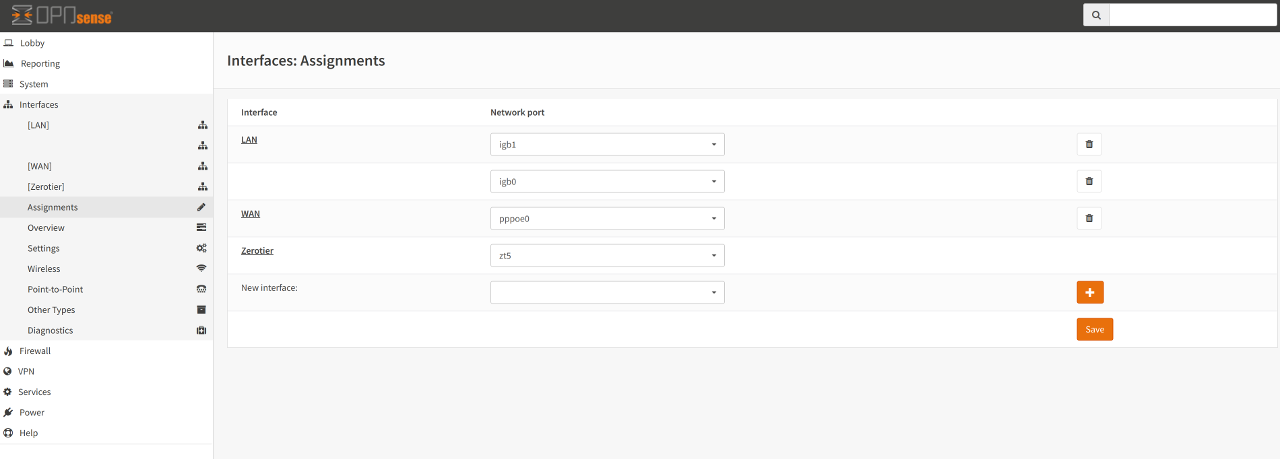
Interface Assignment
Warning
It is highly recommended that the interface have auto-assignment of IP addresses turned off for this particular node only. You want to give the interface a statically assigned, stable IP address (from the Zerotier network IP range) and not have the Zerotier service auto-assign an IP address. Auto-assignment of IP addresses for nodes is controlled on the Zerotier Portal
After joining a Zerotier network (and authorising it on the portal) you may now wish to assign the Zerotier virtual interface on OPNsense in order to avail of OPNsense functionality such as firewalling and routing (using OSPF for example).
To achieve this:
Click on the Interfaces menu item, then click on Assignments. There
you should discover a new interface currently unassigned that begins with the
letters zt. Next, click on the + symbol to assign it. In this example
it creates a new interface called OPT1. Clicking on OPT1 shows the
Enable and Lock options. Check both options.
Warning
It is very important that Lock (i.e., Prevent interface removal)
is enabled. This is because Zerotier is a software interface and not
guaranteed to be brought “up” whilst the system is booting. It could
happen shortly afterwards, hence locking the interface tells OPNsense not
to remove it, thinking it’s gone bad.
Once the new interface has been enabled, it is recommended to change the
Description away from OPT1 to something more descriptive for your needs.
For IPv4 Configuration Type, choose Static IPv4 then in the
appropriate input boxes, key in the IPv4 address that you have assigned to
this node via the Zerotier portal. Keep the IPv4 Upstream Gateway set
to None.
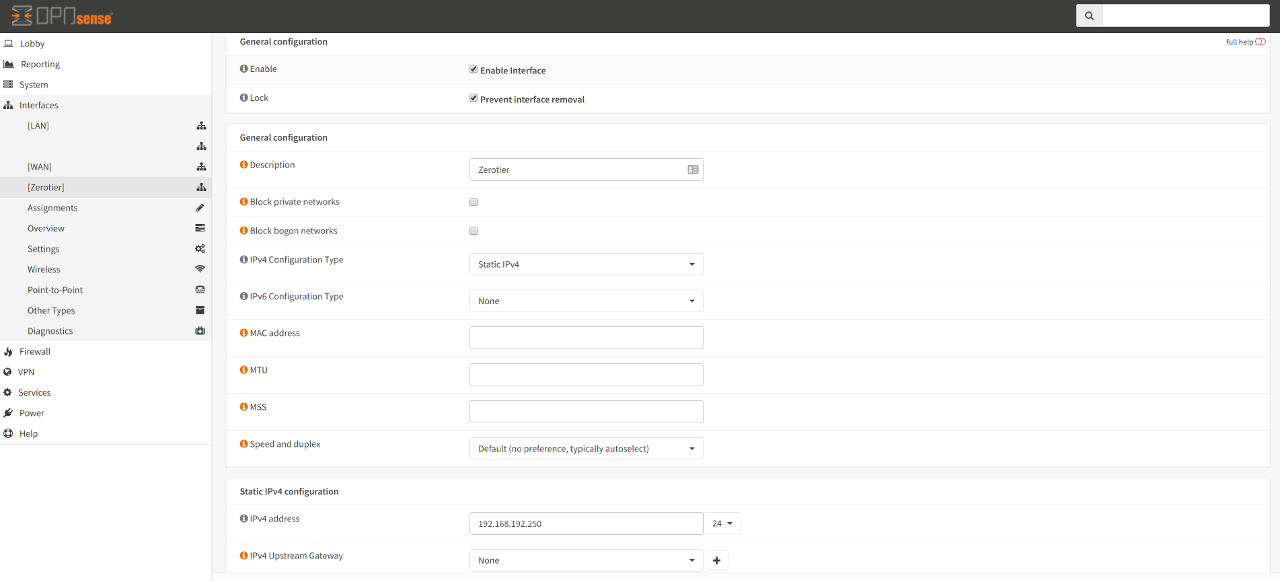
You may choose to do the same for IPv6 Configuration Type.
Once the interface has been assigned with an IP, it show now also show up on
Firewall Rules etc…plus any other operations that be done on a
interfaces can also be applied to your assigned interface.