WireGuard ProtonVPN Road Warrior Setup
Introduction
ProtonVPN is a cloud-based VPN provider, offering secure tunneling with respect to privacy. To set up a WireGuard VPN to ProtonVPN we assume you are familiar with the concepts of WireGuard that you have read the basic howto WireGuard Road Warrior Setup.
Step 1 - Download ProtonVPN configuration
The configuration is available in the ProtonVPN website. The landing page appears after signing in. Click on Downloads from the left hand panel or go to the downloads page and scroll down to the WireGuard configuration
The existing WireGuard configurations appear first with their expiration dates and following are the options to generate new ones.
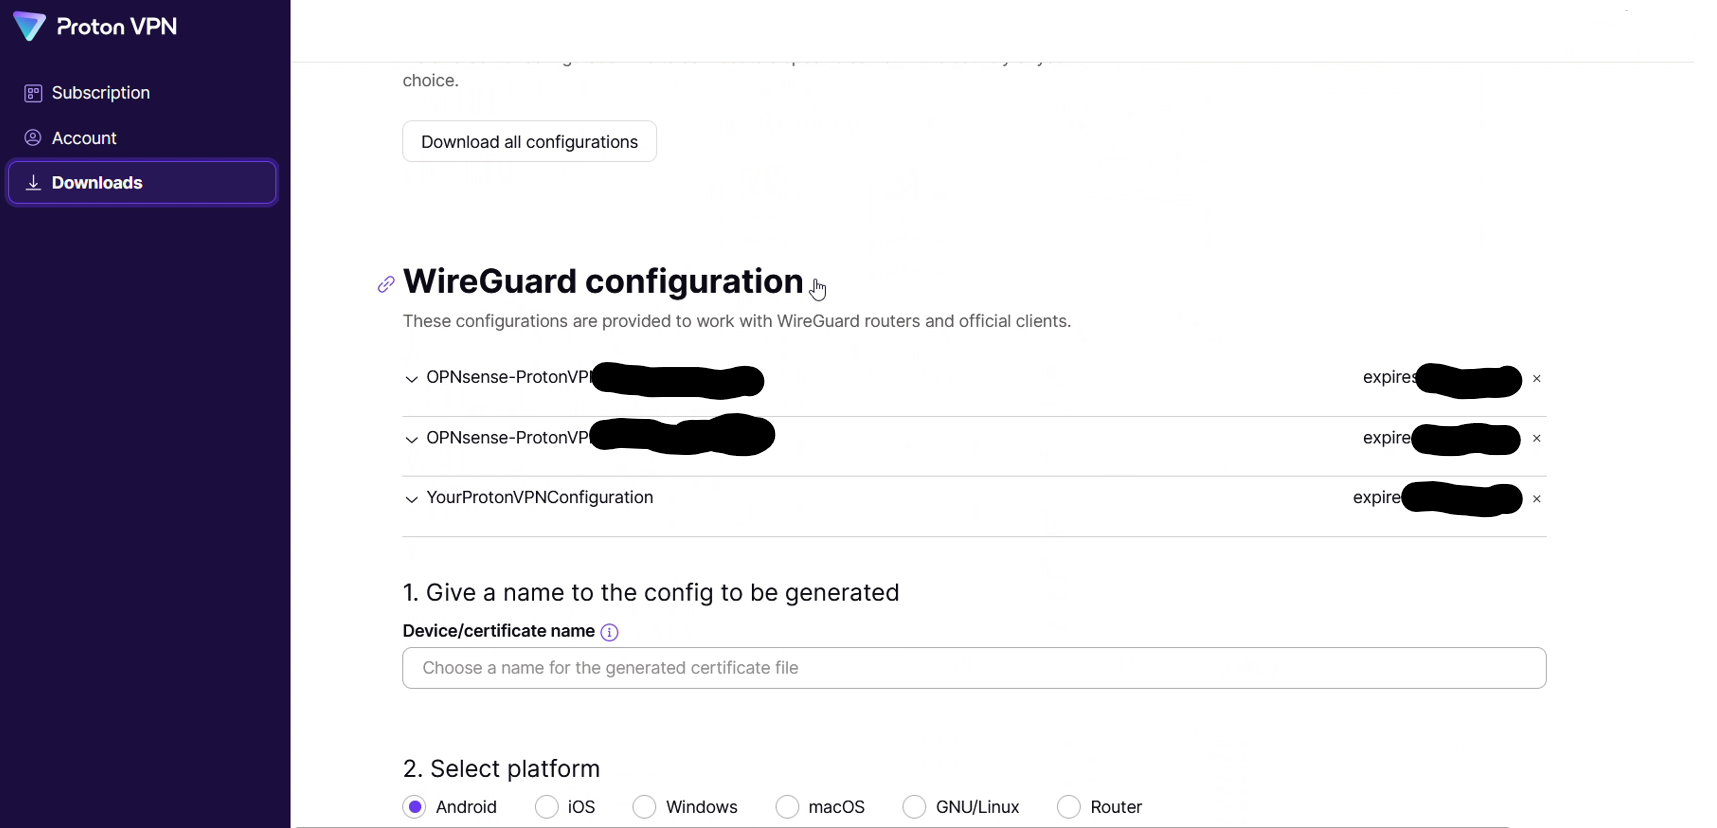
Select a name for the generated configuration
Note
If a name is not provided a unique ID will be generated by ProtonVPN
Select Router as a platform
Select VPN options
There are 3 options for NetShield blocker filtering
No filtering
Block malware
Block malware, ads and trackers
There are also options to enable Moderate NAT, NAT-PMP (Port Forwarding) and VPN accelerator as well. The features are documented in the ProtonVPN website.
Pick the options that satisfy your requirements and move on to the next section.
Select a server to connect to
ProtonVPN proposes the best server or allows the user to select manually.
When selecting manually there are 2 main choices:
Standard vs Secure Core configuration
Exit country
Pick the one that satisfies your requirements and click on Create to generate the configuration.
Upon successful completion a window like the following will appear on the screen.
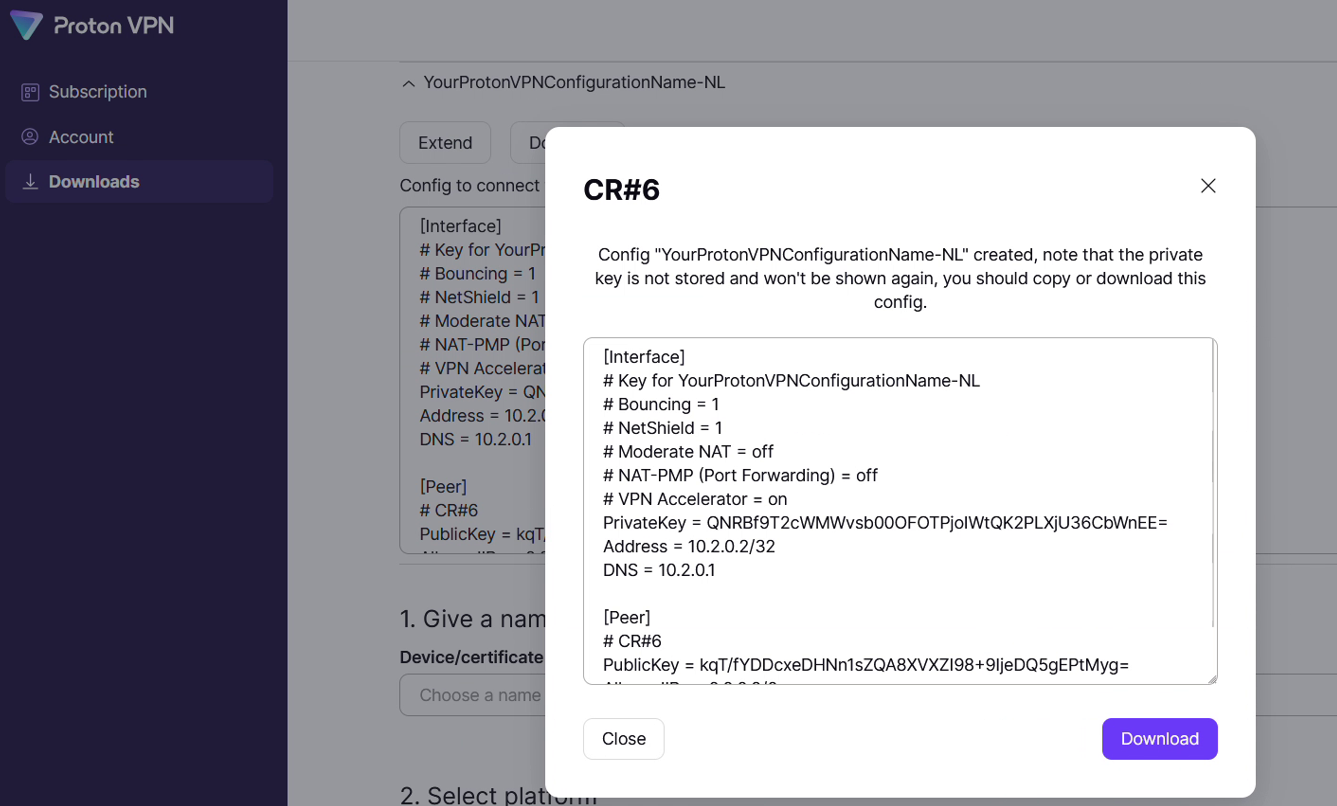
The full configuration looks like this:
[Interface]
# Bouncing = 0
# NetShield = 1
# Moderate NAT = off
# NAT-PMP (Port Forwarding) = off
# VPN Accelerator = on
PrivateKey = 2Kh7TlGz+7PCFa0jEHat8IWkYZgPmDLAiagGq+dyLks=
Address = 10.2.0.2/32
DNS = 10.2.0.1

[Peer]
# NO#21
PublicKey = KOITt3KQ72LHPbpVp7kp4cQo/qw2qvKPrN732UTWWFw=
AllowedIPs = 0.0.0.0/0
Endpoint = 146.70.170.18:51820
Note
The private key disappears after creating the configuration so it must be stored. It will be used in the following section to generate the public key. Both are needed for successful configuration.
Warning
Do not reuse the private keys in these examples
Step 2 - Generate public key from private key
ProtonVPN, unlike Mullvad or other WG implementations, only provides a private key. The private key appears briefly when generating the configuration in the web UI. The public key will be derived from the private key with the “wg pubkey” command.
Windows
echo wgPrivateKey | wg pubkey
Linux
wg pubkey < wgPrivateKey
Step 3 - Setup WireGuard Instance
Go to
Click + to add a new Instance configuration
Turn on “advanced mode”
Configure the Instance from the downloaded ProtonVPN configuration as follows (if an option is not mentioned below, leave it as the default):
Enabled
Checked
Name
Call it whatever you want (eg
ProtonVPN-ExitCountry)Public Key
Insert the derived public key from the previous step
Private Key
Insert the
PrivateKeyfield from the[Interface]sectionListen Port
51820 or a higher numbered unique port
MTU
Needs to be 80 bytes shorter than normal MTU. Default 1420
DNS Server
Insert the
DNSfield from the[Interface]section as is (without subnet mask)Tunnel Address
Insert the
Addressfield from the[Interface]section` in CIDR format, eg 10.2.0.2/32Peers
Leave blank for now
Disable Routes
Checked
Gateway
Insert the same address as in the DNS Server field above
Save the Instance configuration, and then click Apply
Step 4 - Configure the peer
Go to
Click + to add a new Peer
Configure the Peer from the downloaded ProtonVPN configuration as follows (if an option is not mentioned below, leave it as the default):
Enabled
Checked
Name
Call it whatever you want (eg
ProtonVPN_Location)Public Key
Insert the
PublicKeyfield from the[Peer]sectionAllowed IPs
0.0.0.0/0
Endpoint Address
Insert the IP address from the
Endpointfield in the[Peer]sectionEndpoint Port
Insert the port number from the
Endpointfield in the[Peer]sectionInstances
Select the instance configured in the previous step
Keepalive
25
Save the Peer configuration, and then click Apply
Note
The UI for configuring the Instances and Peers changed with OPNsense version 23.7.9 so some of the fields may be in different places.
Step 5 - Turn on WireGuard
Turn on WireGuard under if it is not already on
Step 6 - Configure assignments, gateways and routing
The rest of the steps are mostly the same as described in the how-to on selective routing WireGuard Selective Routing to External VPN Endpoint
ProtonVPN DNS leaks
Since ProtonVPN provides a DNS server an extra firewall rule may be required to route the DNS traffic to the WireGuard gateway.
Go to
Click Add to add a new rule
Configure the rule as follows (if an option is not mentioned below, leave it as the default):
Action
Pass
Quick
Checked
Interface
Whatever interface you are configuring the rule on
Direction
in
TCP/IP Version
IPv4
Protocol
TCP/UDP
Source / Invert
Unchecked
Source
IP of your DNS server
Destination / Invert
Checked
Destination
Select the
RFC1918_NetworksAlias you created above in the dropdownDestination port range
DNS - DNS
Description
Add one if you wish to
Gateway
Select the WireGuard gateway created according to the selective routing how-to page (eg
WAN_ProtonVPN)Save the rule, and then click Apply Changes
Then make sure that the new rule is above any other rule on the interface that would otherwise interfere with its operation. For example, you want your new rule to be above the “Default allow LAN to any rule”
In layman terms if the DNS server makes any requests to a non-local address it will go through the VPN gateway.
All images from ProtonVPN website are the property of ProtonVPN and are used with written permission.