Limit maximum internet bandwidth users can consume
For this example we will divide the internet Download traffic between the connected users in such manner that each user will receive up to a maximum of 1 Mbps.
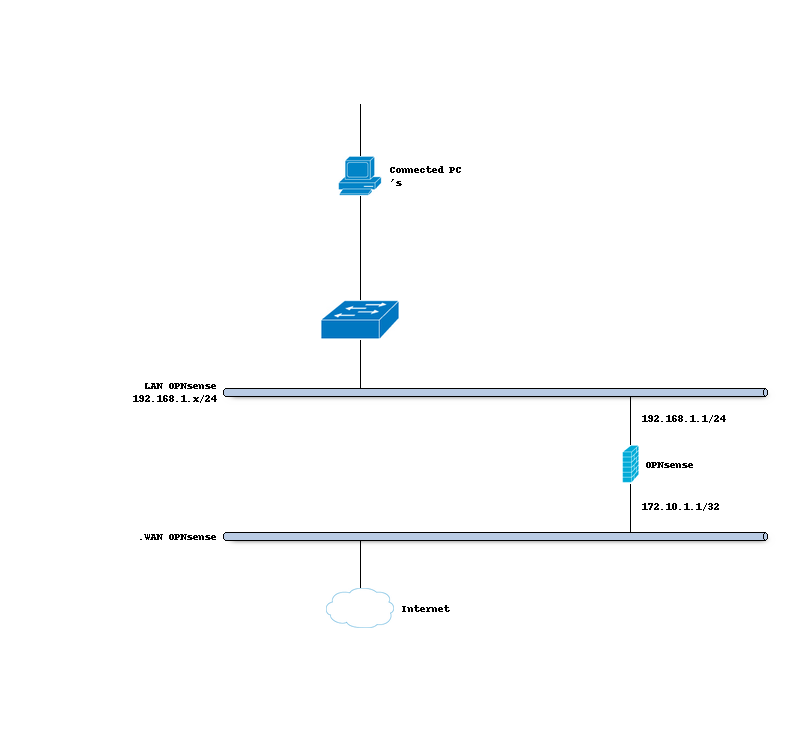
Simple network diagram
To start go to .
Step 1 - Create download and upload pipes
On the Pipes tab click the + button in the lower right corner. An empty Edit Pipe screen will popup.
Create Pipe For Download
enabled |
Checked |
Check to enable the pipe |
bandwidth |
1 |
Numeric value of the desired bandwidth |
bandwidth Metric |
Mbit/s |
Metric to use with the numeric value |
mask |
destination |
Dynamic pipe per downloading client |
description |
PipeDown-1Mbps |
Free field, enter something descriptive |
Create Pipe For Upload
enabled |
Checked |
Check to enable the pipe |
bandwidth |
1 |
Numeric value of the desired bandwidth |
bandwidth Metric |
Mbit/s |
Metric to use with the numeric value |
mask |
source |
Dynamic pipe per uploading client |
description |
PipeUp-1Mbps |
Free field, enter something descriptive |
Note
Always create separate pipes for download and upload limiting to avoid undefined behaviour when mixing bidirectional traffic in a single pipe.
Step 2 - Create rules
On the Rules tab click the + button in the lower right corner. An empty Edit rule screen will popup.
Create a rule for traffic coming from the internet (download).
sequence |
21 |
Auto generated number, overwrite only when needed |
interface |
WAN |
Select the interface connected to the internet |
proto |
ip |
Select the protocol, IP in our example |
source |
any |
The source address, leave on any |
src-port |
any |
The source port to shape, leave on any |
destination |
192.168.1.0/24 |
The destination IP to shape, select LAN network |
dst-port |
any |
The destination port to shape, leave on any |
target |
PipeDown-1Mbps |
Select the 1 Mbps download pipe |
description |
ShapeDownload |
Enter a descriptive name |
Create a rule for traffic going to the internet (upload).
sequence |
22 |
Auto generated number, overwrite only when needed |
interface |
WAN |
Select the interface connected to the internet |
proto |
ip |
Select the protocol, IP in our example |
source |
192.168.1.0/24 |
The source IP to shape, select LAN network |
src-port |
any |
The source port to shape, leave on any |
destination |
any |
The destination address, leave on any |
dst-port |
any |
The destination port to shape, leave on any |
target |
PipeUp-1Mbps |
Select the 1 Mbps upload pipe |
description |
ShapeUpload |
Enter a descriptive name |
Note
If you want to limit traffic for a specific IP addresses then just enter the IP addresses in the destination field instead of the full LAN network range.
Now press  to activate the traffic shaping rules.
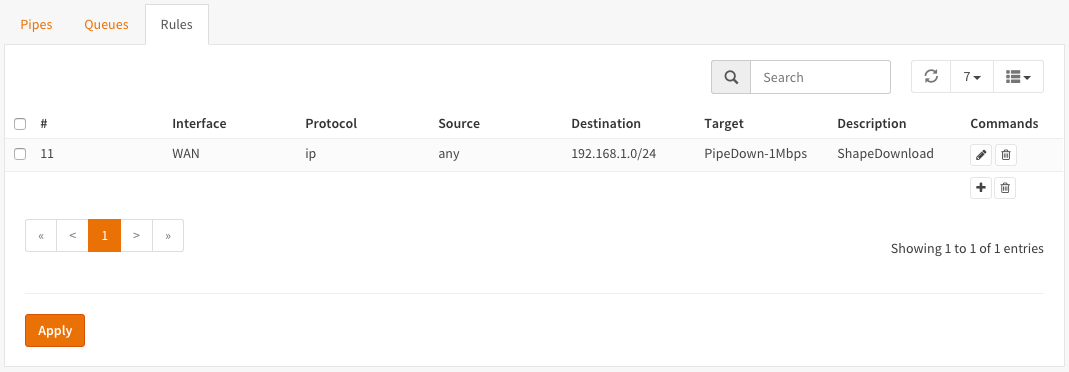
Screenshot Rules

Prioritize using Queues
By utilizing queues we can influence the bandwidth within a pipe and give certain applications more bandwidth than others based on a weighted algorithm.
The idea is simple: Let presume we have a pipe of 10 Mbps and 2 applications for instance smtp (email) and http(s). The http(s) traffic will get a weight of 1 and the smtp traffic a weight of 9, then when all capacity of our pipe is in use the email traffic will get 9x more bandwidth than our http(s) traffic, resulting in 1 Mbps for http(s) and 9 Mbps for smtp.
For our example we only look at download traffic, but the exact same can be done for the upload traffic.
Application |
Weight |
Minimum Bandwidth |
|---|---|---|
SMTP (port 25) |
9 |
9 Mbps |
HTTP (80) |
1 |
1 Mbps |
HTTPS (443) |
To start go to .
Step 1 - Create Download Pipe
On the Pipes tab click the + button in the lower right corner. An empty Edit Pipe screen will popup.
Create Pipe For Download (10 Mbps)
enabled |
Checked |
Check to enable the pipe |
bandwidth |
10 |
Numeric value of the desired bandwidth |
bandwidth Metric |
Mbit/s |
Metric to use with the numeric value |
mask |
(empty) |
Leave empty |
description |
PipeDown-10Mbps |
Free field, enter something descriptive |
Step 2 - Create Queues
On the Queues tab click the + button in the lower right corner. An empty Edit queue screen will popup.
Create Queue for SMTP
enabled |
Checked |
Check to enable the pipe |
pipe |
PipeDown-10Mbps |
Select our Pipe |
weight |
9 |
Weight to use with the numeric value |
mask |
(empty) |
Leave empty |
description |
Queue-SMTP |
Free field, enter something descriptive |
Create Queue for HTTP
enabled |
Checked |
Check to enable the pipe |
pipe |
PipeDown-10Mbps |
Select our Pipe |
weight |
1 |
Weight to use with the numeric value |
mask |
(empty) |
Leave empty |
description |
Queue-HTTP |
Free field, enter something descriptive |
Step 3 - Create Rules
On the Rules tab click the + button in the lower right corner. An empty Edit rule screen will popup.
Create a rule for smtp download traffic (email)
sequence |
11 |
Auto generated number, overwrite only when needed |
interface |
WAN |
Select the interface connected to the internet |
proto |
ip |
Select the protocol, IP in our example |
source |
any |
The source address, leave on any |
src-port |
smtp |
The source port to shape, smtp or 25 |
destination |
any |
The destination IP to shape, leave on any |
dst-port |
any |
The destination port to shape, leave on any |
target |
Queue-SMTP |
Select the SMTP queue |
description |
ShapeSMTPDownload |
Enter a descriptive name |
Create a rule for HTTP download traffic
sequence |
21 |
Auto generated number, overwrite only when needed |
interface |
WAN |
Select the interface connected to the internet |
proto |
ip |
Select the protocol, IP in our example |
source |
any |
The source address, leave on any |
src-port |
http |
The source port to shape, http or 80 |
destination |
any |
The destination IP to shape, leave on any |
dst-port |
any |
The destination port to shape, leave on any |
target |
Queue-HTTP |
Select the HTTP queue |
description |
ShapeHTTPDownload |
Enter a descriptive name |
Adding an extra rule for HTTPS traffic is simple as we can use the same HTTP queue if we like:
sequence |
31 |
Auto generated number, overwrite only when needed |
interface |
WAN |
Select the interface connected to the internet |
proto |
ip |
Select the protocol, IP in our example |
source |
any |
The source address, leave on any |
src-port |
https |
The source port to shape, https or 443 |
destination |
any |
The destination IP to shape, leave on any |
dst-port |
any |
The destination port to shape, leave on any |
target |
Queue-HTTP |
Select the HTTP queue |
description |
ShapeHTTPSDownload |
Enter a descriptive name |
This way HTTP and HTTPS traffic will be treated the same (total max of 1 Mbps).
Now press  to activate the traffic shaping rules.
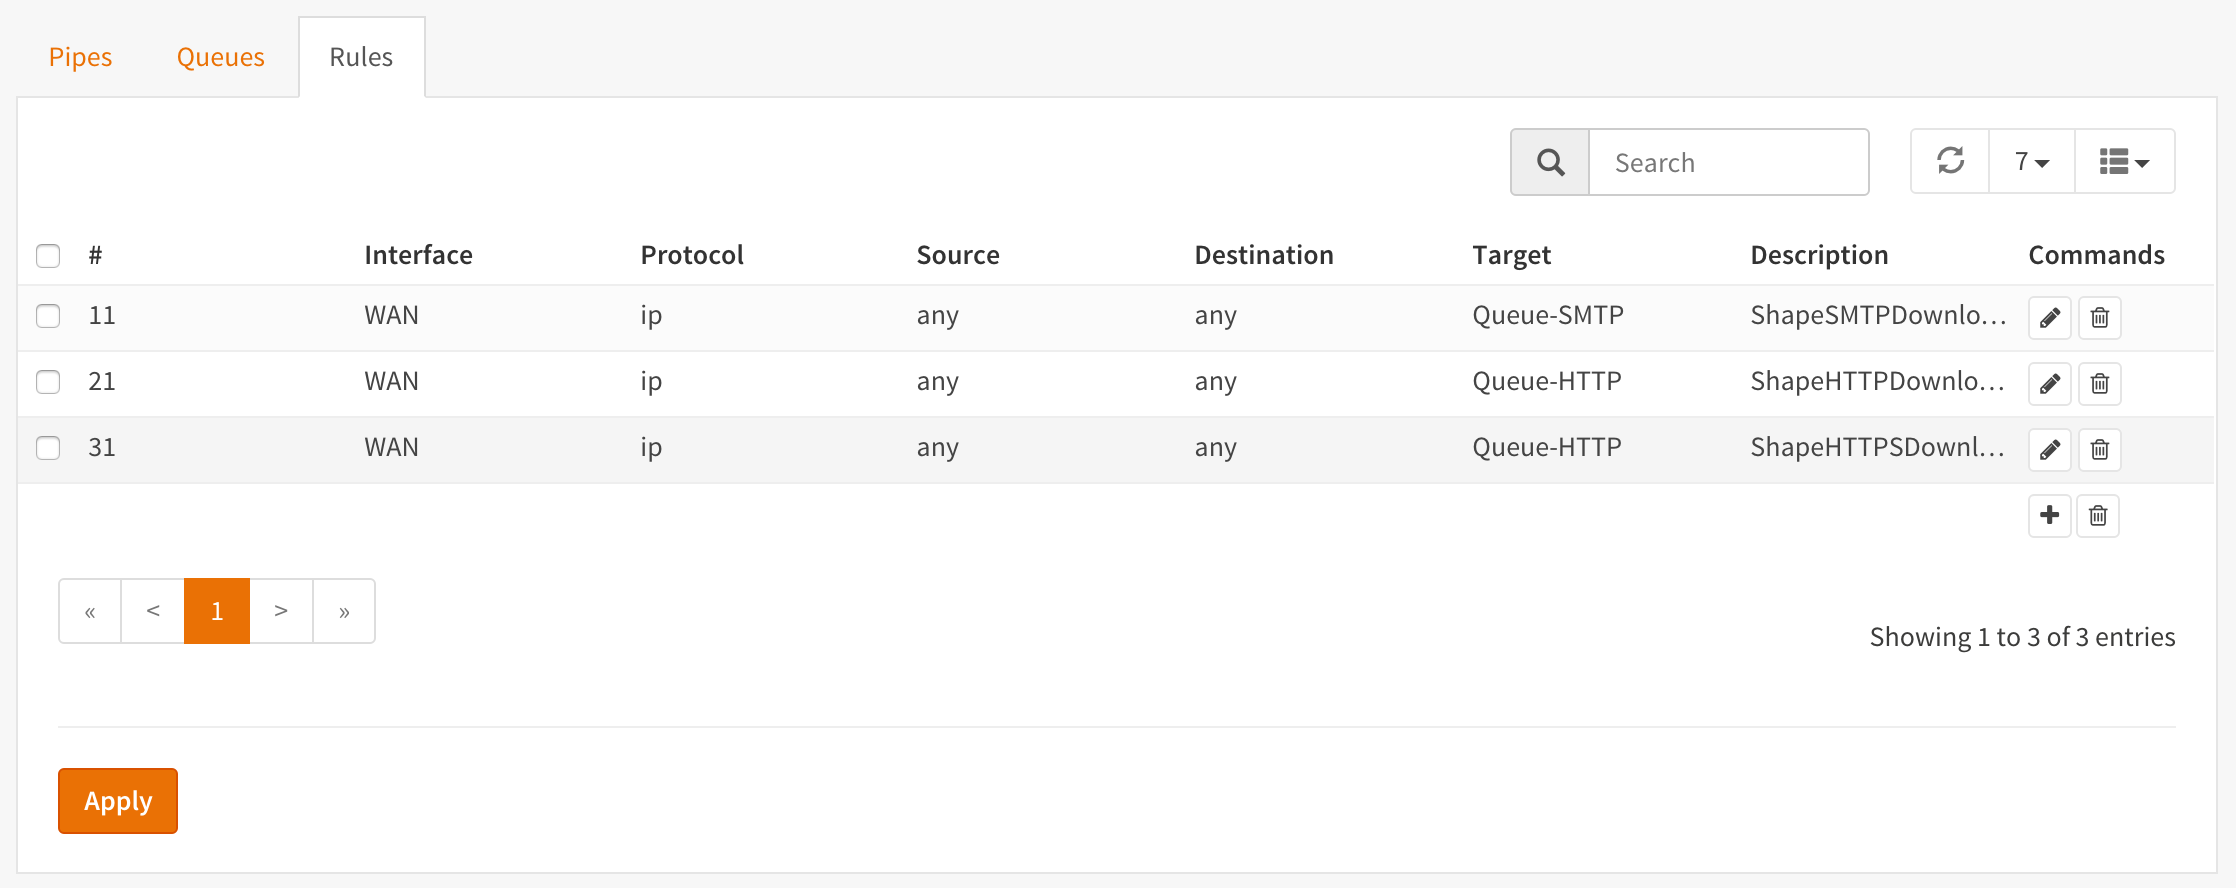
Screenshot Rules

