Interfaces: Wireless Networks (INTERNAL)
This page is about setting up a wireless interface in access point mode to create your own WLAN. In this mode, your Laptops and handhelds can connect to your OPNsense without an external access point for home and enterprise environments. For home networks step over step two and don’t setup the 802.1X service in the network settings. For external access point, just create a cabled network (usually Ethernet) and connect the access point to the other end.
Warning
FreeBSD supports wireless adapters in access point (infrastructure) mode, but this functionality is limited to some drivers and there may be some, which do not support all options available via the web interface. Please make sure that you buy a wireless card that is supported to avoid these problems.
Note
This guide requires the FreeRADIUS plugin to be installed and enabled (via and ) .
Configuration
Step 1
Create a wireless clone interface and assign it.
Step 2 - Prepare RADIUS
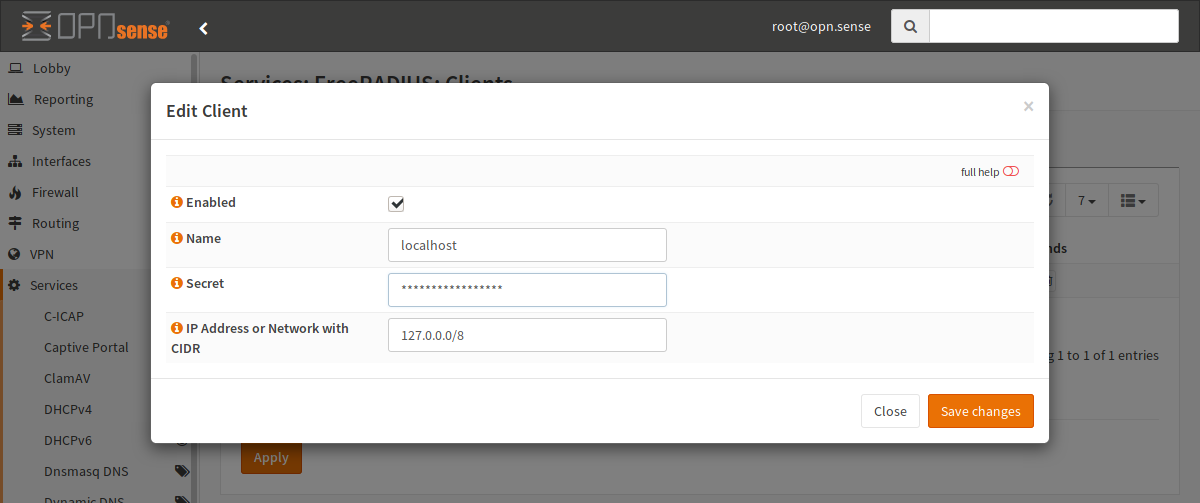
Create a new client, which is the AP. For example, name it localhost, choose a secret and the CIDR 127.0.0.0/8. The secret is later used in the wireless settings.
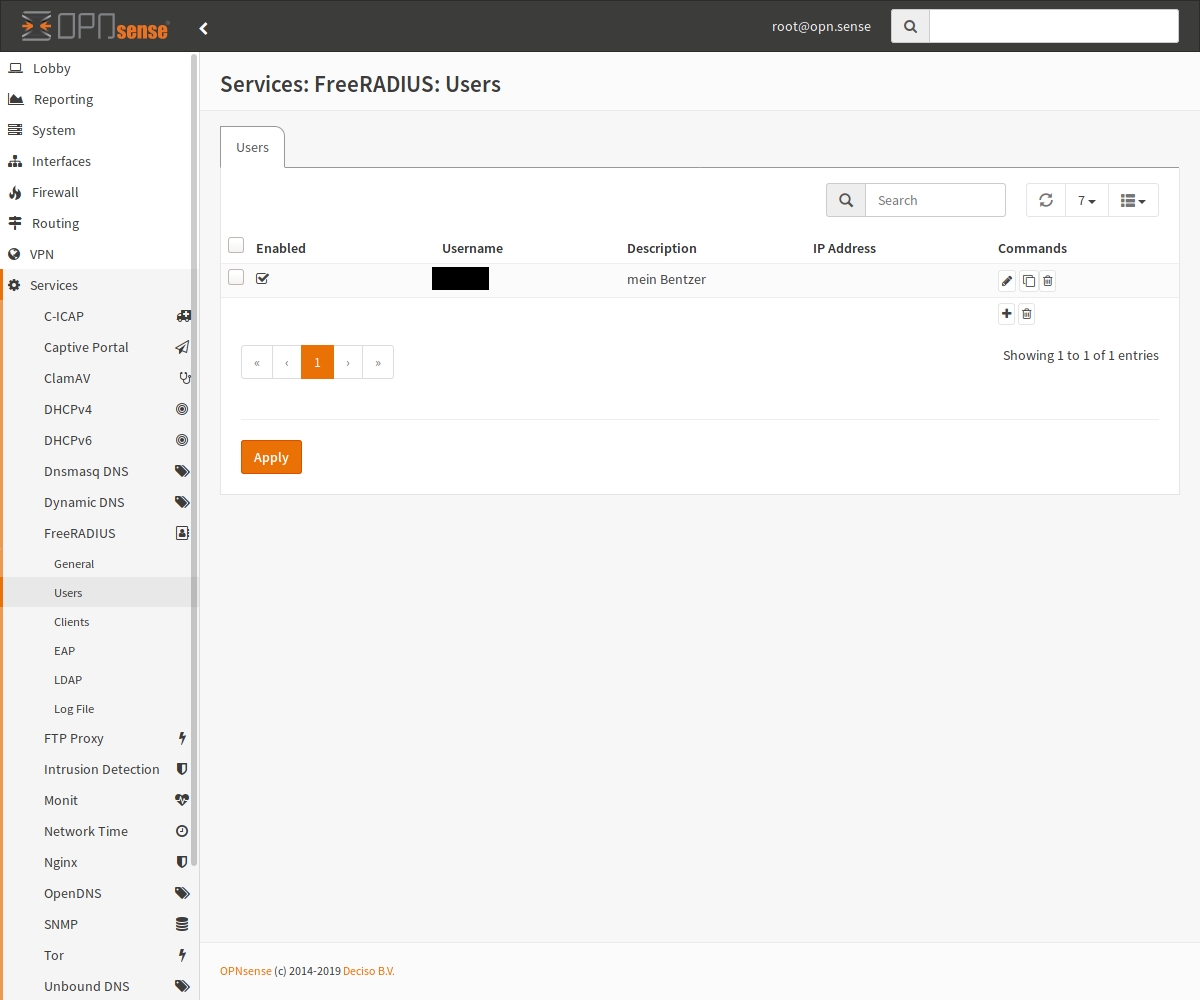
Next, switch to the users menu and create a new user (for example for yourself). The username and the password are used to authenticate later. The rest of the settings can be left on their defaults.
Step 3 - Prepare WLAN
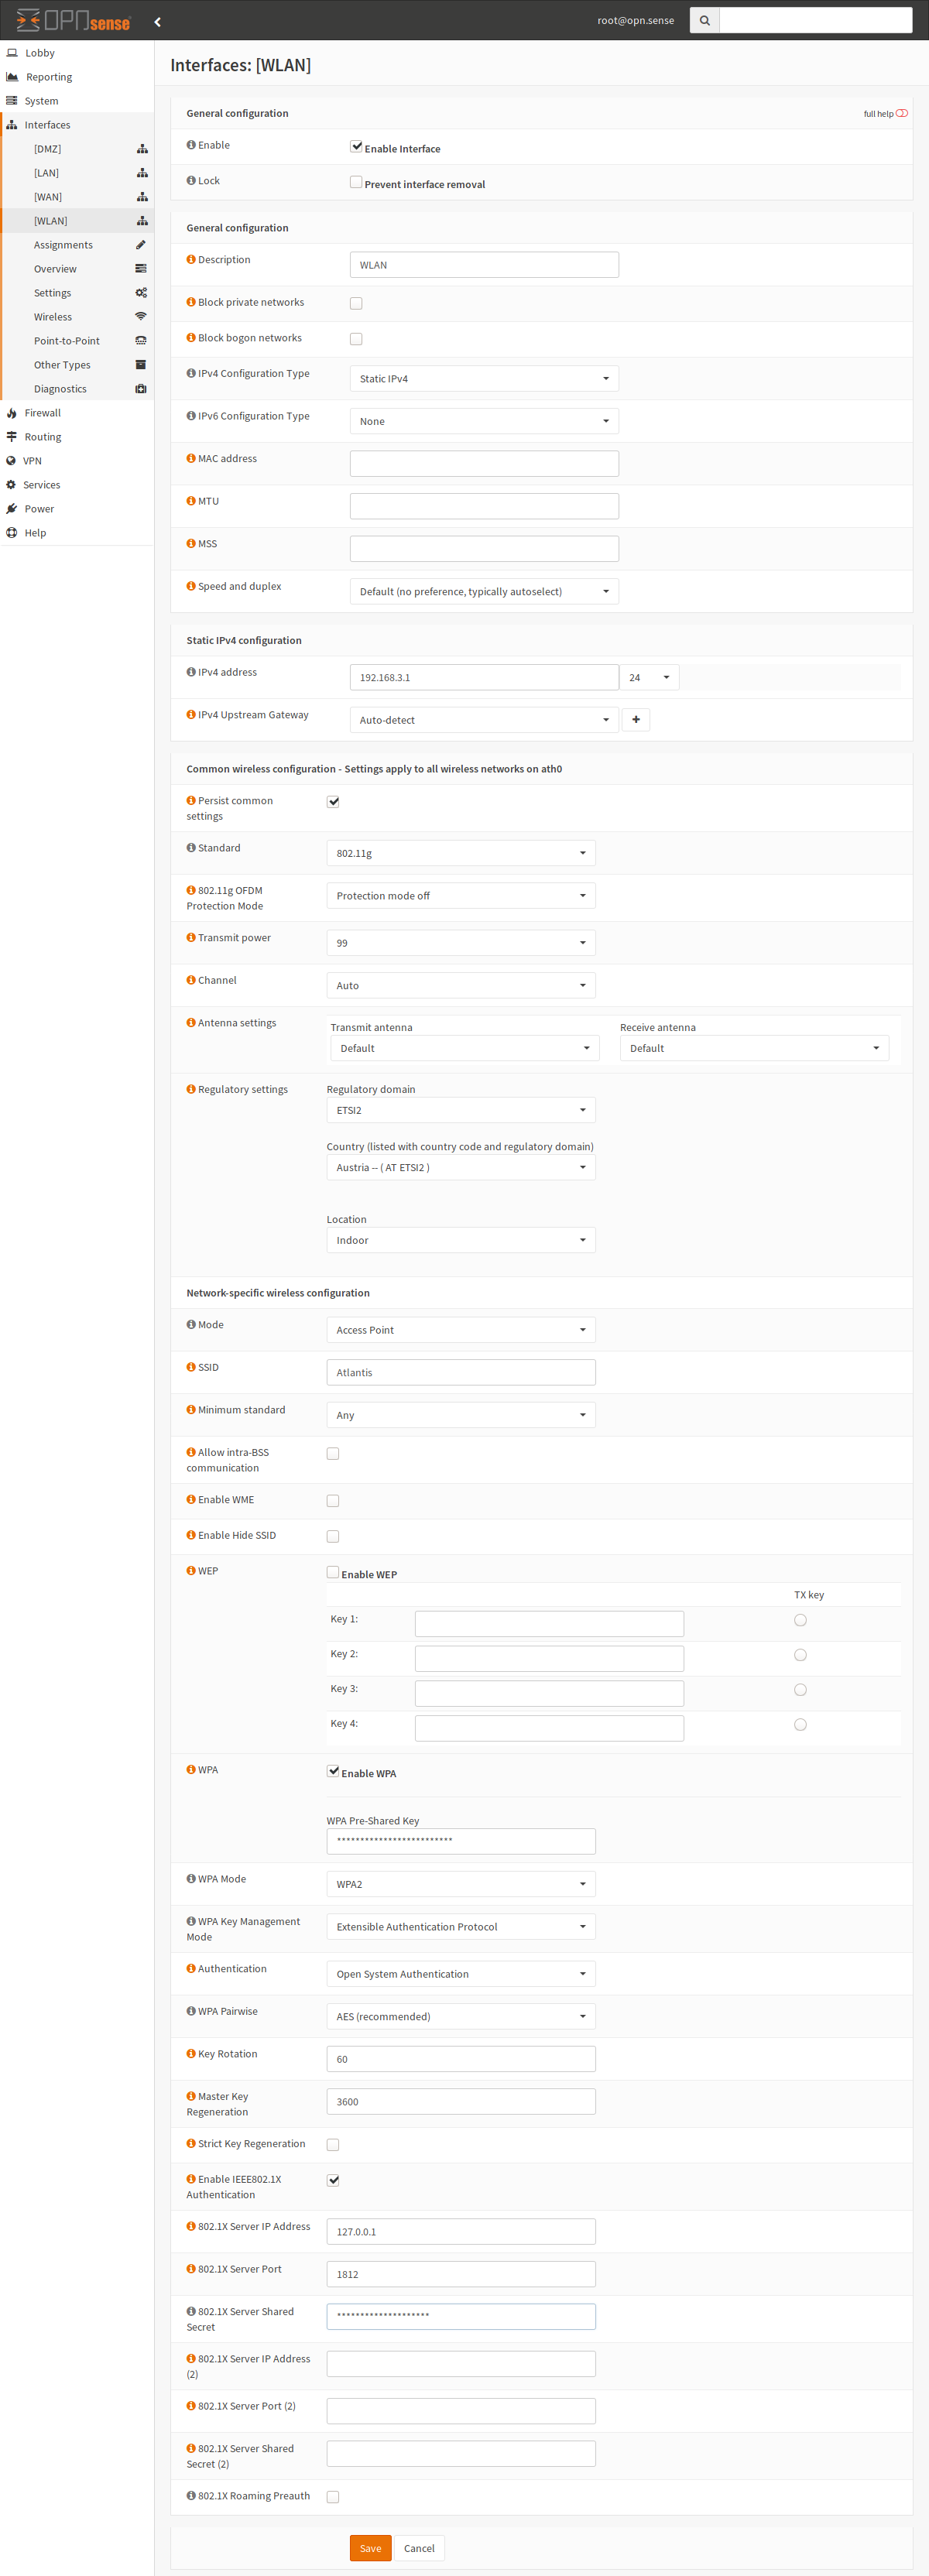
Enable |
Check |
Description |
WLAN |
IPv4 Configuration Type |
Static IPv4 |
IPv4 address |
A network |
IPv4 Upstream Gateway |
WLAN |
Persist common settings |
Check (save for all clones) |
Standard |
802.11g or another standard your adapter supports |
Regulatory settings |
Choose your country |
Mode |
Access Point |
SSID |
Name of the wireless network |
WEP |
Unchecked |
WPA |
Checked with your PSK (WLAN password if wanted) |
WPA Mode |
WPA2 |
WPA Key Management Mode |
Extensible Authentication |
Authentication |
Open System Authentication |
WPA Pairwise |
AES |
Enable IEEE802.1X Authentication |
Check if you want to use RADIUS authentication |
802.1X Server IP Address |
127.0.0.1 (if you want RADIUS) |
802.1X Server Port |
1812 (if you want RADIUS) |
802.1X Server Shared Secret |
The password you configured in step 2 (if you want RADIUS) |
Step 4 - Connect
Note
This is system specific - this screenshot is for a Linux distribution with KDE Plasma Workspaces 5, with the system language set to German.
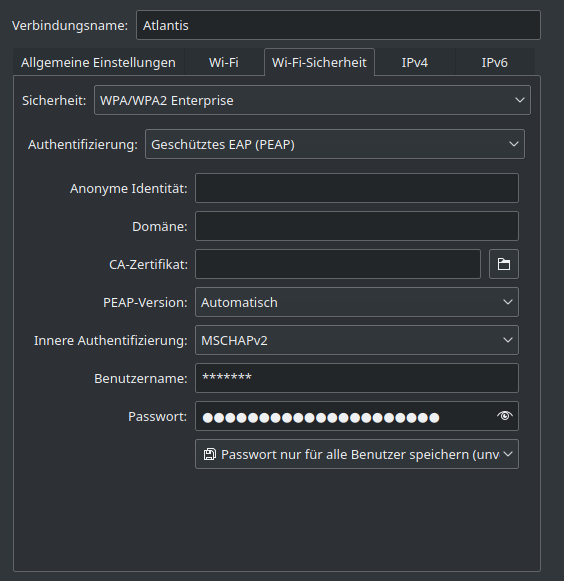
To connect to the network, set the security setting to “WPA/WPA2 Enterprise” and the authentication setting to “Protected EAP (PEAP)”. The inner authentication should be set to MSCHAPv2, and the username and password are the ones you set up in the RADIUS plugin.